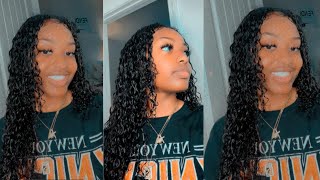
Hair| Diy 3/4 U-Part Wig
- Posted on 04 April, 2012
- T Part Wig
- By Anonymous
I made myself a wig because my short hair is in an awkward growing stage. Please check out these tutorials I used when making my wig for more details on how to actually make one:
Taren's video: http://youtu.be/ZCnKmhtvhOw
Step by Step video: http://www.youtube.com/watch?v=oOyVUUp...
FOLLOW ME:
Tumblr: http://www.raybabyray.tumblr.com
Twitter: @RayBabyRay http://www.twitter.com/raybabyray
Instagram: @RavenElyse
My Online Clothing Store, CUSTOM THRIFT: http://etsy.com/shop/raybabyray
You can choose whatever kind of hair works best for you and obviously get the color hair that matches your hair color, hey guys, what's up it's Raven and as requested, I am doing this video about my new hair, as you can see it's much longer because i Have a u-part, 34 swig on right now and it's a wig that I actually made myself. So I didn't go out to the store or order online, a whole wig and just have it and put it on. I actually bought a wig cap bought hair, got a needle and thread and soda hair to the wig cap myself to create basically a customized wig, in which I can leave out my real hair around the top and the front side looks more like a sew-in or Natural hair, hopefully then like a way because lots of times you'll see a full wig and it'll. Have the hairline look very artificial, even with lace front sometimes so I didn't want that. Really artificial look so I went for the you part, meaning that there is a u-shape going across here. All this right here is open and free for my real hair to hang down, which is what makes it look really natural and I can pull my hair back and everything because that's all my real hair, therefore it doesn't look like a wig um, so yeah, that's Space, that's the basics of what I have going on right now. It is a full 18 inches long with some 14 inch hair on the top to give it a layered look and I haven't, I haven't - had to cut it at all to make it look later. I just bought two different lengths of hair to begin with. This is not going to be like a full tutorial of how exactly i did it. I'M actually going to put the links to the tutorial that i use down the description so that you can click those links and see exactly how to do it and exactly how to install it. But i'm going to show you real, quick, a little clip of me. Putting it on and taking it off and kind of styling it a little bit to see can get a general idea of what it really looks like here. I have a bandana tied around my head, like a headband, but it's not necessary to hide the wig with a headband like some half wigs require you to put a headband on so that you can't see where the wig is, but this wig lets you put your Hair over top of it, so that you don't need a headband to hide anything. I just chose to wear one. You don't even need to have your hair braided. Underneath this way, if your hair is short enough, you can just pull it back and wear the wig over top of your slicked back hair like I am, but if you wanted to, you could braid your hair and actually so the wig on to your braids. I use the styrofoam head to keep my wig on when I'm not wearing it. You can decide how much hair you want to leave out. I chose a moderate amount because I wanted to look really natural, but if you don't want to have a lot of leave out just make the u-shape smaller. I have these two smaller tracks that i made that i can just clip in the front, because i need extra here in the front because my hair is short or if i don't want to wear those. I just took my hair behind my ears like this. It is possible to put this wig into a ponytail, not a very high one, but you can get it up pretty high, but you do need to wear a headband to hide the back of the wig. I'M going to tell you the materials that I used in case. You want to use the exact same hair as me and stuff like that. So I did was I went to my local beauty supply store. It'S called starve you to supply its in pflugerville in Texas. In the Austin area, if you live there, um, yes, so I went in there with like, basically no idea, I just know I was looking for yaki straight hair, so I just tried to find it in my exact hair color and in some quality that I thought Was gon na be good enough and in the link that i liked so I ended up getting in style, hair in style, which I guess is gon na show backwards, but it's en s, T y le in style and it is supreme perm yaki, so yeah key Is a hair texture that is supposed to kind of be close to relaxed, african-american hair so that it's not too silky so that it kind of looks like your real hair and since my hair is kind of a nice silky, ish texture, this yakky really pretty much Matches up pretty nicely, except for my hair, is damaged and this hair is not damaged so but whatever I think it matches pretty. Well, if you have, you know natural hair like me, so it is one hundred percent human hair. It is y aqui, like I said, the brand is in style, comes in the whole big packaging like this. What I did was I bought two packs to here originally was going to get three packs of hair, but um I had a short. I mean a small budget to stick to so two packs was already expensive enough and i thought i would do good enough with two packs and as you can see, i mean it's full enough to wear. My hair doesn't look too thin, but and right now I need to like brush it out, but I mean it's enough, but if I would have had three packs it would have been much fuller and thicker like I really wanted it. So i recommend trying to get three packs of hair if you're buying packs like this. So what I did was, I got one pack of 18 inch hair and one pack of 14 insurances, the 14. So a pack of 14 inch hair is like this big and then, of course they is like even longer so I did the 18 inch added 18 and tear down underneath so at the bottom of the wig, and when I ran out of 18 in chair, I Started using the 14 in tear up a top to create a layered look and it came out pretty nice right now. I have some curls kind of slept in it. To be honest, my hair looks like crap right now. I need to fix it, but what I'm trying to make this video fast, you guys can get information if you can get three packs and then get like a 12-inch. So do 18, 14, 12 and i'll give you really thick layered hair for your wig. How I soda tracks in so people do one track cut it one track cut it, so they just make individual tracks that are all cut apart. What I did, though, was I just sewed one track flip it around so the other track. So i did like a zigzag motion going up the wig so that there was no cutting involved. I just kept sewing turn it around kept. So I looked about Tex kappa song, so I just went all the way up. It'S all connected. So if I would too, if I were to like cut the thread I can still take it out would be one long piece is just zigzagged up my head, because when you cut the tracks to create individual little things to go up, the wig, like that, you Cut them that creates shedding because you're cutting the hair making it come aloose. So it's best not to cut it and just kind of fold it over and keep going because there's one part where I did cut it and the hair started coming out. This is a wig, it's not sewn onto my head, it's sewn onto a cap. It'S a net cap netting looks like this. It'S black. This is the little piece that I cut off for the u-shape part cut this part off. So it's is how much I cut off of the week cap. It'S just this black netting. Sorry, my phone keeps going off black netting and looks like this. This is a deluxe leaving cap and it's I got an extra large because I have a big head and yeah. So this whole little, you part that you see in the front, gets cut off so that your real hair can come out right there, and it also has the elastic in the back to make it adjustable. So this is a really good cap. I don't know what brand is this. It looks, but yeah looks like this there's different kind of caps. You can get then to make the wig stay on your head. You need some clips, so I actually just use my old hair sentence lips so stay in road. Basically, the same thing: they look like this go to abusive I've store. I get hair clips like this and you so the clips, wherever you want to have the wig clipped to your head around the perimeter of the wig. I actually only have two Clips one on this side. One on this side and the wig is just kind of hanging on my head like that. But i need to put two at the bottom two, so yeah I actually bought some. You can buy a wig clips, but they make up the same thing as the other pie. They actually are like exactly the same week. Lips they're pretty cheap few dollars. This one comes with two, so you just get clicks like that too. So at the top of your wig and at the bottom, the 18 inch pack of here that I bought it. It was like $ 65, and the 14-inch pack of here i bought was like thirty nine dollars. I believe so. Then i had to buy the wig cap, which was like three dollars and i bought some extra clips. But really i just cut the clips off of my old hair extensions. So i didn't lay by those clips with the clips are like a few dollars and don't have anything you need to buy a Styrofoam head like this. So these are the tracks that i had a little bit of hair left over they're, just really small and thin. But i put some clips on here just so that if i need some extra hair in the front, i can put them in, but I mean that all de just pins on like how it goes when you try yours on yeah, I'm wearing it um, I curled It with my flat iron, I just kind of put a little a little wave into it, so it wouldn't just hang completely down flat and straight because the hair comes completely painted straight Aleksei. You could curl it. You even put flexi rods on it or anything like that, but if you wash it it's still gon na be straight. I don't know how long this wig is going to last me. I made some hair extensions like what, like two years ago, out of a similar hair. It wasn't the exact same brand, but it was yaky, hair, real human hair. So it's you know same type of here about different brands. It'S actually a brand that I would consider to be like worse than this brand because it was, I just bought it at Sally's Beauty Supply and it was pretty cheap um. I remember exactly the details of it, but I used that hair with my clip in hair extensions and I wore those hair extensions for a good year, at least like off and on so I was wearing them every day, but I honestly did not even really take Good care of them, my wash them I tied them. I used hot tools on them. I did everything to the succession, so you could possibly do to some hair and um. They actually lasted a really long time after a while, of course, they start getting damaged and kind of ratty start tangling up easily and stuff like that, but I still have a few pieces that I can still use like in one of my other videos. I was using them in the front for my bangs that hair is from like at least a year ago, so i mean i'm pretty confident in the quality of the hair, even if you just get yaki hair from the beauty supply, so you don't have to go Online and buy like the most expensive here you can find because for me personally, i just kind of like to play around with it. I don't wear it every day, so it does not need to be some really expensive, hair but yeah. So hopefully this video helped. You a little bit give you a little more information of what i really have going on in my hair. A lot of people think it's like a sew-in or clip in extensions, but no it's a actual wig. It'S one big piece so yeah. Hopefully this helped you. If you have any more questions, feel free to contact me and I'll try to help you out the best that I can, but I'm no, I'm no hair professional at all. It'S my first time I get a wig, so I could let you know it's not that hard, but yeah. Hopefully this helped you and thanks watching by actual tutorials, linked in the description.


Comments
HairDeLaCreme: one of my subbies told me you link my video....that's so sweet of you! Thanks for showing love...keep up the great work. BTW your wig looks good girl :-D
TheRayBabyShow: I heard that gluing the tracks is less secure than sewing them, so I went ahead and sewed them to ensure that they would stay on through brushing and styling.
curlypearldotcom: You're dorm room reminds me so much of my freshman dormroom at Hampton University, small! lol Love your videos! It looks nice on you.
Arleen Diaz: that looks pretty good, and those wigs are super expensive at a salon, even a crappy one. How much did you end up spending?
adi yeun: this. is. genius!
Maria Carrillo: Brilliant!!!
Chels: do the two clips really stay secure on your head? I've never wore a hair piece and I'm kinda iffy on how small the clips are :S
TheRayBabyShow: I have longer parts in the front that still have relaxed and damaged ends.
makeupforever8: loooveee your shirt! where did u get it?
leoluver10: if you go to school with a lot a white ppl they're reactions are going to be hilarious. i really want you to talk about that in your nxt video lol.
TheRayBabyShow: A total of about $120, as mentioned in the video.
Leslie: You're gorgeous
Sherry E.: OMG so funny- I just started watching your videos today and thought to myself, "I wonder if she's in Austin"? (you seem like an Austinite for some reason...I don't know why). I live in Pf-ville too. I always to go to M&W beauty supply. I've never been to STAR (can you inbox me where it is?) Glad I found your channel! I love your hair videos!
DanicaaMarie1: sweet video ;)
Alia S: How do you make a UPART wig
q2travel: Your hair is STILL damaged!? Didn't the big chop help?
WelcomeToMySunnyDae: rli helpful x
briscoeduck: OMG...You look like my little sister!!!...
Amanda: I guess, but it's basically a quick weave
TheRayBabyShow: Both collared shirts are thrifted.
Amanda: you could've glued it, I've made 8 wigs so far and it takes me only an hour. #noob
TheRayBabyShow: Please don't spam my comments like this, nobody actually follows people who post comments like this. lol At least, I don't.