How To Make A Custom Wig + Closure Step By Step!
- Posted on 02 March, 2017
- T Part Wig
- By Anonymous
HEY GUYS! OPEN ME BABY!
** One thing I forgot to mention in the video, I used a tape measure to get the circumference on her head, and I used the corresponding wig head to get a perfect fit.
** I know my dorm was a mess, don't judge me! lol
LETS KEEP UP!
SC: VSHBVSH
IG: @styledby.ash
Twitter: @styledby_ash
HAIR:
14" 16" 16" Malaysian Body Wave
14" Malaysian Body Wave Lace Closure
styledbyash.mayvenn.com
Catch ya in my next video. MWUAH!!
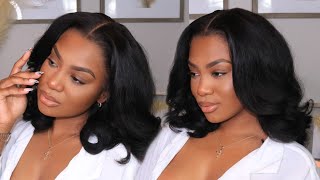
Hey babes, it's Ashley! Thank you! So much for coming back to my channel, if you haven't been here already, go ahead and hit that subscribe button. This video is gon na, be all about how I made this week for my client, so we're gon na jump right in. If you want to know all of the information about the bundles and about all the materials I'm using, I will list them all in the description box, but yeah. I always use a deluxe leaving net to make my wigs because they're more breathable than dome caps or spandex caps in my personal opinion, but yeah. I just line up the middle of the cap to the middle of the stitching and the cork head and I go ahead and I put my tee pins in the edges of the cap and I use nylon thread because I just feel like nylon thread, gets my Wigs more snatched and that's just what I do to prepare. It takes like five seconds and I just get the longest bundle and I start sewing and whenever I'm starting a wet, will you see me doing my bears? Basically, I just take the thread and I loop. It a couple of times around the Eagle and then I pull and it leaves a knot. The tires are not in it. So that's a really good tip. I got from Peak mill and it's super duper awesome. I use it all the time whenever, like I'm on the edges or in the middle, to tie a knot, but whenever I'm not trying or not you'll see I'm just kind of like pulling the needle through the loop without tying a knot. So that's just how I sew and also when I'm right around where I'm about to fold the West like I'll, take the weft on the top and then I'll tie a knot and so that one fold it over and then I'll tie a knot through the web. On the bottom and then I'll continue, the web sewing it in the opposite direction, and that is just a tip that I learned and it is really effective and getting the folds really flat. So at this point I finish sewing on two bundles and after I sew on two bundles, I always proceed by selling on closure. So these are some T pins that I've had for a long time, and I hate them because, like the open triangle makes me really hard to sew, I like the ones that are flat because your thread doesn't get caught on them. So yeah. I just use those two pins and I'm just taking them out of the way, and I put the closure like a little bit ahead of the front of the cap, and then I use my T pins and I stretch the closure flat and I use my T Pins to secure it, and then I put my teeth - ends in each corner, making sure that the edge is taut. And here I am just doing it on the other side and then doing it around the back and basically getting it as flat as possible and readjusting. Where necessary, like totally it's totally okay, to lift it up and put it back tighter if you need to. I know that I normally need to to make sure that it's as flat as possible, because this step is really important because once it's time to cut the net from underneath and you apply it like doing that stuff, we'll make sure it's really flat. And then I just get my nylon thread and then I tie a knot around the front like I'm on the edge and then when I continue, I just sew normally and in between also not to be here and again, every now and again, but for the most Part, I'm just sewing making sure that I'm sewing really close to each other. Does it make sense really close to each other? I don't know I'm just making sure that I am selling one stitch really close to the next one and then, when I get to the other side, bada-bing bada-boom, I just tie my knot again and then I am done with sewing on the closure and then here I am sewing on the third and last bundle and whenever I am on my last bundle, I don't double the West just because it makes it flatter like if I were to double the left. I'M pretty sure I still would be flat, but it's just like extra extra flat. If I don't double it around the end and sorry, I wasn't able to film that last part, but I just used the flip over method until I got to the top. This is what V wig looked like on my client when she came and picked it up. She was totally in love with it. Thanks for watching and please subscribe and like this video I'll see you guys next time,


Comments
Mari Ma: Very straight forward tutorial. Love it.
CurlyyIndyy: Your video was very informative and easy to follow. Thank you for posting. I have a question about the placement of the closure. I've watched this several times and I would like to make sure I understand prior to trying this on my own. Would you say the closure is placed about a half an inch in front of the weaving cap?
A&J Productions: This looks so good!
JC Cofield: When measuring for a custom unit which measurement do you take? Also how to you sew to where the cap doesn’t shrink once it’s on the clients head?
Jaslyn Koger: looks great!!
kuroichan101: That wig turned out really nice.
Mrs.RED'VON 77: I see that you are partner up with mayvenn me too I love that hair I love the company are you still with them
Lee Lee: what if your client head size is bigger than your 22" canvas head. do you still use it to make their wig? Wouldn't it then be too small?
NIA THE ISIS🤍: What size cork head is that 23inch? Or something else