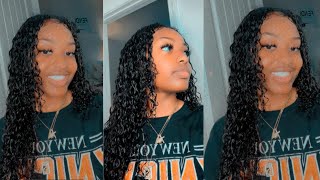
How To Make A 3/4 U Part Wig Glue Edition Hair Tutorial
- Posted on 06 May, 2012
- T Part Wig
- By Anonymous
Things you will need:
Maki Remi Hair in 8" 1B
Hair Glue
Scissors
Blow Dryer
Wide tooth Comb
Dome Cap
Mannequin
Hey YouTube is black barbie and I'm going to be doing a video on how to make a? U part wig glue edition, so for those of you who do not know how to sew. This should be an easier method for you and you can glue it on and then it only takes 45 minutes to do so. It'S just something quick and easy. So if you like it stay tuned, so the hair that I'm using is the Makai remy, hair and 8 inches. You can get this from your local beauty supply store and i will be using two packs of this hair. I'M using a dome cap that i got from Sally's and I use the white eyeliner pencil just to line my caps just off and follow along the tracks. So the first thing you're going to do is you're going to always measure your track before you apply the glue on there and never put the glue on the whole truck. You just want to put it halfway on there. Okay, then you're going to take a blow dryer and you're just going to help speed up the drying process. It don't take very long to dry, so you shouldn't have to hold it there that long after you finish that you're going to go ahead and glue. The other half down and follow the same process with the blow dryer. Okay, once that's in place, you're going to do the same thing with the next row and after I cut my West, I always make sure that it lines up with the with the cap as well before I put the glue onto the track because sometimes I'll cut It and it will be way too long or it may be too short, and you don't want to glue it on there if it's too short to long, you can work with because you can always cut it down, but when it's too short, you have to cut A little piece of track - and it's just to complicate it - okay, periodically you're going to want to comb down the hair just to get all the tangles out and any glue that may have gotten to the hair. It comes out pretty easy. So if you get glue on the hair, don't worry pretty much you're just going to be doing the same process on each row until you get to the top. Now. What I do is throughout the whole process. I would take the cap off the mannequin and I actually try it on just to make sure everything's fitting really good. But before you actually try on the cap, you want to kind of blow dry, the inside just to make sure the glue is completely dry because the glue do soak through the cap. It'S not very bad, but you just want to make sure it's dry so that it doesn't get all your hair and, as you get closer to the top you're going to want to put less glue on the web instead of putting glue on half of it, you May want to shorten it up just because it likes to slide a little bit when you're going around the little corners. So you may just want to put enough on there just look and stop at the first side the side, part of your mannequin and then once that's dry. Then you can go ahead and add the glue to the back part and then you're going to have to add glue to the other side. I just add a glute to the whole thing within. I realized afterwards that you know kept sliding and stuff like that, or maybe you didn't slide on this one. It slid on one of them, so it works for you to do it on half and half and go ahead. I just had a problem with it on one of the rows, so this hair is like really soft. I like it a lot and it was like. I think it was about thirty dollars to pack there. It was 30 something dollars and I bought two of them because I wanted it really full as you get to at the top. You want to be really careful and you want to just make sure you keeping the right amount of distance because you don't want the you part to be way too long, because then you'll have to leave more your hair out going toward the middle of your head. So you want to make sure you're measuring that part really good, because that was a that was one of the mistakes that I used to make a lot when I was started out making you part wigs and now it realized. But I have to take my leave out. We'Ll go all the way to the middle of my head, and I really just didn't like that and another thing that I noticed when I was putting the tracks on as I was putting them to close in the back and as I started, getting tore at the Top I started running out of hair, so what you can do is I'm always leave more space in the back, so that once you get towards the top, you can make the tracks a lot closer, because when I finished I had to go back in and add Tracks like toward the top part, because I left too much space, so that's just another rule of thumb when you're doing this I mean it was easy to, you know, fix it, which itself only having to go back in. I would just be careful about the space and that you leave at the top, because you still see the tracks in the middle, even though the hair it lays on top. So this is the complete look of the wig. What I'm going to do is I'm going to actually cut around that band part in the front. I usually don't like that bad on my forehead, so I'll cut that out. If you want to see how I cut it, go check out my um, how to make a? U part, wig and I'll, show you exactly how I cut it and also how I so on my wig clips. So I just want to thank you guys for watching. Don'T forget to rate comment and subscribe, and just if you have any questions, just feel free to ask me I'm here, for you guys. Thanks have a good one.


Comments
Tikeeia Mason: I did one today on my daughter for the first time. I used the same technique from your sew in method along with the clip pieces in the front. Thanks
Hair Journey to Waist Length: It was really easy to do. This was my first time ever gluing it on.
SharingTinasWorld: This turned out gorgeous. Love the hair
alicat19: Very simple and easy to follow. Thanks
Hair Journey to Waist Length: You are absolutely right, that's why I sew clips on and clip it in and take it off every night. I didn't think about the glue melting in the heat though. I never ever glued tracks in my hair before but I'm glad you mentioned that.
Maliyah May: Omg your hair looks so real and believable wow keep it that way. No one would ever know it was not real i love it
cherishdeb: omg yours looks sooo natural woooow keepin it short and simple is the way to go. looks like your hair!
Peachy Gege: love it!!!!! you did a good job
LeBron's Unicorn: So pretty <3
msdoza: thank you, very detailed...:)
Hair Journey to Waist Length: Really, weave is addictive. I'm trying to slowly start wearing only my real hair but I'm growing it out from the short pixie style and it's in the in-between stage right now.
LIONEL JENKINS: thanks you helped alot
Shenee Marshall: Hey doll , you made that seem sooo easssssy.
Hair Journey to Waist Length: I actually prefer the sew in instead of the glue. The cap fits my head better with a sew in.
stacian morgan: it looks like ur own great job!!!!
Hair Journey to Waist Length: Thanks hun. We all have to start somewhere lol.
Hair Journey to Waist Length: Once my natural hair gets this length I will definitely wear less of it. I don't think I can get completely rid of it just tone it down to where it looks like it's all mines.
Hair Journey to Waist Length: I usually don't have patience but I always remind myself if you make this one you won't have to do your hair for a longggg time.
Nailah Smith: How did u pit it on ?
Hair Journey to Waist Length: Thanks hun
Hair Journey to Waist Length: Thanks hun
juicy8721: Did you sew wig clips in this wig
Hair Journey to Waist Length: I like the sew better and the clips because I take it off weekly.
Hair Journey to Waist Length: Believe me I will be wearing my natural hair as soon as it grows to my shoulders. This inbetween stage is getting on my nerves.
Hair Journey to Waist Length: Yes I can't wait because It's still alot of maintenance.
Hair Journey to Waist Length: Trust me it's very easssyyyyy
Hair Journey to Waist Length: Thanks
Mr. Smith: Heeeyyyyy I saw you make that. Lol
Hair Journey to Waist Length: Yea babe cause you kept coming in the room getting in my video and I had to edit a bunch of it lol.