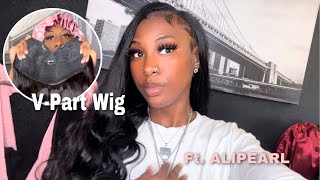
4X4 Amazon Closure Wig Install | Ali Lumina Hair
- Posted on 12 December, 2021
- T Part Wig
- By Anonymous
Welcome to my channel❤️ Don’t forget to like, comment, and subscribe.
Link to wig: https://www.amazon.com/gp/aw/d/B08JPW5...
Inches: 20 inches
*In the video I said 18 but it is actually 20 inches*
Products Used:
•Ebin 24 HR Sleek Extreme Firm Hold Wax Stick (mango scent)
•Got2B High Hold Hairspray
•B&B Charcoal Foam Moisturizer Wrap Lotion
Check out my other socials:
INSTAGRAM: Kiannamoracia
Snapchat: Kiannamorae
Tiktok: Factualbrat
Email: [email protected] (Email for business inquiries)
Intro Song: Live your life by Uptown
https://soundcloud.app.goo.gl/WsawFGz8...
FAQ:
Age? 17
Ethnicity: Jamaican
Fav Color: Dark green
Keywords
#amazonwig #closurewig #wiginstall #humanhairwig #humanhair #curlywig #closurewig #wigtutorial #closure Wig install, curly wig install, human hair wig, amazon wig, affordable wig, ali lumina, ali lumina hair, closure wig, wig tutorial, easy install, 4x4 closure, closure install
All right, what is up y'all! Thank you for tuning in to my youtube, video, i'm just gon na get straight into it, because i hate when people have long intros. So, as you can see here, i'm starting to plug my wig um bear with me on this. I do plug my wigs kind of crazy. I section off one piece at the front and then i just gradually go back with my tweezers. You want to make sure that you have sharp enough tweezers that could pluck the hair, but not too bright, because you can end up taking out more hair than you need to so after i part my thin section, i'm just moving up and down in lines plucking Wherever i feel like needs to be plucked, this is not a beginner way to plug. I would recommend tuning into my plucking video, that's coming in about a week, because the way i plug my wigs i'm be honest with y'all, it's kind of crazy. I'M looking at this - and i'm wondering is this: how i look when i'm showing people how to do it so yeah? I will make a more detailed tutorial on how to do it later, but as for now, you see me sectioning off a thin piece of hair at the front and gradually, as you pluck, that one section you want to keep parting back until you're, about satisfied with How the hairline is so now, i'm just going up and down plugging in different spots. You don't want to pluck in the same spot, because you could end up creating a bald spot, i'm just going crazy. I don't know what i'm doing right now, but yeah keep coming back, so you can see how much hair you've plucked. If you don't do that, you risk plucking continuously and not seeing all the dead hair that got taken out and you could create a bald spot. I also like to stay away from the middle of the hair or the place that i'm going to part until i make that part, because you can end up plucking a ball spot right in the middle of your part, especially if you make a middle part without Knowing and i do apologize for my voice - i am a little bit sick, but i should be better by the time i make a next video. So i'm sorry about that. So here i am just continuing to pluck the wig. I got to the other side um and you can see me combing out a good amount of hair balls out of this wig. So it might not seem like i'm plucking a lot, but after i brush you can see a visible difference and i'm just gon na go in some more again, not going too close to the middle, because once you part that that's where i want my part to Be and once you part it, it might look a little bit bald if you continuously pluck right there without seeing the part first. So now you can see the rest of the hair. I did go back and comb through some of it, but you can see how it looked and i'm just giving you guys some cap construction here, and this is how the hair looked after. I was finished, plucking it, which is pretty good. I was satisfied with it and i'm just gon na go in with a wax stick in my edge brush and comb through. So now it looks like a customized hairline, thank god, and i'm just going to go in and keep brushing. I like to do this to kind of give myself a foundation to start when i put the wig on my head, so that way it's not just all over the place, and i have my part. I already know everything i can do with it and yeah. So now you see me with the wig about to install it. Um, don't fight me on this, because i know how you girls like to tussle. I don't do the ball cap method anymore. I don't i'm sorry. It does no difference in my installs. I just don't see what it makes i just put foundation on. My wig keep the ball cap the same. Sometimes i put some foundation on it, but it doesn't do anything for me. I just push it back and i keep my hair covered because i noticed the ball cap method is actually what was ripping out my edges, so i stopped doing that um. I was having a little bit of trouble with my camera here. So y'all bear with me. Please now i'm about to go in um. I came up like that because i had just found my scissors now i'm about to go in and cut the hairline. I did try doing it in front of the ring light for you guys because my phone was set up to it, but i wasn't able to i just couldn't see well enough. So if you see me turn to the side, that's why so i'm just going to cut in a zigzag motion. I will do a video that actually shows what i'm doing, but here you can see i'm already like halfway done, cutting it, so we just gon na go ahead and get right into it. So now i'm about to grab my bottle of spray. I don't do installs with glue any well, not anymore. I haven't done an install with glue in a while i'm about to grab my um bottle that i use i'm gon na list all the products that i use in the description box below, but right now, i'm just separating my edges in order to like make sure I have my edges because i, like keeping my edges separate from the rest of the hair, so that way they don't get mixed in when i'm cutting my edges, also, the brushing that i did before with the wax stick that also helps to keep the hair separated. So that's what i'm doing right here. Also i apologize for being off camera again. It'S just! I didn't find a way to set my phone up where i could look in the mirror. Clearly so yeah right now, i'm just trying to separate my edges guys. I can't believe i forgot to mention this, even though it's already in the title, the hair is from ali lumina hair on amazon. It is an 18 inch, 4x4 closure wig go check them out. The hair is beautiful. I love it and yeah. Let'S just get back to the install so right now, i'm about to just section off my edges, i like to do a little twist in between my fingers and just roll them together. So that way, they stay separate from the rest of the hair and i'll have to deal with them, and i still keep the look of having that like space between the edges and the wig. So that's what i do. I part my edges away in a straight line. That'S how you get the the edges. Look as if it was like your actual hair, and now i'm just going in again with my wax stick. I think the wax stick is the even wax stick and the mango scent. It smells amazing. I love it because some hair products do not smell good when you put heat on them. So that's what i was doing right here and right here. My camera fell and i had to fix my whole setup again. So if it takes me a while to fix it, y'all i'm so sorry, but i decided to include that in the footage, because this is my first video, so we're gon na have a little bit of bloopers. It'S all right! So right now i'm about to go in with my curling wand. I just go in with the tip of the wand because it's easy to put it on my forehead and it doesn't burn me like the hot comb does, but i still do use my hot comb because you know beauty is pain. So i go in with my wand just to get the front of the hair exactly how i want it to and make sure the wax keeps those hairs in place so that they do not get separated along with my edges. So my edges and them can stay separate and they don't get mixed up. My edges, i'm sorry. I said the wrong thing. Also, i'm going to end up re-parting my hair, a lot because sometimes my part gets lost and then the brightness of the ball cap underneath, but that could be fixed with some concealer, so i'm not worried about it. Also y'all. I made this face right here, because my roommate and her friend were putting me onto some tea and the whole video. I was trying not to get distracted, because what they was telling me was crazy, but anyways we're gon na get right back to the hair. I did lose my edges, so you're gon na see me resection it just a little bit to try and get them back and then, after that, i'm gon na go right in and pluck and try to spray the way down. I'M sorry, i don't know why. I said plug, i meant just section it off now, i'm doing my twisty technique again just to keep the edges sectioned away, adjusting the wig on my forehead, because i don't want it to be too high up, but i don't want it to be too far down. Then i'm going to take my holy grail going to take. I just had a tongue twister, my holy grail spray. It'S got to be, but it is the high hold got to be the high insta hold and i swear by this product. I'M gon na put the link in the description box below please don't make it be sold out, because i will never forgive y'all for that and after i spray my product down, i like to just hold the edges down in place so that after i cut them, They'Re already set how i want them to be set and they're separated from the hair and they don't end up straining back or messing up the hairline once it's finished being glued down with that spray. And that's where spray lasts me the whole day, and i can also take my wigs off whenever i need to so i did go ahead and cut my edges off camera. I just cut them in an arch. I was tired, i'm gon na be honest with y'all and have no pattern for cutting them. This time. I don't recommend you do this. If you are a beginner um, i will make a detailed customization video, but for now i'm just going to go in. Take some mousse and do my ideas. I ended up doing this off camera because i could not look in the mirror on my phone and do it. I couldn't do it like. I couldn't see the fine hairs just enough, so you see me going off camera. I do apologize, i'm gon na figure out my setup for my next video, but, as you can see, the edges are coming together just a little bit, but i am gon na go in a couple more times to get them exactly how i want them to be, And i know y'all keep me doing my little dancy dance. I was fooling myself. I don't care something about curly hair. I had not had a curly install in a while, so i was just doing a little bit of dance trying to figure stuff out. I am gon na fix that one edge that separated itself from its family and went into some kind of different country that one piece you know exactly what i'm talking about, that one middle piece is separated from all of them. I'M gon na fix that cause. Looking back at it, i don't like it look at how far away it is from the other edges. Oh my gosh yeah, i got ta fix that, but right now i'm just about to go in with my wand to try and get my hairline to look like it's flowing on my head again, because it does look a little bit flat and i don't like that. So now we're gon na go in with my hot comb y'all. Please bear with me because the way this hot comb is about to burn me in a second y'all, don't see hold on so right. Now i'm just going in again and i'm redoing my part because my part did keep getting lost, and this is where i noticed something wrong with my install one of my swoops ended up not being there, so i parted those pieces out because they were already cut. I parted them out and i had to put some mousse on them just to give it another suit, because that's the look that i wanted, i didn't want just those two right there that would look awkward, so it didn't look right, so you're gon na see me Go in on the hair itself with some mousse, because it's looking a little bit dry and i don't like that. I need to bring the curls back. The curls on this wig are very beautiful. They came almost instantly. I didn't have to use as much wig as i eat as much mousse as i usually use. I'M sorry so yeah i'm gon na go in again fix my part. I don't know what it is just kept getting mixed in at the end. I did go in and fix it off camera, but right now, i'm just trying to moisturize the wig. So that's what i'm doing right here. So if you see me going in with my wand or with the hot comb, it's because i'm trying to get the top of it flat y'all. This is where the hot comb burnt me. You see me yell and then stop. I was about to cry like i felt my scalp burn. I did end up having a scab after i took the wig off, but it's okay, it's okay, yeah that thing burnt me hot combs are dangerous, like it snagged the hair and everything i almost end up. Giving the hair heat damage right here, so i'm gon na brush it again and i'm gon na put some more mousse on it off camera. But i had to do what i had to do to get the top of it flat. So i went in and i recorded the hot comb me hot comb in the back of my hair off camera, because the facial expressions i was making it wasn't gon na work. It was not gon na work. My so right here i was feeling myself like it was starting to come together. Um, the hair did end up getting a little bit dry after this, so i hot comb, the back fixed that front part, put a lot more mousse in it, and this is the finished product. I hope you all like the install the curls on this wig are beautiful um. The link to the hair is in my description box and yeah stay tuned for more videos um. I absolutely love this wig. It was very easy to come out and yeah bye-bye


Comments
Jamiliah Diamond: I LOVE THIS!! Putting the hair in my cart now
Sadilyn Gordon: Love that hair Kiki. Great job!
Latoya Mckoy: Yasss beauty do your thing. It's your first video and I'm loving it. You got such a pretty face.
Tanyah Brown: Yes sis as u should u look good
Alistaree: “I hate when people have long intros” lmfaooo great video!!
Aaliyah Tate-Barnes: I love your video’s
Ailyjay Jones: Alright cuzzo... Looking great... U did Amazing
Tammara Linebarger: Perrioddd sisssyyy proud of youuuu
emma k: also this video is my claim to fame now
Alyvia Skye:
Stacy Hilton: Yaaaasssss! Kiki baaybayyy
emma k: i adore youuuu
Iamnyar: ❤️Prada uuu
Marcus Henderson: Yuhh‼️
SaniOfficial: hair