Very Easy 28" Jerry Curl Wig Install Feat. Kiss Hair
- Posted on 29 March, 2022
- T Part Wig
- By Anonymous
Currently, You are watching Very Easy 28" Jerry Curl Wig Install feat. Kiss Hair
◆▬▬▬▬▬▬▬▬▬❤ KISS HAIR ❤▬▬▬▬▬▬▬▬◆
———————————————————————————
☛Direct link in the video: https://bit.ly/3tPXBvC
♛Hair details: 4*4/13*4 Jerry Curly Human Hair Wig, 150%density, 28inch
♛Almac Hair store: https://bit.ly/3Ix8QyA➤Coupon link: https://bit.ly/3LjlgvT
❤Other affordable wigs you may like
Beginner Friendly Brazilian Straight Wigs➤ https://bit.ly/3uui4qe
New Ombre Loose Deep Wave Wig➤ https://bit.ly/3DcuDu9
Can Not Miss Kinky Curly Wig➤ https://bit.ly/3JRezR2
Aliexpress Almac Hair store: https://bit.ly/3Ix8QyA
KISS Hair Official Web: https://kisshairfashion.com/
Alibaba Kiss Hair store: https://bit.ly/3e0h8SF
Contact Us for Promotion?
WhatsApp Number:+8617737168487
Kiss Hair Official email: [email protected]
~~~~~~~~~~~~~~~~~~~~~~~~~~~~~~~~~~~~~~~
Please ask any questions in the comment section. Also, leave a comment and let me know what you think.
~~~~~~~~~~~~~~~~~~~~~~~~~~~~~~~~~~~~~~
Thanks for watching. Road to 100K
Remember to Subscribe, Like, and Share. Love ❤️ you guys and appreciate you all so much!!! Forever thankful
~~~~~~~~~~~~~~~~~~~~~~~~~~~~~~~~~~~~~~
Make sure you watch the video in the highest quality (HD/ 4K) to get the best out of it.
~~~~~~~~~~~~~~~~~~~~~~~~~~~~~~~~~~~~~~
Other ways to support my channel:- https://www.paypal.com/donate/?hosted_...
~~~~~~~~~~~~~~~~~~~~~~~~~~~~~~~~~~~~~~
CONTACT INFORMATION FOR PROMOTIONS ⬇️
Email: [email protected]
~~~~~~~~~~~~~~~~~~~~~~~~~~~~~~~~~~~~~~
Follow me on my other social media websites
~ Instagram- @karrill
~ Snapchat- Karrill
~ Facebook- Karrill DaDiva
~ TikTok- Karrill
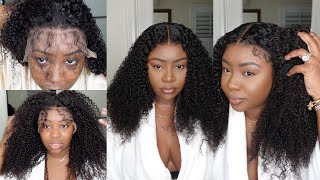
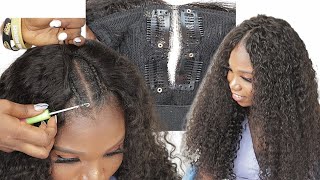
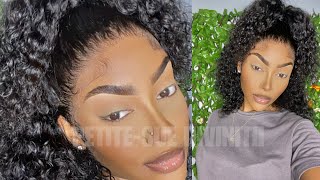
Hey guys welcome back to my channel, it's your girl, Karril DaDiva. Today, i'm going to be installing a wig in my hair, and this will be very easy because it's a 4x4 wig before i start i'm going to brush my hair out and then i'm going to use some got to be glued styling gel. To lay my hair down, this is the got to be glue. Styling gel i'm going to use to lay my hair down, i'm laying my hair down, starting from the back, because i want to apply the gel in layers. This way i'll get more gel into my hair and it will work just like. I wanted to the reason why i'm using gel to hold my hair down instead of braiding it or anything like that, is because it's faster and easier, especially because my hair is short. I use a hair tie to hold it in the back and this i could take out later on, or i could leave it the way it is because i'm going to be doing curly hair. I also went ahead and brush it down some more and this wasn't really needed, but i want it to be nice and flat under my stocking cap, so i went ahead and do that now i'm going to tie my hair down and leave it to dry. Now. My hair is completely dry and ready for my wig install y'all see my face. This is because i really like it. This is my first time doing it like this, and i absolutely love it now. I'M gon na go ahead and put my second cap on because that's the first thing you do when you're gon na put a wig on right, you put a stocking cap on, get it all ready make it look. Scalp like i am not gon na. Do a ball cap, though, let me just point that out i'm just gon na put the stocking cap on and work with it. This is the wig they sent me guys not in a box. Don'T ask me why it's not in a box. I don't know why, and the name is not on the tag either. However, this wig is from kiss here. The length is 28 inches. It'S a 4x4 lace closure, jerry curl wig, as you can see on the lace, it's not pre-bleached, so i'm going to do my thing and customize it the way i like it. The wig comes with two clips in the sides and also another one in the back of it. As you can see here. The first thing i'm going to do is put this wig on just to see what i may need to do before securing it onto my head. So far, i can see that it has its own baby, hair, which i really like, and i won't have to do anything to that and i'm not going to be plucking it either, since i'm going to be doing a center part. Now it's time to take this off and customize this baby, since i'm not gon na be bleaching it. I'M gon na use my foundation on it to give it that natural look i'm going for, but before i do that first, i'm gon na go ahead and add some onto my stocking cap. This is what it looks like now that i added the foundation on it. Now, i'm all ready to put the wig on and secure it to my head to secure my wig on today. I'M going to be using my got to be glue free spray as usual, so this is what i'm going to do. This is how i do it. First, i'm going to spray it on and dry completely and i'm going to be spraying it on more than once so just watch and see. I'M spraying it on again for the second time, and i like to call this my second layer which is gon na, be the last layer. Now i'm going to go ahead and put the lace down on it and dry completely. Here, i'm just brushing all the hair back with this comb just so i don't cut none of it off when i'm cutting the lace off here, i'm cutting the lace off using the scissors that i got from amazon. I actually really like the scissors, it's small, but it gets the job done after cutting the lace off, i like to seal the edges to prevent lifting, and to do so, i like to use my got to be glue. Styling gel i like to use the tail of the comb to apply the gel because for some reason it just works out and get the gel exactly where i want it. Now i'm going to take some baby hair, oh not because it's needed, but just because it's cute and i like it, i'm also going to be cutting them just so they lay properly instead of brushing them back into the rest of the hair, like i usually do, And to lay them down, i'm using my mousse and also the got to be glue, styling gel and now that i've done that one i'm moving on to the other side to do another. One. Now that i got the edges out the way i'm going to go ahead and give myself a center part, i'm using the mousse on it to open up the parting a little bit. Another thing i'm going to do with the parting is squeeze away. Some of the hair to make it have a more natural look to it. If you're not very experienced with this, i would advise that you go ahead and skip this step. You could also use foundation to help to open up the parting and the reason why i say this is because you can plug too much from the parting and then it looks like you have a bald spot and you don't want that and that can be fixed. Also, but i feel like it's better not having that to worry about. You know what i'm saying so just skip that step if you're not very good at it. So, even though i plucked some of the hair from the part - and i still went ahead and add some foundation on it, because i like to do whatever it takes to make my wig look as natural as i can get it, i'm gon na be tying down The edges of this wig, including baby hair and all - and this is the reason why i'm putting it up in a ponytail. What i'm using here is an elastic band and you can find this on amazon. Mine has the velcro on it, because i find that this works so much better for me than having to tie it at the back to define my curls. I'M straining a lot of water on it and i'm gon na get it nice and wet and by the time i'm done doing my makeup it's gon na, be you know exactly how i want it. Looking refreshed and my curls gon na be looking so juicy also using my pantene hydrating buttercream on it, and this is one of my favorite thing to use. When i'm doing my you know my curly wigs or you know whatever hairstyle i'm doing whatever wig style. I'M doing that this can go on i'm using it on it. Now, i'm all done we're installing the wigs styling, the wig. So there's only one thing left to do and that's doing my makeup and i will be back to show you guys the finished. Look. The pow this is the finished, look guys. What do you think? I really love this wig and it was so easy to go on just because it's a 4x4 lace wig the curls are amazing too. Let'S not forget that, and it did not take a lot to bring them back to life, check out the back guys how full it is and how bouncy these curls are. I mean, what more can you ask for in a curly wig like this? It'S amazing. I really don't have anything bad to say about this wig i did get a little bit of shredding, but usually with curly wig. That is to be expected. I will leave all the information on this here down below so definitely check the description box for that as usual. If you find this video helpful, please give it a thumbs up. I would really appreciate that. Also, if this is your first time on my channel, i would love it if you would subscribe and hit the notification bell, so you will be notified whenever i post a new video. Thank you so much for watching i'll, see you in the next one bye you
Comments
Talonda Barnett: I am loving the curls on that wig it looked so easy to install.
Mula A: The curls are really nice. What gel did you use? Also, you did a good job with the installation
Rose G: Hi Gorgeous, i can tell you love this wig it's beautiful , great job i love your nails , take care see you in the next one.
Сергей Скорнин: Felicidades, es un buen ejemplo. 115 sentadillas son unos XX18LIKE.Uno muchas y un buen ejercicio. Se deja ver que hay muy buenos resultados Saludos desde la Cd.. de world los mortalesa abian apreciado tan hermosa mujer.k
winne: i love this wig!
Brigite Green: Super beautiful the wig is totally you.
Brigite Green: Your nails are very beautiful.
Selena Hambrick: Very pretty....
Lady Noir: És super linda