Custom Lace Closure Wig|Do'S & Donts, Best Wig Cap, Construction, Plucking & Styling! [Fool Pro
- Posted on 27 February, 2018
- T Part Wig
- By Anonymous
Hey y'all, make sure you Thumbs Up if you like this video, SUBSCRIBE, and turn on your Notifications to stay up to date.
Personal IG: ayannathestylist
HAIR IG : glammedbyayanna
Snap: lovemaccc
To Book an Appointment with me: Styleseat.com/glammedbyayanna
For business inquiries: [email protected]
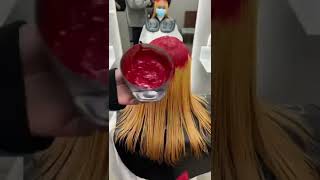
Hundreds of tutorials, but I just feel like my mess, it might be just foolproof the easiest easiest way. Hopefully it is easy. Hopefully I get straight to the point we're just making a basic closure week. My hair is a wig. I like units they're, easy, they're, versatile. If you worked out, you like to work out, take it off, I work out what my hair is put in a ponytail before I start make sure you guys like comment and subscribe once you've watched this whole video and you enjoy what I put out make sure You guys subscribe to this channel, make sure you guys, like this channel. If you guys would like me to make you a custom wig, you can definitely go to my style, sea and book that, if you're out of state or anything just email, man here Breanna calm, and I could possibly do that for you. Let'S get into the things that you're going to need: you're gon na need a wig cap. I know everybody uses all different types of wig caps, their own preference of weekend people like spandex caps. Some people like the netcat, some people like the adjustable strap cap me. I like to use this particular brand. I am freakin giving out industry secrets right now. Oh well likes you to make your own wig brand. You could probably order these on Amazon. They don't have them at your beauty. Supply store, but I like to use the stretch mesh dome style week, so back in the day when I used to make with I used to just use a regular spandex cap. This is the mesh one. So it's breathable you got ta, need some tea pins to hold the wig down and hold the closure down. Of course, you're gon na need thread needles. You know the basic stuff now the key to having your wig fit your clients hair properly. Is you need to measure their head now? I know this part stumps a lot of people because they, like, oh my gosh. How do I measure what do I do like? How am I supposed to figure out how to measure this? I'M not a seamstress. Neither am i right so the easiest way being that this is the elastics cap is you're, just gon na measure. The circumference of your clients, hair their circumference of my clients head for this week, is a twenty two and a half inch. This is a 22 inch, so if I had is 22 and a half, you don't want to go to the 23 inch head, cuz they're just going to be too big. So what you're gon na do is just use the 22 inch head and you're gon na put the cap on it, but you're gon na just stretch it down just a little bit further. That'S gon na give us our extra half an inch. It'S no fancy measurements that you need to do. However, you do need to use the right size cap, because that's when people go wrong, you can't use those little white foam heads that you stick in those are like 16 inches nobody's had the best one. Can I use that to make a wig, I mean I used to back in the day. Trust me, I did we've all done it, but you really really really can't use that because you're just not gon na get a good fit. When you think about how a wig is placed on your head, I know we've seen a lot of videos. They started off like back here and, like I said this is a person's head, but think about it. A person's head is just not this flat like we have an opposite bone. You fill the back of your head. Your occipital bone is like where your head makes. The question mark - you know figure, so these mannequins don't really have that. Yes, while they're 22 inches around, which is the average size of a person's head, they don't have all of the grooves and the curves that we have as humans. So you're not gon na place. The cat like that, you need to place the cap actually around the whole 22 inch up the person's head because the person's head will, you put up, say you were just putting on a wig cap? Are you gon na just put it on the back of your head, or are you gon na put it all the way on now? You can, at this point, take your measuring tape again and measure it and see where its measuring up to, but I made enough of weeks to know that this should be. The point 1/2 inch head here is from on her hair company, but the closure is from Kay's fab here and it's a silk closure. Now you guys, I prefer lace closures, that's just my personal preference. He specifically wants a side part now, usually standardly. You would just put it in the middle and clip it down and then really you can wear your wig any way. You want me yeah when your part is in the middle, and all you get here is pretty much the same length. You can wear your wig in any direction you want, so I have. A middle part is made in the middle, but if I decide I'm on a side part, I'm simply just sliding it to the side, and you know just making it look making it look right. You know I'm gon na keep my little song. I'M gon na keep a solid price today, but I need my hair behind my girl. Well yeah. You could just slide it to whatever, but she specifically wants a side part because I don't know maybe she's going to a bob. I don't know we haven't decided on the style here, so I'm just going to bare it off just a little bit more to the side. I'M gon na have something to watch, have some music playing. I prefer watching something because it makes the time go by faster and just help paying attention to me Kim this week. So you're gon na leave the lease on it still and just pin it on down just so. It'S secure, as you guys can see. It'S veered off to the left, so even if we part it on the left, it still has some bang area. Well, if you do it, if you put it right in the center and try to part it on the left, then it might not be enough space. You know so just just put it a little bit off to the center and then you think we're gon na worry about the party and stuff. Later I do a single thread I just nodded at the end, see I just nodded at the end of one. I do a single strip, but it's very, very strong. It does not pop it doesn't loose up literally my flights never come back for our Moose Tracks ever and I do single stitches on some wind. So I do the same for weeks. Gon na be able to see you're just going to start sewing, and for this you can sew through the elastic. You don't want to go all the way through, but if you guys can tell well once you have the cap, you're gon na be able to each other this top layer kind of lifts, this top layer kind of lifts up. So you want to kind of go through the top layer, as opposed to going through the whole cap. Okay, so top layer not whole cap. If I can do this the opposite way, because I want you guys to be able to see - I were really so going downward, but I want you guys to see we're literally doing a straight stitch. You can basically, whatever yours, sawing mess. It is you're gon na. Do that I'm sure you know how to stitch a pair of pants. I'M sure you know how to stitch a hole or something just going through the Nets I mean through the closure and then through the cat through the closure through the cat. You guys kind of see how this side is stitched, so you want to take out this back pin because you want to make sure that it's you know staying flat, just continue just around this along this whole side. Now you can legit go in a whole circle with this, like literally take this around the whole side, or you can start a new thread and then just do this side and then do the back, but I think it might be easy to show you guys. I mean easier for you guys to just use one thread and just go around this whole thing so see how that side is sewn down. You just have it flap over, so you just want to hold it and make sure that is staying nice and flat. None of my clients better think that they gon na be making their own wigs and after watching this video, you still need me. Okay, see how we did the back now we're making our way over to the side. Hopefully, you guys are following what it is that I'm doing this is like so easy, it's definitely time consuming, but it's an investment piece, and you also want to be careful where you get your mannequin hand from we order hours off of Amazon, but I ordered one That had it was a black one. I wanted cuz, they always come in this just um. What is this material for a canvas material, but I ordered one that was black so on the website, I'm the own Amazon. You would think that it's just the same canvas material, just black. No, it was just hard styrofoam and it had like something kind of like the cab covering it. So when you was going to make the wig, the freaking thread was getting sold onto the face of the mannequin and literally when you cut it, you're, basically cutting out all your scenes. I was so pissed, so I cut off the face of the mannequin. So now it's just hard styrofoam. I left the bad reviews. Nonetheless, we come around to the edge to the front, because at the end, when we cut the middle part of the leaves off, you don't want the closer to be. As can see, my one string has become too it was that what it was one, but it became too to do that. All you have to do is not the end, that's not not it, and so, and it's going to turn into talk, okay guys. So I always double my tracks. I just like it better when it's doubled, it feels more secure to me than just alone, and also just doing single tracks would take way longer. I also want to let you guys know that every track should be going from ear to ear. You don't want to be sewing it in any type of u-shaped patterns, especially not for the bottom we're worried about that we get to the top for now. Let'S just go straight across so that every track is evenly distributed against the cap and so that the cap still fits perfectly. I also let you guys know that I do not use the flip over method when doing wigs. I just don't think that you're gon na get a nice flat wig by doing that, so I definitely am cutting each track once I finish on the side, that's another reason why we doubles so that when you do eventually maybe reuse this here or something you don't Have little pieces you still have long webs and I sew through the weft, not through the actual band, but just through the hair. Only once I get to the ends I sew through the web, so that is nice and secure and being that the closure is beard off a little more to one side, you're gon na finish one side or finish before you finish the other, so I'm just coming Up on almost the end of this side, but I'm still taking it from ear to ear it's no curbing going on everything is straight across and again make sure those ends are very secure. You don't want your tracks lifting off with your clients way. So now I'm showing you guys the very last track on this side, and I like that last track to kiss with the closure so you're, taking the edge of the closure and you're sewing everything together. You want it, you don't want to see any cap at the end, so that whole tyre side is done and that's what we have left so, as you guys can see now, of course, you're not going to be able to go straight across so now, you're going To just go straight in the direction of what's left, so it's like a slight u-shape, but not quite you're. Just following the guide up, what's left make sure those stitches are really close together and neat, especially if you're gon na be selling this to someone. If this is your own personal wig, you make anything yeah, you can skip a few steps, but you want to only sell quality work now see how neat and close those stitches are. Okay - and this is the final track and like I said before, I'm taking the edge of that closure and also slowing that into the wet so that the last track and the closure are one you want to marry the two see that little space you want to Feel all of that up, you don't want to see any of the wig cap. Okay, so we're all done you wan na choose where your part is going to be and now we're gon na begin to start. You know directing the hair in the direction that it should go, so I'm using Nairobi moves you can use whatever moves. You want to use or use something. That'S too heavy. These are still going to stop us here, and it's also easy. If you do this after you wash the hair after you made the wig, however, the hair was already washed, so I'm just moussing it down in creating where I want my part to be and just making sure the hairs are going in the right direction. Because disclosure, you know it's straight out the pack, so it's just going in one direction. You have to create your own direction and I'm gon na put the wig under the dryer as if she was a client and I'm just using wrap strips. If you use more mousse, the wrap strips would have catch it better, but you get the gist, I'm just plucking the part. Now I do not use tweezers to pluck the part. I use a very fine tail comb, the end of it and you just want to part out when you have that part and lightly tug at the hair. Until you have an even opening, and I hate hate, eight super wide closure. It'S like you're here is parting. The Red Sea, so please be easy with this. Take your time if you're a beginner do not plug any white part, you just don't want any here in the park. So just take your sweet time a bit if you're a beginner, but I definitely suggest using the tail comb rather than tweezers, because tweezers can easily rip your leads. We don't want that. That'S looking good to me, so this is the inside of the wig. I want you guys to see how neat it looks on the inside construction is everything, and that is from going from ear to ear with the tracks instead of just doing different pattern, and of course you want to cut out the middle piece of the wig cap. So that the closure is exposed now, I'm just placing her back on the mannequin head and I'm using a wax stick and some hairspray to tame down the flyways and I'm using the cold setting when the blow dryer just to you know, take all of those flyaways And get a really smooth base for putting it on my clients head. She looks amazing good. That part looks so natural, so this is my car Anita. They hardly hire you guys, hey Vinita girl. I'Ve been trying to persuade Bonita to get wigs for over a year. Like literally over a year and I'm so happy, she finally got a wig. She has a whole lot here and here grows fast. So when she gets her lace, closure someone's, you know they grow bad and then of course, yeah edges are out and exposed, and you know sometimes you get sticker - that nobody wants to be putting edge control on in here every single day, especially if you have a Closure, like it defeats the purpose so, like I said her hair grows really really fast and so with the wig she's. Not gon na have this problem with her hair growing out and her edges being exposed because it's a wig, it's not sewn down. So I've been persuading her and she. Finally, let me do it. I was so happy yep yep, so you just want to bridge the client here, according to the part that they're gon na be wearing. So, of course, if she was gon na be wearing in the middle part, then I would have braided it going down on both sides or you can actually do the braids going all back but um. I think you just have more security with your wig. When you have to anchor braids at the front - and you want to keep a very neat part so that you can see it through, usually I would be using a lace closure, like I said before, so the silk can't really see the partner underneath. However, I still just like to get my client some neat braid, underneath so that they're good for the next. So I did add some red in here and a few of the braids and I just burnt it with the flat iron so that the ends don't unravel. And I just use a crochet needle to just pin it through so that it doesn't unravel. And then I go the extra mile and so the braids down. I don't do that for some wings because I will put a net on, but since this is a wig, are you gon na, be you know, taking your wig on and off every night you know leash once your braids to be secured under there. So I just go the extra mile for my clients. Most of the time is the weed look at that wig. Look at that wig! It'S a perfect, fit perfect! No slipping! No, not that okay! So at this part it goes a little out of focus, but I'm just literally cutting the leaf off the excess lead. So we need to decided that she's just going to wear her hair straight today, but I just framed it a little bit in the front not too much and then probably the next time they'll be doing wind refresh. Then she'll cut it into another style. But the hearings actually really long, so I'm just straightening out with my baby list Pro Flatiron and of course you know you guys, can style it or use whatever type of products you want on it. This is up to you, but I don't use many products to get a nice sleek look, and I just put some hairspray on my comb, another industry secret, and I just do that again to tame the Flyway so that it's the super sleek look. She absolutely loves it. Look how nice that part looks so natural


Comments
Ashley Polk: I paid $350 for a class on wigs and learned way more from this video!!!! Thank you!!!
shamsazzie: Nah sis. You said to like this video after we watch, and like your content. I think you deserve a thumbs up at about 3 mins in. You’re spitting truth in a clear and concise manner and these are “industry secrets” as you stated!! I’m here for it sis. Thanks for this and bless up
Kersha Beaver: Now this is a true tutorial. Explained a lot
Blanche Anderson: This is the best tutorial I have seen. I am more confident now to attempt my first wig.
Najia Murphy: You did such a great job and made it look so easy I’m going to try to make my first wig ❤️
katlady5000: Thank you this is so helpful. It's confusing picking a wig cap and how to place the wefts etc. This walks you through everything. Health issues have caused me to have partial baldness. I know how to sew, quilting is my hobby, you're using a simple whip stitch we using it in quilting all the time to bind a quilt. I have seen other videos using a blanket stitch but this stitch is easier for me. Your video has really given me the confidence to make my own wig. I was paying $250 to $300 for synthetic wigs that tangle at the nape of the neck. This will be much better. Thank you for this wonderful video.
Lalaaaj.: Thank you for making this tutorial! This was very informative and actually visual! All these other videos are not really detailed. This wig came out so nice and sleek. I will be referring to your video when it’s time for me to make another wig! Thanks again
Lemon Girl: Your video is very helpful. You did a great job! And I like the fact you have included the actual instal too! Well done! Keep them videos coming girl!
Naomi Rodriguez: Thank you so much for sharing these secrets with us, I've learned so much watching, made my first awesome wig with your techniques and now I feel confident to start working my next wig. :)
Trelynn Wood: Wow.... Very detailed and beautiful finish!!! Amazing! Thank u so much! I learned a lot! Blessings be unto u for sharing ur personal methods like this. Stylists like myself love to see and try different methods and this one is EXCELLENT! Thanks again.
Desi: You REALLY know your stuff! The BEST tutorial I've ever watched. Thank you.
Sonya Sassafraz Williams: This is by far the best tutorial I’ve ever seen on you tube .. you did that!!! I’m definitely using your video over an over to per-fect my wigs thank you so much for sharing
Koryne Hill: Finally someone is showing exactly how far you sew in through the cap this is an example of a true tutorial thoroughly explaining and showing up close how it's done thank you!
PRITTIBABESHUSTLE: Thank you for putting out this video. It was SO helpful and WELL NEEDED to the hair/wig community on YouTube
tammy howard: New subscriber here, I am so happy you were in my feeds. I shaved my hair off to start my natural journey and wanted to try wigs. I’m a beginner and knows nothing about making my wigs or anything.You are blessing to me and others making it easy.Thank you so much young lady.❤️❤️❤️❤️
Keeping It Jassy: Great Job! Thank you very much for taking the time out to explain this. I appreciate it.
whitney watkins: Your work looks soooooo good Ayanna! can't wait to make my own wigs!:)
Katrina Jefferson: Im a beginner and I love your tutorial you get straight to the point so glad I've found your channel new subscriber!
Chrissy Nicole: Best tutorial hands down thanks for sharing ya secrets so we can slayyyyyy✌❤️
CANDICE WARE: Sis !!!!!!! This is the best tutorial I’ve came across. You’ve explain every detail in the video. Thank you !!
Kayla's Life: Hands down best tutorial ever. I’m doing my first wig ever and I’m so scared but i will follow this video thank youuuu
Black Girl Magic: THANK YOU SIS!!!! I’m going to try to make my own unit!
Agnieszka Lockwood: You’re amazing! I’m sitting on three wigs cuz I’m scared to pluck and cut the lace I’m worried I’ll waste my $ so been sitting on them for about a month
Shanelle Cooper: This is the best detailed tutorial!!!! I now have the confidence to make my own DAMN wig!!! Thanks sis!!!
Ya.BaldheadedMama: God bless you for thisI had a duh moment with the last part about cutting the inside part for the closure to show better! Thank you for the detailed video✨
Mzlovinmykidz: This tutorial is bomb AF!!! THANK YOU!
London Day: Best tutorial yet! I've been searching and searching. So glad I came across your channel, thank you!!
Shy Jo: Love this! So informative. Thank you!
Maria Sifontes: You did a great job! Very talented . I love the part it look so natural
ladiablita: Really wish I would have watched this video first , thank goodness I have an extra cap around starting over , but thank you for all the clear instructions!! and not skipping steps
Erica Garza: I love it! Very informative. I want a wig like that.
Mocha Marie: Love this video , thanks for the tips !
Melanin Magic: Fantastic instructions diva Queen!
Gabby Goody: Wow I’m not even finished watching the video yet and I just had to say thank you for this very informative video. You are the best keep doing what you do. God bless.
Darcus Sanderlin: You really showed me how to make a wig. Thank you soo much. You are an excellent teacher
The Ice Box: This is the best wig making tutorial I’ve seen. You are talented as hell
Quijuandas: Giiiiirl thank you for this video! Very helpful
Jay Scroggins: Yessss you did that! You gotta new subbie! Can’t wait to watch more of your work girl! ❤️
S Robinson: Omg...I loved this I'm just starting and u explained this like no other thanks
Naee'sReflectionOfHairInBeautyTv: Absolutely love ya work!!!! One or thee best videos I came across. And very detailed
R. Boyd: Excellent Instruction! Neatness. Single threading, interesting.
Destiny L: Yes! This is so nice and most def helped. I see what I did wrong last time♀️
Tiffany: Thank you for sharing this. I am a natural and I make my own wigs but the only problem I have with my wigs is the back never stays down. It rides up. Do you have any advice for that/can explain why this happens. Your input will be deeply appreciated
Bensalem: this is definetly the best detailed tutorial i've ever seen making me a wig this weekend
Marsades Porter: Best wig I seen made on YouTube! Wonderful job.
Best Day Ever: Best detailed wig tutorial ever. Thank you for sharing your knowledge.
knowledge Hungry: Look at you .You did yo thang. Had everything slick and sleek. You did that with precision. Keep up the good work. From one wig maker to another.
Valerie Jackson: Such a wonderful tutorial, thank you! Question, if the last track and the closure kiss, how can you replace the closure when it starts balding? Can you do a video like that?
Dee Dix: This is by far one of the best videos I have ever watched on YouTube!!!!!! This is a real tutorial
TishasaurusTV: I love the comb method of plucking!
Teshan webbe: LOVEEEEEE THIS TUTORIAL OMG!!!
Laura Sanchez: thank you so much for sharing. beautiful job too. amaizing!
miss dee: And this is one of the best videos I have seen and I've been looking at them for the last past month thank you so much for sharing this
Q. Ashton Beauty: This is the probably the best wig tutorial on YouTube honestly
Kizer: I have searched everywhere on YouTube for you. I'm glad I found you . You tutorials are the boom!!
IamAC: Wow girl you REALLY schooled us!!!! Thank you for actually explaining shit! I ain’t even finish yet I’m 4 minutes in & had to pause
jewelzofthasea: Great video very thorough thanks
Lee lee: Great tutorial..very informative..I'm a beginner..
J. Arzu: THANK YOU!!! I wish I saw your video before I made my wig lol
Tete Johnson: Great tutorial
Christen Ann: New sub I love how you explain it thank u‼️
Rachael Christopher: Wow!.,.I had to pause the video to comment...best tutorial hands down!!....u slayed that wig nice and neat good job!
Laila Marciano: You are amazing I would never have thought to put the closure to the side and side part is all.I wear!! Thank you so much
Arlene Auguste: lol @ clients making their own wig! appreciate your work. Looks awesome!
Beauty over 50 lifestyle: I really enjoyed the video thank U for your tips and tricks
RHONY _Jones: Yess... finally someone who went in details that you so much learned so much
Lola Grace: Thank you so much!! So helpful
S Benton: I would love a custom wig
Tracy Bradshaw: Finally a tutorial i understand. Thank you !!!!
martin steere: awesome tutorial thank you.
nikkireese1: Wow i wish I had found this video when I started making my wigs especially when it comes to the mannequin head. I measured my head and it says 22 inches but when I make my wigs I always have this excess space and it’s feels to big. Maybe I’m measuring it wrong or the cap really is too big. I don’t know how to fix this
Gillie C.: Love this! ❤️
Chenell: I love your details
Tamika Searight: Very help full explain everything in detail very well best I seen so far
Milnon Taylor: Very nicely done!
Laniqua Scatliffe: You slayed this tutorial. The finished product is so bomb
Auntie Helen Rizpah: Beautiful work.
J Mead: where do you buy your lace closures? thanks so much for the great video! Best one out there by far.
Simone Bailey: I love your detail explanation..
Jhaded: Where was this when I started learning to do wigs. This is so helpful
felicia ladytruth: I seen ur review. Thank you because i was about to purchase that black one as well until I seen ur comment
Solo One: Wow your work is amazing
Pynk Bella: Gyrlllll yessssss than you for taking the time to make time for us to see this video...loveeeee n Blessingggg
Jevone’ Mayes: LOVE THIS VIDEO!
Janay Francis: You can braid with those nails you're great!
knowledge Hungry: damn your so creative and that wig was so perfect. i had to subscribe.
A.C. N.: BEAUTIFULLLLLL!!!!!!!!!
Lonasia Goodwin: I love this video . Also where do you purchase your bundles from
Eat With Loring: Wow...you did that...new subbie by the way
Beautiful Diva: You’re a great teacher.
Jacky Lovett: I just have one question, I noticed you said you usually sew downwards but for the purpose of this video you did the opposite, but im not understanding.. should we be seeing through the cap first then the tracks/closure or sew through the tracks/closure then the cap?
Kay O'coney: Very helpful!
Jennifer Byous: How much do you charge to make wigs I love ur work and I think u did an amazing job
Kiersten Mccree: 2mins in and I subscribed . You know your sh*t sis ❗
Isaiah Moya: I love this and you this was soooo good
Nkechi Enwereji: Wow great tutorial
D Knigh: Good job!
Lady's Boutique: new subbie great job
Tashell Clarke: How am I just seeing this ♀️ it’s so good madam
felicia ladytruth: I know what black canvas head ur talking about. I am in the process if getting my supplies to start making my own units. Thank you for ur review it kept me from making that mistake by getting that wig head