Sewing Hair To Doll Wig Cap
- Posted on 06 June, 2017
- T Part Wig
- By Anonymous
In this video, we complete the wig after previous videos where we made the wig cap, and prepared the alpaca fiber. I'm sewing the glued alpaca wefts to the wig cap with needle and thread for a beautiful finished wig with bangs and a center part. Enjoy!
Supplies I use on a consistent basis and WHERE TO FIND THEM (These are my Amazon affiliate account links, so you don’t pay more, but I get a small amount with the purchase that helps me bring you more cool videos):
1. Liquitex Matte Medium – use with airbrush as a base on face-ups before adding color: http://amzn.to/2s02WUf
2. Liquitex High Gloss Varnish – use on eyes and lips as a final coat to add clear gloss finish:
3. Liquitex Matte Varnish – use with airbrush as a final finish to face up.
4. Krylon UV protectant clear spray in MATTE – If you don’t have an airbrush, this is a good final coat. Use as a final coat on face before adding gloss varnish to eyes:
5. Faber watercolor pencils – These are a little cheaper than Derwent and work well. Plus you get a sharpener and brush included: http://amzn.to/2sZGA4z
6. Pencil sharpener – Battery operated one: http://amzn.to/2tXCOG7
Manual one: http://amzn.to/2rZVt7D
7. E-6000 glue small tubes – I buy in bulk (LOL) – use on just about everything: http://amzn.to/2tXuO7X
8. Ginger small scissors – sharp, and great in small spaces: http://amzn.to/2sZNYwA
9. Ginger large scissors – great for fabric: http://amzn.to/2tCWNu7
10. Baby sewing machine – Janome brand (the style I have (New Home) is no longer available, but this is pretty much the same thing.): http://amzn.to/2tXEe3p
11. My big Singer sewing machine with 100 stitches: http://amzn.to/2rZfpHz
12. Martha Stewart X-acto knife – Okay, you don’t really need the Martha Stewart one, but I love the handle and the way it fits my hand. And it’s pretty. So there! : http://amzn.to/2t44TP1
1. Easy Mold silicone mold material – I use it to make molds for polymer clay doll shoe soles and other things you want to make over and over: http://amzn.to/2tCM6ry
2. Liquid Sculpy – for bonding clay pieces or decorations to clay: http://amzn.to/2rL1QaB
3. Polymer clay cutting tool: http://amzn.to/2t3ksa4
4. Polymer clay roller: http://amzn.to/2t3A0KG
5. Set of Premo Polymer clay in assorted colors: http://amzn.to/2t3O72F
6. Prismacolor Chalk pastels – http://amzn.to/2t3lX8d
7. Tacky glue – http://amzn.to/2t3XaAP
8. Good quality Acrylic paint set that’s not too expensive: http://amzn.to/2s4cVmo
9. Tiny brushes I use on face ups – These are actually for nails, but they’re perfect for applying pastels and paint to doll faces, too. Plus, it includes the small ball top tool I use to make the white sparkle in doll eyes: http://amzn.to/2tXoTjg
10. Pearl EX sparkling powder pigment set – for special effects on clay or dolls and accessories: http://amzn.to/2t3fcTW
11. Air brush – use this to apply theLiquitex Matte medium and Matte Varnish to doll faces before and after face-up. Can use to apply paint to face also if you like that effect. This is a good starter set: http://amzn.to/2t3vXi3
12. Suri alpaca locks – for doll hair - www.alpacameadows.com
13. Pet groomer brush for brushing the alpaca hair: http://amzn.to/2t3Jbeq
MISC items:
I buy small buckles, extra doll stands, kid leather, leather scraps, lace scraps, and other odd doll size items by searching on Etsy or EBay. Usually somebody somewhere sells whatever you need. LOL
I like to shop thrift stores for scarves that I convert into doll clothes. Scarves are nice because at thrift stores they’re cheap, and you can find some really beautiful patterns and fabrics like silk. Sometimes I find curtains that are great for doll clothes at thrift stores, too. It’s cheaper than buying fabric at a traditional fabric store.
For beads and jewelry making supplies, I tend to go to Michael’s, because I use their discount coupons when I need supplies. Otherwise, I find Michael’s more expensive than Amazon on art supplies, etc. Especially if you have PRIME and get free shipping for your Amazon orders.
For specific Fabric needs, trim and sewing notions, I pretty much have to go to Joann’s Fabrics since that’s the only fabric store near me. Although sometimes the notions can be cheaper from Amazon. But as far as buying fabrics, I think that’s something you just have to do in person.
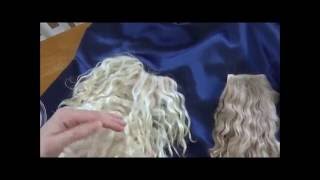
Welcome to artistic adventures today we're winding up this week. We did the wig cap, we've processed the alpaca fiber, and now we're going to be putting the fiber onto the wig cap. So here's all the wefts that I made so far. I did have to make some more during the filming, but that was a start. I pretty much used almost all of that two ounces. Just to give you an idea. This wig is used a lot more than the normal blue wig. So here I'm just going to give you an outline of the plan that I have for the wig, and this will tell me how I'm going to so the fiber to it alright. So this is the wig cap from the front. The dark part is the opening. So I'm going to put two rows of fiber for bangs right in the front and then I'm going to sew lines of fiber around starting at the bottom. So this is a side view, so that those are the two rows at the top for the bangs and then I'm going to start sewing at the bottom and sew some layers around. I did change this design a little bit now. This first part, the part that I'm coloring in there is where I'm going to put the part and I'll show you how we're going to do that in a minute. Alright, so that's kind of the basic design that part is going to look kind of like this. I'M going to have two watts of hair that I'm going to attach together in the center and then place over that center part, and that will cover up all the the on the glued pieces that will still be showing okay. So that's kind of the basic design and we're going to stick mostly to that. I did change it just a little bit at the end, but I'll show you that later alright. So now we're going to make that center part and taking two pieces of the the alpaca that we clued together actually four pieces, two for each side, because I want to have a piece long enough to cover the area that I need to cover in the center. So I'm going to have to glue two of these pieces together on each side to make it long enough, so I'm just using e6000 to put a little dot of glue there on the scene between the two pieces and I'll. Let that dry and then now that that's dry, I'm going to come back and attach them together, now put this piece of paper in between them just to keep them separate, while I'm working on it. So I know where the two pieces are are, so one piece will be flipped over all right, so put just a little bit of e6000 down on that seam area, pressing it down, and then we let that dry after its dried. You can see that we can flip it over and we're going to have a nice little part where nothing of the glue shows and we'll be attaching that to to the wig at the very end of this project. So we'll put that aside for now and keep the paper in there just to keep it separate all right. So here's our doll with the wig cap that we made in a previous video and we're going to start. As I said, by putting two rows of the alpaca fiber across just the front part of the wig and then we'll go back and put the layers of fiber in around starting at the bottom, and then that party piece will go right here in the center. I'M just using regular thread. I tried to match it to the fiber of the hair, so if any any part of it shows it won't be that noticeable starting at the end point of where I wanted that fiber to come to for the bangs, I'm just going to start sewing now. The secret here is, you want to sew just right at the base of the glue area. The glue can be hard to get the needle through, but if you get it right at the base, where it's not very thick, you get the best position for it to hold the fiber down. The glue is what is holding the fiber together and that's what will keep it from coming out, but the sewing is what holds that waft to the wig cap and it's really important that get it a tap a place where it's going to secure it. The most so I'm just adding the webs as I go along. If I need to trim pieces of glue, I do and making sure that I keep the edge of this right at the edge of the wig, and that way the wig cap edge won't show. Once you finish the wig, even though she's going to have bangs, I still don't want it to show, and if you wanted to pull her hair up into a different position, you would not want the edge of the wig cap to show, and, as I said, you Can go back and climb up trim off the excessive sets of pieces of that glue, but you want to make sure you don't cut too much or the fiber will start falling out all right. So we've done that complete front piece across for the bangs and now we're going to start on that second row and you can see there if I turn it up, you don't really see the wig cap because we got it sewed nice right at the edge and You can see the different the distance from that end of that to the ear all right. So it's really important when you're doing this to clip off sections of the hair, because this fiber is very fine and hair like it does get caught up in the threads. Sometimes it just gets attached to other fibers and makes it really messy. So I try to keep sections clipped off and keep the thread out of the way of the fiber all right. So I've ended that first section and tied a knot and now about a half an inch back from that. I'M starting another row and this will be our second row for the banks, and I wanted to tell you that I did notice a big difference between this Elmer's glue and the e6000. I ended up having to go back and use the e6000. The Elmer's glue really didn't hold it that well. So that's an update on my experiment with the clear Elmer's glue. Alright, there's my second row done and we're going to add that clip to the front part of the bangs. Now we're going to start at the back and put rows of fiber starting at the very bottom, I'm going to do a short row there and then we'll just keep continuing making rows as we come up to the crown of the wig once again trying to keep It at the edge of the wig cap and also sewing right at the base of the glue and I'm just doing overlapping stitches, where I make one stitch, come back to the middle of that stitch to make the next stitch and that that seems to hold it. This pretty well I'll, tell you, as I'm doing this sewing at the edges of this. We cap was actually pretty easy. It didn't seem to want to slide off too much as we get to the crown where we're actually pulling up a little bit it did. It did get a little bit harder, so you'll see that in the end, but overall it stayed on pretty well during the sewing process. I guess you could attach it down to like put clips on it and attach it under the chin or something to hold it on, but I didn't really feel like I had to all right. So that's pretty much finishing up that bottom row at the very back and tied a knot. Make sure you tie really. You know two or three knots in your thread. You want, you don't want it to come loose and then that the fiber would start falling off. All right, so I'm going to start my second row of fiber and I'm coming up probably about 3/4 of an inch, maybe somewhere between 1/2 and 3/4 to an inch. You don't have to put these rows right next to each other. They really aren't going to show once you get the week completed and if you put them too close together, you can have a really thick bushy, wig and also you're, going to use up a whole lot of fiber. As I said this, this process used more fiber than normally I use, but you can have a fairly big head head. I have to say that and then also just doing this process, you tend to use more of the fiber than you do when you're just gluing. It on, but I think the end result looks pretty good and I'm going to show you here about the distance between the two. So you can get an idea. I'D say it's anywhere from 1/2 to 3/4 of an inch between the two layers. I'M going to continue that layer across off camera. Okay, there there's the second row completed as you can see, and that ended up working pretty well and I'd, say it's probably about a 3/4 of an inch above the other one and we're going to clip that off to keep the fibers out of the way. And now I'm going to start another row, the third row again putting it about somewhere between 1/2 and 3/4 to an inch you kind of get a feel for it when you're sewing it on as to what we'll show or not show - and this will leave room For a fourth row of hair across the back of the wig, which will pretty much work out perfectly for how we'll put the wig to look okay so get that row started and then I'll go off-camera and complete this. As you know, still working with that bum thumb, so my sewing is a little tortured, while I'm doing it on camera, because I have to hold the doll in a certain position and again you can trim off any excess pieces of glue, making sure that you don't Trim down too far so that you lose your fiber okay, so that's about half of it and I'll complete the rest off-camera all right! There is our third row completed as you can see, and we're going to clip that off to get it out of the way. If you'll notice, the hair is, you know it is kind of like wavy and everything I am going to wash this wig at the end. So it'll end up looking a lot better once we get everything completed all right. This is a final one, making all the way across and I'm going to join in it right to that edge where I did the bangs coming over in the front and that will make sure we cover up all the front areas of the wig right. So same process, just continuing to sew out to 3/4 of an inch from the previous layer and I'll get it started here to show you and then complete it the rest of the way off-camera coming along nicely. Yes, alright, there's our last row all the way across and you can see the distance there and we're going to go ahead and add that to the bunch that we've clipped off in the bottom, then we're going to start finishing up the top of the wig. Now this is where the part will go right in the middle of this section, so we're going to measure right now to see if we've got it the back far enough up that the parts going to cover it. So you take your part section and just lay it across you want it to be able to cover the glued parts, and I can tell from this that this is not quite enough, but I don't want to put another row cross. So what I'm going to do is put two rows across the section on the sides and then a shorter row across the back. Alright, so two sections here two sections here and then I'll do another small section across the back, and that should be enough that the part will completely cover the glue in the front and the back and that it'll fall down over the sides. But you want to make sure that parts section has lots of fiber in it, because that's what covers up all your sewing area in the glued area, and you want to have that nice and thick you're always going to lose some fiber once you finish a wig When you wash it and as dial it in comb it so having that section really thick in the beginning is really important. Alright, so we got our first section sewed on that side and I'm starting on the second section, and you can see here, the wig caps bunching up a little bit as I'm sewing and that's just because I'm pulling up as I sew and it tends to pull The wig cap off a little bit did wasn't too bad better than I actually thought it would be, but just something to think about, as you're sewing you're trying to hold that we cap on, as you sew, and make sure your your web star going on straight And you do this on the with the wig cap on the doll, because you want the stitching to be stretched out to the size of the doll's head. If you try to do it off of the doll, your stitching would pull when you try to put it on the doll. So we finished the one side with the two rows: we're going to go on this side now and put the two rows, and I finished that part and yep wig keeps trying to come off, and now we've got this section where that's the front of the wig. Okay right in the center, that's the front part where the bangs are, and this is where I'm going to put another short row in the back, just to make sure that my parted section is going to cover up all the uneven pieces where you see glue and That really is using, I mean I think I used all, but about two wefts of the two ounces of fiber for this wig. It'S a really nice full wig. Alright, I'm putting this paper towel around it just so I don't want to get my thread caught up and in the alpaca hair as I'm sewing and now I'm taking that center part. I folding it over so that you can see the glued part, and you want to put the end of the glued part where the hair is coming out of the glue right in the center of that open space. Because that's where you're going to sew it. And that's where your part will be - and I said I pin this down just to keep it in place while I'm sewing since I I don't have full use of my left hand, it's a little hard to hold things, and so so the pins made it a Whole lot easier, so I'm going to sew down that front edge and put a couple of knots in it just to hold it really tight at the front making sure I've got the glued edges of the bangs covered up completely and then I'm just going along the Base of this sewed piece, I've just glued peace, sewing it down to the fiber cap, get to the end. Also there we're going to put two or three usually three, I think, not they're - to make sure that it holds and that it's covering up the glued section of the website. I put on the back all right so now. We'Ve got that sewed in and I'm going to trim off some of that excess glue that will make the part lay down a lot nicer. Just make sure you don't cut too much or your fibers will start pulling out. You can always go back in with little dabs of glue if you need to, if you cut too much all right so now, we've got that done. We'Re going to flip over the half part of that wig that part section, and now you can see we have a nice part on the top of the doll's head and cut off that paper towel. Let all the hair loose all this mass of hair, but now what I want to do is somewhat position it, where it's going to be end up and then go ahead and cut the bangs, and this was just going to help me as I washed the wig And put it back on the doll to see where everything is positioned, so I'm making sure that I have it in an even section in the front I'm leaving some on the sides. I can always cut more later of the bangs, but I just want to get the center section cut, always cut less area, then well cut more like the bangs. You want to cut them longer and you think you will need them because you always end up thinking. Oh, this is way too long and then later on. Oh that's kind of just right, so I've got the bangs cut there and just making sure that I have pretty much everything where I want it and you can see there the finished raw wig before any, washing or styling. Now I've washed it I put shampoo conditioner, then I took my time and combed out the sections holding that fade the fiber at the base to make sure I didn't pull it out, I'm going to trim off the ends that are a little bit straggly and this Wig really turned out nice and you can also use a curling iron if you wanted to make it curly, I'm using a flat iron just to flatten out some areas, and I give the slightest curl to the ends just to make them look a little bit more Finished but basically she just got nice beautiful straight hair now and I have to say I wasn't really crazy about this doll. When I, when I received her, I just I don't know I wasn't. I wasn't as happy with her as I have been with some of the others I purchased, but after I got the wig on her, I really cut all over. I don't know it really just changed her look and gave her more personality. Just goes to show you that some of the things that you can do for a doll like face ups and hair and costume can really add to the doll, so don't give up on a doll that you purchased, that you don't necessarily love right away there. She is with her nice, beautiful wig and I really do think it turned out really nice. It took a lot of effort, but one reason you do these alpaca wigs like this is to get a color. You want to get a style you want and for it to look a lot more like human hair, the synthetic doll, wigs just don't look the same as the alpaca fiber, which is just so beautiful and human hair like so. I hope you liked all this wig making video, if you did give it a thumbs up and as usual subscribe, so you don't miss a thing thanks and bye.
Comments
WisteriaSuriRanch: Wow, love how the wig turns out and how you were able to style it! I've raised Suri alpacas but didn't know how awesome it looked as doll hair. It is a time intensive process just to bundle the locks with the cut sides aligned after shearing :) Great tutorial!
Georgana Bredy: Beautiful, can’t wait to try. This is awesome! Thanks for sharing.
ImaCynomingirl: Lara, you are absolutely right! She is looking just lovely with that thick, soft hair framing her face and neck. Great work, especially with only one fully working hand. Once again, amazing!
Nefertiti Jones: Wonderful wig. I just love watching your videos. Everything is always a learning experience.
marie Caronia plotkin: such a great video- lots of work involved, I need to make 5 cloth dolls in the next 14 days. So I think I need a faster way to go with the hair. But once I have time, I would like to try this method. Thank you!
Kaye Schlenert: she looks great now she has her wig. The Alpaca fibre is lovely, I will have to get some and experiment with it. Thanks for sharing.:-)
Foxiepaws ACAnderson: After having tried probably all the methods of giving dolls hair (rooting, knitting and gluing and making various wig caps with different glued in hair) this is my favourite. I really think sewing it into an elasticated wig Cap gives the best result. I haven't tried making the wig Cap in the white glue and stocking way and then sewing in as it just sort of seemed logical to make a wig Cap from elastic and stocking material and then sewing the hair in. The only thing is the parting line because I usually cut the wig Cap along the part line and insert the last couple of bits from the inside to get a nice parting. I think just bought a prerooted head because I just had another rooting nightmare with the cat getting involved and hair everywhere! It's nightmarish..but this is the best way Lol! Yeah I do a sort of running back stitch too..I find it's better on the doll too as you don't have to hold it in the stretched position if you do. I don't know how you're doing that with your hand still in plaster! You are of a stronger constitution than I (me ? Whatever Lol!).
Dawn Templen: This video is so informative. Really liked it. Thanks
Uchiba Uki: The best wigs tutorial :-) I saw so many complicated videos!
Sarah Longshore: WOW That is a beautiful wig!! I cannot believe you did that with one thumb! I candy do it with two! LOL
Betty Bho: Her wig looks really lovely. Is it hard to sew into the glue and is there any shedding of hair when you comb the wig?
Celestia a.k.a Nancy B.: Fantastic!!!
Blanca Tirado: Thanks great video. Praying your thumb is feeling better.
Jen C: This seems a lot easier than glueing it
冰bingy: I have two of this doll
PattyAnn: Great wig and WOW sewing with a bum thumb mustve been so cumbersome..You did great!
bitchclub: thank you so much !
BABAI RAY: Very nice
Mandy MCcreadie: I love you Barbie Doll's
Sarah Longshore: Can't