How To: Braid Down On Thick 4 Type Hair | New Stocking Cap Method | Very Detailed | Ft: Recool Hair
- Posted on 02 June, 2022
- T Part Wig
- By Anonymous
#RecoolHair Buy Now Pay Later Accept!
Hair info:13x4 HD lace wig deep wave 24 inches 180%
Video hair Link➤https://bit.ly/39X9rOf
Crazy Sale!Use Code “DB17” get extra 17% off
HD Lace Wig➤https://bit.ly/3wP2bNI
Glueless Wig➤https://bit.ly/3LIRH6t
Short bob➤https://bit.ly/3GiKUj1
Colorful Wig➤https://bit.ly/3wN7o8t
U part wig➤https://bit.ly/38jXaTR
Bundles with Closure➤https://bit.ly/3Gj2JhI
Follow @recoolhair on IG:http://bit.ly/2L5XDZ5
Whatsapp/Tel: +86 17339028510
Email: [email protected]
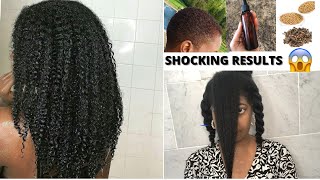
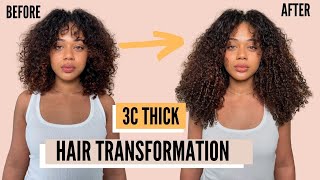
Hey y'all: what's up so i'm back with another detailed tutorial today, i'm doing a deep wave wig over uh four type hair - and i mentioned four type hair because she has a full head of hair and she loves her natural hair. She wears it frequently, but she wanted to try something new and so we're gon na be putting all this hair under a wig so guys. The first thing you want to do is detangle it and that's what i'm doing there to making sure it's detangled um. She did a good job of coming with it like kind of detangled already, so here is she's her hair super thick and we're just going to get it under the cap. So what i'm going to be teaching today is just how i did that so we're using recall hair today and they sent me their 24 inch deep wave. It has 180 density and it has a 13 by 4 lace, wig. So the lace - i think you know, i'm not sure i think it's hd or transparent. It did go on pretty well on her hair, so um it might be hd wig, but it looks really nice. I love how the curls are just loose and stuff. I did go ahead and wash the hair, and i did i have to dye the knots on this wig. So i've done that already. So that's why the hair doesn't look like crispy fresh, like it just got out the box, because i did wash it so with um with that they sent me a head like scarf thing like a head cap um. I don't know why a bunny there we go bonnet, they sent me a headband, they sent me a comb, some clips and a wig cap and they sent me a edge brush and some lashes. So today, i'm not gon na use. The wig cap, i'm gon na, be using a stocking cap. The stocking cap method is what i'm going to be doing today. This is my first time using this method, and but in this video i'm going to, let you guys know if i prefer that method or not so the first thing you want to do with hair as thick as this is make sure you have a really good Braid down and what's important about this braid down is the braids have to be super small like yes, it could be smaller than this, but we don't have all that time. So this is the size that i'm gon na be doing throughout her head and, as you can see, when i braid i braid back and around the nape, so that's gon na anchor the wig. The way that i braided that first braid so throughout the um, the braiding process, um her neck area, where her nape is, is really small. So i'm just like having to fit all these. This thick hair and like um, her hair, is long and thick and i'm gon na have to kind of try to fit it in a small nape. So, as i'm parting, these braids, when i get to the back, i do part the back a little bit smaller than i would the front so the front of her head like has more space, but then the back is as small as possible so that i can Fit every braid into it, so that is important. When um you sizing up a client's head to make sure that you size up the size of their the front of their hairline compared to their nape, and if they have a small nape. You kind of just got to make the parts that go to the back a little bit smaller at the back and a little bit bigger at the front. So this on this side, i'm going to be connecting the two side braids and have i've taught you guys before - is that i use a two side brace to anchor my wig. So those braids are very important, so always part those braids smaller and try to make the braid a little bit tight on the sides, because you're gon na be using those side braids to anchor your wig. So i did connect the braid that goes across the nape with the side braid on the other side, and this is my finished - look for a braid down. As you can see, all that hair is pulled back to the back and i'm going to go ahead and oil. Her scalp with my jamaican black, castor oil. She did complain about possibly itchy scalp, so this is gon na alleviate all that under the wig. So i went ahead and moisturized her scalp with my jamaican black, castor oil. Secondly, the the first thing you want to do after that is basically lay her edges and i use the got to be glued gel to go ahead and lay her edges. Then i take like a brush and like swoop swoop, it back and gon na blow dry it just to keep it in place so because i did oil, her scalp um, it kind of loosens the got to be gel, so i went ahead and sprayed some got To be spray on her hair so that all the little hairs that did not lay down because of the oil it lay down so right now i just tested like a stocking cap. We thought a darker color would work, but it didn't match her skin tone. So i went with a lighter color and i'd rather go with a lighter color guys, so that you can build the color based off their skin tone. So me, going with a lighter color stocking cap is ultra sheer. Then now i can go in with my ruby kisses match it to her skin and then um build the color. That'S gon na match her complexion the best instead of using the darkest or a dark tone stocking cap that i think might fit her complexion. I think it's best to use a light tone stocking cap just to build the color on top, especially if you already have the makeup to build the color. So here i am skin matching her the complex um, the color to her complexion to make sure it's gon na be flawless. So that's what i went ahead and did i think, i'm using number 15 of ruby kisses, i'm using a lighter color in that pack to color into her hair and it matches her skin tone. I always do a skin match before i do it, because you just don't want to use the wrong color. So after i've done that i go in with the got to be glued spray and just spray along her hairline. I try not to i try to get it as perfect, as i can around her hairline. So i use my thumb and kind of like guide the spray once it's on the cap, so that it doesn't go too far into her forehead. So once that is drying, i go ahead and i do my under looping sewn method to um get um the cap to stay on her head once the got to be glue is spray and, as you can see, i'm going over the braid and then kind of Anchoring it at the bottom, so the the thread line is always gon na be under the braid. If you guys get what i'm saying so at the end, i just go ahead and tie that off to secure it and then i'm gon na now um. Now that i see that the tab next to her ear is not secured, i always go back in. I use the end of my rat tail comb and i spray the got to be spray. I hold it down next to her ear like that, and then i blow dry it out so that there's always an issue with the air tap. I always have to do this on each and every client just to make sure that the air part of um the stocking cap is secure because you don't want to get the glue on their hairline, so just go ahead and do that method to keep it intact. So now i'm using a scissors to just kind of cut along um, the her hairline and if it went beyond her hairline, i kind of lift it. That does hurt a little bit because there are little fine hairs on your face still, but just you know you have to you: don't want the stocking cap to be too long, because then your wig might not cover it. So go ahead and lift it up if you've went beyond it and just kind of cut it off. So now i'm using um the glue and it doesn't matter which glue you use. I mean it does, but i'm using the glue to like lay this down, and i use about three to four layers. If they're gon na be wearing it for a really long time or they want to i'm gon na, be using about three to four layers. And i always wait for the glue to dry first and when you know that it dries that it gets clear. And then you can add your layers once it's clear so now i had to color because i didn't, i wasn't sure if it was swiss or whatever lace. So i went ahead and colored it inside and i'm glad i did that because it matched up really well. So i still use the same color that i used to color her cap to color the inside of the wig. So now you know i'm always having big wigs, but as of lately, i've been having small wigs. Maybe they've been listening to my video and sending me smaller sized wigs, so this wig was a little bit too small for her head, so i literally had to like force it down on her forehead um and, of course the hairline of the wig did not match Her natural hairline, so i'm just gon na, have to cut off some of the hair from the wig to match her natural um hairline. So um yeah, like i really like i had to force the wig on and sometimes sometimes you bump, into a wig that doesn't match the client's hairline at all and you just kind of have to pull it forward so that the hair gets along the glue and Sometimes you can't get it to go along the glue, so just pray, you have good lace and when it doesn't go along the glue line like it still doesn't show, because the lace kind of like is melted into their hairline, and so you can always use baby Hair to cover it, if if the wig does not match their hairline, so now i'm just going to sew it down, and i just cut along the air to like you, know, form it along her ear, be careful when you're doing that you don't want to nip Your client, so that's what i did. I went ahead and sewed around the wig to anchor the wig and now i'm gon na cut. So what i like to use is one of those eyebrow razors, but i could never seem to have a sharp eyebrow razor. So i had to go back in and just kind of use, my scissors to finish it off and, like i taught before in my other videos, is that when you're cutting the hairline, i don't just cut, like some people, say: cut zigzag whatever i'm basically just cutting Along the glue line, so whatever is attached to the glue, i just cut off the excess of that. So i can already tell this is really good lace and that um, you know it's going to blend in well, but i you know, i always go back in with the got to be glue spray along the hairline, and this is going to help melt it even More so, even though i've glued it down, i always go back in the hairline, with the got to be glue spray and then put the band over it, and this is going to help it even like melt in even more into her skin. So i let the band stay on for about five to ten minutes, while i either style the hair or do makeup or whatever i'm doing for the day. So right now, i'm just gon na style, the hair and the hair is really pretty. All i needed was some water and some curling cream and it turned out so pretty we really didn't want it to be too defined. We kind of wanted like a messy curl look and it turned out really well with that look. So here i am just spraying. It with some spray and i'm going to use the design essentials curling cream. It smells really good and it just kind of defines the curl like look how pretty the curls are. Once i put that on there, i'm gon na comb it through with the brush and yeah this hair. Again, i said it's from recall hair. This is her deep wave, 24 inches, 180 density, and so i'm gon na go ahead and take the band off. And since i did spray, it got to be glue, sprayed i'm gon na go in with a comb to kind of ease it up, because of course, it's gon na, like uh, make the hair a little hard. So i'm gon na, like use the comb to release the hair from being so hard and that's gon na give it even a more natural look. Just try not to scrape the hairline too much and then now i'm just trying to figure out where i want her baby hair and i'm like. I know it's not going to look right, good right there so always try to follow your clients, natural baby hairline. So her hairline um, her baby hairs is right there, where i pull the hair out her natural baby hair. So that's where i want to pull it. So i went ahead and pulled some hair out and i curled them with my curling iron and now i'm going to cut them with my eyebrow razor and by the ears just because the wig didn't fit. The hair by the ears has to be a little bit. Thicker because i'm trying to cover where the hair did not fit. So i go in with my erica j's mousse and i'm styling her baby here, and this process has to be super quick, because once you put the glue the mousse on there, the lace might start to lift. So just be really quick. With this put the band over it - and this is the finished - look you guys it looks, super natural it blended in so well, i'm so proud of how it turned out it just looked like. I could barely see the lace and i'm just glad that we did this so go ahead. All the information will be in the description bar of how to receive this wig and i do have a discount code. It'S called db17 and you're going to get 17 off. This wig so go to the description, and then you can purchase this wig from recall hair. Thank you guys for watching


Comments
All Things Art w/ Mari: The way you packed all that beautiful hair in those braids. And you matched the color perfectly
Jackie Randolph: Hi Duchess love how you did this style it's beautiful love the lesson..❤️❤️
Joann Reese: Always beautiful when you finish ❤️
Cindy Ings: STUNNING!!!!! I love this!!! I need hair like this!
Megan Sampson: So beautiful!
Alice Andreia: Boa noite! Adoro seus vídeos Alice de Guaratinguetá SP Brasil
Farah's Features: I'm excited for this video!!
Cassandra Turman: She look beautiful, but her natural hair is beautiful too. Great job beautiful lady
Namithalie Mendes: Beautiful hairstyle
Desta Berhane: Ten out of ten!!!
Иван Сабанцев: Bendiciones hermosa Celina quec Dios te cuide donde quiera que Pamelarioss.Uno encantan tus videos.
Soikot Ahmed: Bendiciones hermosa Celina quey Dios te cuide donde quiera que QUINZAA.Monster encantan tus videos.
Сергей Рябушко: Hai anna iam Nagendar Anna na age 42 Sweetlovee.Monster qualification m.l.t medical lab technicianr ,Srpt lo jobs unte cheppagalaru anna.with govt Jobs
Lowanda Carmichael: NC, yes ma'am, Gorg❤️
Sara Miles: Bendiciones hermosa Celina quej Dios te cuide donde quiera que gisellee.monster encantan tus videos.
Da'Myia Henry: Lol good job
Delayhni Watkins: That clients hair the client said her hair hurts and she never getting it done by you she said she's gonna she at the door emi cus her hair