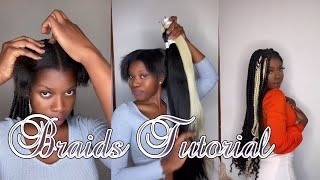
Beginner Friendly Install| 20" Water-Wave T-Part Wig| Talkto Hair| Amazon Review
- Posted on 14 May, 2021
- T Part Wig
- By Anonymous
Hair Deets:
Hair Wearing:TalkTo Hair T Part Middle Part 13x4 Lace Front Wig 20 Inch
New Arrival: TalkTo Hair Handband Bob Water Wave Wig https://amzn.to/3gml7eL
Hey Layahbabes,
I hope you enjoy today's hair tutorial on this easy-to-install unit. Summer is approaching and curly hair screams beach, pool, idk just get me to water! Be sure to subscribe for more hair related videos + more!
Til Next Time Layahbabes,
Let's keep In Touch:
Instagram: HallayahSade
TikTok: HallayahSade
Shop: https://www.hallayahsade.com
The curl pattern is really pretty you guys that that's the only thing i don't want to be up and stuck is the top of my wig okay she's back hey babes. What is up welcome back to my channel, i'm sitting outside for today's intro just because it feels really good, and you know it's very fitting for today's hair tutorial. Today'S video is sponsored by talk to hair this water wave 20 inch tea part unit. This is how the hair looks completely air dried. For the most part, the curls are still in with the mousse, and i am loving. The texture is definitely giving me all types of summer and spring vibes before we get into today's video. You know i have to give a shout out to our sponsors. Thank you talk to hair for sponsoring today's video for the rest of the tutorial, i'm going to be in my bathroom. So if you guys want to see how i achieve this hairstyle, that was super easy and effortless very much so beginner friendly then stay tuned and keep watching. Okay, guys, let's get right in to it. So i don't have the tripod today. Bubby has it and i'm just praying and hoping that this concoction of you guys being attached to my mirror, look fingers crossed that it works. I command stripped you guys to i'm recording with my phone today. Anyways! That'S that's neither here nor there. Today'S video is sponsored by our friends over at talk to hair, so this is the box that the wig came in and you guys know i'm a sucker for anything pink. So i thought that was super cute and the brand is talk to this unit. Is their 20 inch water wave e part unit? This is how the wig came in the box. It has a hair net, so it automatically they got a plus for me for sanitation and that that's it automatically just judging how it looks with the hair net over it, you can see the curl pattern. This is their 20 inch water wave, which is very fitting for where the brand will be going very soon so make sure you subscribe so that you can be in the know of my weekly vlogs and just rubbing my fingers through the hair. It feels very soft. I'M not seeing any shedding and i'm rubbing, you know pretty pretty vigorously. Okay, i'm trying to see what it is. What is it so a little bit of details about the lace? This is their 13 by four by one, so it's a tea part, meaning that it just has a middle part. Now i love middle part wigs, but i do also like that versatility. So preferably would i have gone for a wig that was like this, probably not, but i was willing to give it a try, because it may just be a little bit easier, especially if i like metal parts anyway. You know i don't know why, like i think it's the look of just a full lace front. I feel like it just looks better, but i could be wrong, which is why we're doing this for a video today um, i want to tell you guys a little bit more about the hair, because it does look very voluminous. As you can see, the bounce is there a hundred and fifty percent density y'all know. I love me some thick hair. So let's get into customizing this baby a little bit because i can see she needs a little bit of work. She'S, bad, hey, girl, hey y'all, know this is my um trusted wig head that we do not name because it's fine, she doesn't need a name. So i'm just gon na pop her on here and pin it back in some areas. So i know that this lace is going to be easy to customize, because i only have four inches and by one inch to work with so let's see it might be a very beginner friendly wig. I am definitely here for the curl pattern and the thickness um of just the way it looks on the wig head. I can't wait to see how it looks once i actually wet it. This is first impressions y'all. I have not done anything to this wig. I wanted to make sure i just sat on it um until i was able to do this video. Let me make the wig stand taller, because y'all can't see that okay, so real, quick, some of the items that you're going to need um. These are just what i use when installing my wigs, and it lasts me about anywhere between four to six days, depending on how frequently i'm tying it up at night, but i'm using the got to be freeze spray um. You can find these at your local beauty, supply, store, walgreens or cvs. I'Ve been and i've checked um. I would prefer to use the black bottle. I'Ve got to be, but i'm all out, so we're going to suffice for the yellow bottle, but i'm going to show you guys how i use this very sparingly, because this can dry a little bit white and tacky if you've used it before. You already know what i'm talking about. You are also going to need a blow dryer, preferably one that goes to a high hot heat setting i like to use two forms of scissors. These are like sheer scissors, and these are lash scissors just so you can get really close to the lace. You'Ll see once you get there um a comb. I would prefer a rat tail comb, which just has the long end, so it'd be a comb like just like this, but without the rest of these. It just helps to make your parts even, but i can make this work too. It'S whatever um tweezers, because that's what we are going to pluck the hair with and then your lace trainer, that's what this is from. Grayson marie hair - and this is just what we're going to use to tie down our edges once we get to that part. Okay, guys, if you want to see how i transformed this wig, then just keep watching okay, you guys. So now you are ground level with me, i'm in my room. So hopefully this doesn't! Okay, i don't know okay, so i'm going to pluck a little bit at the lace and let you guys see so let me zoom you guys, okay, so the reason why i want to start by plugging downwards is because i don't want to tear this lace and I can kind of feel that this lace is a little bit like that hard lace. It'S not too soft, you guys, so we are going to have to do some manipulation just a little bit. I'M gon na collect downwards and being kind of gentle and when you're plucking you're really just eyeballing it to your liking, then i also like to just take the hair back again to see how it softens the lace, so we're gon na have to take this. In a couple of layers, but just take it layer by layer, so i'm just taking a little row at a time and plucking at the root. I would say: try to hold firm right here that helps you to keep your control and actually see where you're plucking too. This curl pattern is very pretty, so i definitely think i'm gon na, like this, i haven't had curly hair in a very long time. Um and it's very summery, so i'm excited so this is very short: you guys where it starts the track area of the hair. So if i got you guys close a little bit, so this is where the track of the hair starts. Basically, like the width of the hair - and this is where the lace is so - you literally have an inch of lace to work with so do not over pluck because girl, you will just see nothing but the track and a lightly pluck around here and we're going To add some foundation to the lace, and hopefully that makes it look a little bit more, like scalp install this baby play with the edges a little bit. I'M definitely going to try to make this wig work for you guys, because i want to give you guys. Versatility, um, and i know a lot of you guys - are not really into fully wigs and something like this may be a little bit more up. Your alley is baby, i wonder if we should just go a separate place. Okay, guys, i think this is about as much plucking as she could take before. We are seeing nothing but trap, and now i'm going to bring you guys back up, so i can actually put on the wig cap and such oh. Do you guys not care about that yeah, i'm going to show you that, okay, okay! So one thing that i did appreciate about their packaging is: they included two wig caps. Well, most wig caps come with the package too, and these are the colors that i needed. I mean i feel like that. Was they probably needed happy anyways? It came with two wig caps that is a necessity to installing wigs for some um. But for me i am going to use a wig cap because i'm pretty highly upset that i didn't have a wig cap for the past. I don't know like a week when i was trying to wear wig. It just helps with the longevity of how your wig stays on and the amount of times you're gon na have to lay it back down, because i'm stretching my wig cap. This is a method for my big headed girls, or you know, whatever you want to call yourself pop this one off and pop the wig cap on and i'll see you guys in tuesday. Okay, wig cap is on okay, so i'm just gon na pull my wig cap down just a little bit. So using the got to be glued gel, you can use the black one, which is the one i prefer, or this one just take a dime size amount. Um, because of the way that this one dries down, it's just that it can get very tacky very fast. I'M going to press very firmly with this one, because i want to make sure that it almost like. I can feel it touching my scalp as well, because that's what's gon na help to make sure it's stuck like chick. So now, i'm just gon na blow dry this on a high hot heat setting um. Until i see the white kind of fade away so then i'm going to do a second layer with the got to be free spray. This is just going to really make sure that it's nice and stuck before we start to cut away the lace. I'M going to add some foundation that is similar to my scalp color or skin color, and i did notice that these knots were not bleached. So if you are familiar with, like you know, bleach and nuts and stuff by all means, go ahead. This girl over here we are not dye experts, so i'm not even gon na pretend to be until i start actually practicing um. So for now we will use a full coverage foundation, so i'm just taking this all across the lace um, and it's almost as this. Your your bleach in the knots, but depending on how dark the knots are, um that'll that'll decide. If you really need to do this and this lace is so small, i really don't think it's too necessary to bleach it i mean yeah. I i think, i think, using the powder foundation, you might be a-okay for this one. So while that's doing its thing, i'm going to cut off this lace right here so using my lash scissors, i feel like this is pretty dry down now. Yes, it is um and i just like to start in the middle of the wig cap, because that just helps to release some of the tension. And this is why i like to use lash scissors because they get really close without getting too much of the lace or just being in the way, and then i'm probably just gon na just go at an angle. So i don't cut off all of the wig cap and it can still securely stay on my head and because i already have makeup on the lace kind of naturally faded in with the foundation. That was on my forehead. But i am gon na go back in and lightly over the area, but i'm gon na i'm gon na go back in with foundation and lightly dust over the lace, but i'm gon na first secure it again using the freeze, spray. Okay, then taking the same powder. I'M just going to lightly go over the lace and where our middle part is going to be because again we didn't bleach the knots. Even if you did bleach the knots. You probably want to do this anyways, because it'll just help make it look a little bit more transparent and then it also does have the adjustable straps right here, which i like to especially on new wigs, just unclasp, because that's going to help to loosen the unit. Just to see, and then if i need to make it tighter, then i can always clasp it with it still on my head, because you can feel for it. It'S almost like putting your brush. It gets a little bit big head girl friendly because i already know the size dome on my way. I already know it feels like it has a good stretch, love the density. Okay, let's line it up right here, still a little bit tacky, so i'm gon na go back in with a little bit of oh. I like this hair already, so i'm gon na go back in with a little bit of the got to be. I mean like it starts to get white and looks very and then i'm going to pull the lace forward, but you never want to pull by the lace. Try to like go underneath to the root. So i am going to use the combs just because it fits without me having the clasp underneath so definitely undo the clasp only thing about combs. You don't want to get your entire edges, because so i'm trying to get like the root of my braid better than the edge of the braid. That will also help with prevention, of pulling out your hair and just gives it extra security. When you can get the comb on, there makes it a little flatter same thing. I do like this hair, though you guys i'm liking it. Let'S see how we can finesse the rest of this lace to make it. You know, lay how we do. Okay, honestly, i feel like i can just go ahead and cut off the lace, because i don't have to do any of that lace: maintenance around the edges, because there are none. This is literally where the lace stops. So, let's see is okay, so the wig is secure and on i know you guys can still see the lace. So i'm going to show you guys how we're going to definitely camouflage that, but i'm going to pluck at this area a little bit more, because i want to really see that there is a part and we're gon na still add some foundation in that area too. So that will expand turning, so i wanted you to see the hair just with the finger combing out the curls. I am going to go back and redefine them, but i want to give baby a little bit a little trim on the ends um. Just because i can see it's going to be prevented with meshes okay taking my shears, i'm gon na give her a little bit of shape because right now it's just like it's there like it's cute, but i like my hairstyles to have a little bit more. So i'm gon na just bring all of the hair to the front, like literally just split it in half and bring it to the brush, so we can see the length. So this is what 20 inches looks like on me and i love the density of this hair. It is super full um they're shedding, but that's because i was manipulating it, so i will let you guys know like how it does after the fact um. That'S another reason to subscribe, because i'll probably have this unit in for the rest of this week's weekly vlog, so you guys can kind of see how she does for the week. So, let's just cut around the edges. I think i want to just give it a nice scoop shape um, maybe do a little a little bit of a bang, but nothing crazy. So, let's see and the ends um, they look pretty full um. They really do not look like they would be thin um. Once the hair is wet and it looks like the girl would curl all the way to the end. That'S that's the key to seeing if curly hair is really really good or not. I'M honestly glad i did not get anything longer, because this hair is very, very cool um, and i can just imagine how hot i live in arizona, it's hot here already. Well, it is me so that is like appropriate time, but whatever you'll get okay and i'm literally just eyeballing the cut i feel like it looks pretty even to me, let's just add a little bit of bang situation, so i'm just going to section this. Oh, you guys saw me, do my edges all the way through here, because i don't know if i decide i want to do it to the side. If that happens, i didn't do it on this side, because i don't necessarily prefer this side so yeah all preference. All preference okay, so i want this to be my bang, but i don't want to cut it like crazy short. So, let's start and i'm cutting downwards, because i still want it to go in that a-line shape just a little bit of bang. So it has. You know just a little shape once the hair is actually curled. I am going to lay down the lace before i start wetting it and stuff. So give me about 15 minutes of laying this bad boy down. I'M probably just going to clean up this trainer is from grayson marie hair. I like it because it's a velcro, so you don't have to worry about tying it slipping and moving and catching the hair in it. Just so many unnecessary things, but let this sit. It'S definitely not too tight, but it's tight enough to where i know it's going to lay it down and i'll see you guys in a little bit. Okay guys. So it's been about 15 minutes. So i'm gon na take off my lace trainer and reveal our lace reveal yourselves salad, i'm just going to use some water and some mousse and see what that does for it. I don't want to put any product in it um, just because i want to see. Oh well, okay, i will put water first and then mousse just to hold it, but really it's the moisture. Miracle rose and argan oil moves, so it's very natural, so it should just help to define it a little bit more and ultimately keep the girl. Here'S. What the lace looks like up close mind you. I already know that this uh got to be spray kind of dried down a little bit, i'm not even going to continue to try to peek at it because no um and then, if you get close yeah, it's i mean transparent for the most part. I would say you could probably cut a little bit closer than i did um, because once i till my head back in certain lighting, you can see it's a little bit light. That'S when bleach in the knots comes in handy, because you won't really see that unless you're cutting really close um, but it's something that can be covered up with some bronzer so hold on, give me two seconds. Let me go grab that one. This is the palette. You guys saw me using earlier. This is just the morphe 8a bronzer palette and i'm just going to take these second to last two bronzer shades and lightly tap over the lace smooth that out a little bit, but you can see the difference in lace. When i add a little bit of a darker bronzer um lightly, on top so when i just added my foundation powder - and i just did these two colors so there we go, it looks a little bit more transparent, a lot more like scalp and less like wig. So, let's add some water to this baby, i'm literally just going to add some water in my hair and start running it through. Okay, just our first impression of putting a little bit of water is definitely giving water away. I love how it's just reverting back to its natural state. The curl pattern is really pretty you guys. That is a really pretty girl. I like that, i'm gon na just add water. All all the way around and i'll be right back. Okay, you guys. So here is the curl completely damp. I have not added any product any mousse and you can already tell that the water wave texture has definitely just reverted right back. I love the curl pattern. I love the fact that i decided to add some shape to it. So it's not just like stuck to my head um and then once this actually gets a second to air dry. I know how it's gon na look so i'll. Make sure that i'll insert some clips later on once i let it air dry, but let's add some mousse to this, because i do want this to stay like this. So, like i said, i'm using the moisture miracle rose water and argan oil curling mousse. So i'm just going to add a little bit of that to my hands and i'm going to start at the root of my hair, because i really want to press this down and not make it look so stuck up there. That'S the only thing i don't want to be up: instead, it's the top of my wig okay, but i was definitely down playing the teapart wig, but now that we're here now that we are here, i might have to say, give it a try b. It'S one of those just put it on and go y'all saw how easy it was to customize. I had to do little to no plucking, because there wasn't that much space to work with with um. Of course, if you are like a hairstylist or you take this to a stylist um, who wouldn't mind working on a different unit, because i know then you would definitely be able to get that professional look. But for my beginners this is definitely a wig that you could pull off for the summer time to the top work. Our way down to the roots, i meant to the tips of the hair and i'm just lightly finger combing it and you guys, can see the curl literally just bounces right back. I love the curl pattern and i can just make sure y'all subscribe to the channel. Okay, that's all i'm gon na say make sure y'all subscribe to the channel, okay guys. So here's what it looks like with some mousse added in there i'm gon na let this hair completely air dry. Let'S see what it looks like once: it's done: okay, babes! I hope you guys enjoyed today's video if you did make sure you give it a big thumbs up, don't forget to hit that subscribe button. So leave me a comment below on what you liked about this hair. If you would try it and if you end up trying it tag me on my instagram, because i want to see how it looks on youtube: okay, guys i'll see you in the next video until next time.

Comments
carl mosley: wow your hair looks beautiful
beauty hair: honey,you are sooo skillful and you look sooo beautiful.