*Start To Finish* T-Part Wig Install *Detailed*
- Posted on 06 February, 2022
- T Part Wig
- By Anonymous
#Wiginstall #howto #wig
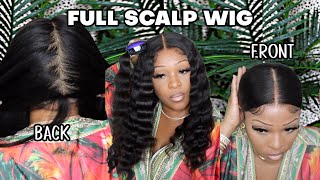
Watch me install my T-Part wig! Turned my wig from black to burgundy. ❤️✨
MAKE SURE YOU PRESS THE LIKE & SUBSCRIBE BUTTON & JOIN SuperMom3Tv FOR NEW VIDEOS WEEKLY!!
Thanks for watching! Stay tuned for more videos! ❤️
If you want to send the family gifts then check out our list of stuff on Amazon. All gifts are greatly appreciated! ❤️
https://www.amazon.com/hz/wishlist/ls/...
Instagram: Jadacharise
Tiktok: SuperMom3Tv
Twitter: Purple_Dreamsss
Clubhouse: SuperMom3Tv
*BUSINESS INQUIRIES*
Today'S video, i will be showing you how to install a teapart wig. I went ahead and dyed the hair last night from black to burgundy and it came out so pretty so stay tuned. Hey super mom squad. Welcome to my channel, don't forget to like comment and subscribe love. You guys hey super mom squad and welcome back to my channel today i will be installing this beautiful teapot wig. I went ahead last night and dyed it from black to burgundy. So, let's get into this video okay! Now it's time for me to braid two braids on the side of my hair, i went ahead and parted down the middle. It'S not a perfect part, but that's okay got a little bit of oil, so i can add it to my hair, so my hair doesn't get dry and break off. While i have these braids and up underneath my wig, so i put the oil in so i'm about to start braiding up the right side of my hair, the braids you add up underneath your wig does not have to be perfect, so i'm just going ahead and Braiding right on down to the back of my head pulling in some of the sides and as i'm braiding, i'm just making sure that i have all the hair put in. I got a mirror on the side of me, so i can make sure i'm not doing. No crooked braid, now that i have finished braiding up the top. I have to finish the ends i broke out with a little song. I was listening to some music as i was recording my video, so there's the first one now it's time for me to get on to the second one. This is the left side of my hair, which the left side for me is a little bit more difficult. Yo this braid turned out so good. I was underestimating myself talking about. I don't know if this is going to look good, but damn does that mother freaking braid look good. So now i have to get a little rubber band, so i can tie both of these braids together at the back of my hair. So i can pull it up. So when i put my wig cap on with these two bomb, ass braids going to the back of my hair, i give me some edge control to put on my edges on each side. So i can get my little wig brush and brush that on into my braids, without putting too much tension on it for me braiding it so that when i put my wig cap on, i have to worry about it pulling so much. The wig cap is on so i had to find my scissors and with my scissors i like to poke a little hole by my ear, one on one side and then the other on the other side, and then that way i pull my ear over. So when i spray my holding spray on my head, i don't have to worry about my cap starting to slide, so i made sure i pulled it up a little bit more so that the lines were up on my forehead instead of on my hair. So now i'm just going to spray my hair with a generous amount, i'm going to put like two or three layers on let it dry and then spray some more layers. Now i'm blow drying the first layer of got to be glue that i sprayed on my hair with the first layer dry. Now i am applying the second layer of got2b glue so that my wig can be very secure. My song came on while i was draining my hair, so i busted out with a little bit of karaoke with the wig feeling nice and dry on my head. I'M going to go ahead and cut the cap so that i can make sure it is the right size on my head before i put the wig on once i cut those two side pieces. I go ahead and wrap it around the back. I tie it up and i push it up underneath my hair. So when i put my wig cap on the wig doesn't slide because the back is cut off. I got my scissors to cut around my hairline, so when i put my wig on it doesn't show the wig cap up underneath. So i started on the right side and i'm working around not going in a complete circle, so it's kind of like up and down so that it looks like a natural hairline that cut turned out so good. So i had to get a little bit more got to be glue to spray around the edges. Now that i took those pieces off so that when i lay it back flat, it looks natural. So i use the little ends of my brush to mix it in and lay it flat. So it looks just like my hairline, as you can see it's blending in so good. So now i just have to let this dry time to get the dryer again and let this dry very nice and then i'm going to apply my makeup. Do y'all see how good that it blended after i put the last layer of got to be glue on now it's time for me to get my makeup and apply my makeup to the wig cap, so that when i put my wig on, you can't see the Wig lying underneath the makeup i'm applying is some concealer that i got that matches my skin tone, i'm putting it right down the middle of where my hairline will be, and right on my edges and now you can see my beautiful wig that i'm about to put On i had to get it all nice and ready to go so i just had to brush it out a little bit and then let's get into throwing this baby on the wig is ready to get put on my head. So first i start with the back. I slide the clip up in the back and make sure it is secure. Then we got to make sure the sides are secure and then we have to make sure that the part is sucker. It needs to be right down the middle, not looking crooked or lopsided, because once you put that wig on and you got it all nice and secured and glued on your head, you do not want to be out somewhere and look in the mirror and see that It is crooked, so i just went ahead and made sure that the part was right down the middle with the wig on and secure time for me to go ahead and glue my edges down. So now, i'm just getting my got to be glue, sometimes i'll spray. It directly on the edges, or i will get my brush and spray it on the end and then just make sure i lay it down to where it's sticky, because it can run down your face a little bit. But that's: okay, just use a little bit of alcohol on a little cotton ball and you can clean that right up or sometimes a little bit of soap and water will get it right off too so either org will work for you. Y'All know i had to get my handy, daddy dryer, because the dryer is the best trick. If you want to hurry up and get it dry, quick or you can just hold it and let it air dry. But for this video i'm using my dryer because it works a lot faster, i had to step off camera, so i can go ahead and clean off my forehead. I use a little bit of soap and water, but i couldn't find my edge band. So that's fine. I went ahead and got my scarf. I'M going to start at the top make sure i lay it flat, wrap it around the back and then tie it up at the top of my head and leave that on there for a few minutes, super mom squat. So i was caught between a difficult situation between the curling wand or leaving it with the regular texture which is body wave. The timer is going off, so let's go ahead and take this scarf off and, as you can see, it is laying so nice and flat what we wear. Oh my god, it is so beautiful omg, and this is the final result of the wig in store. I hope you love it thanks for watching bye,


Comments
SuperMom3Tv: How did this T-part wig turn out? I am obsessed with the color and install. ❤️✨
Tori Cain: You made it look so easy !, I love the color ❤️
Era Alston: Great job, on my hair too
Briana Symone’: I want you to color my hair. So cute ♀️
Terry Low: Install me one