Diy V Part Wig | No Leave Out | Under $50 | Viral Crochet Braid Method
- Posted on 15 June, 2022
- T Part Wig
- By Anonymous
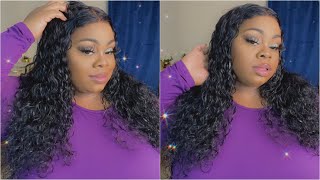
I wanted a V-Part Wig but I did not want to pay $200-$300, so I made my own. I didn't leave any hair out and I spent about $50 on this synthetic fiber hair. I used the viral crochet method from Naturally Mary and it turned out amazing. Let me know what you guys think.
// a s • m e n t i o n e d
Organique Water Curl 30" | https://amzn.to/3QlKZH7
Organique Water Wave Closure |
Weaving Cap | https://amzn.to/3Oh9S
Wig Clips | https://amzn.to/3HyzcBl
Crochet Hook | https://amzn.to/3OzcMT1
Transparent Thread | https://amzn.to/3xVhBAy
3-Way Mirror | https://amzn.to/3MVgQvl
Naturally Mary's Video | https://youtu.be/nP8w23trDsQ
Sign up for Mercari and get up to $30 : https://merc.li/TYWU3uwsb
// S U B S C R I B E
IT'S FREE!: http://www.youtube.com/vividrose
// S E N D M E S T U F F
Lauren Rose
1441 Woodmont Lane NW
Suite #687
Atlanta, GA 30318
// SERIOUS BUSINESS INQUIRIES | https://bit.ly/PromoteWithMe-Rose
// F O L L O W
Website | https://www.shopvividrose.com
Blog | https://iamlrose.com
Instagram | https://www.instagram.com/vivid.rose
Facebook | https://www.facebook.com/iamlrose
TikTok | https://www.tiktok.com/@vivid.rose
➖➖➖➖➖➖➖➖➖➖➖➖➖➖
YOU'LL LOVE THESE VIDEOS TOO
Celery Juice Challenge:
Rice Water Results:
Candy Brow Tint Review:
Natural Bald Cap Method:
Fenty Pro Fil'tr Concealer Review:
Make $500 This Month:
// GEAR I USE AND RECOMMEND FOR YOUTUBE VIDEOS
Camera - Canon T6i: https://amzn.to/2EPKnab
Mic: Takstar- https://amzn.to/2UXtzqa
RODE Mic: https://amzn.to/2HwyvdJ
Neewer Ring Light Kit: https://amzn.to/2wvnsPP
Tripod - Manfrotto: https://amzn.to/2P3akrx
Vlog Camera - G7Xii :https://amzn.to/37wNleM
Vlog Tripod - Joby Gorillapod: https://amzn.to/3bRYr1s
Editing Software - Premiere Pro
➖➖➖➖➖➖➖➖➖➖➖➖➖➖
"FTC Disclosure: This post or video contains affiliate links, which means I may receive a commission for purchases made through my links"
Timecodes:
Intro 0:20
Products you'll need 0:53
Closure Install 1:00
Sewing the Bundles 1:35
Cutting the Closure 2:38
Wig Construction 3:30
Crochet Installation 3:52
Cutting the Wig 9:08
Outro 13:18
Oh snap: okay, okay, okay, okay, okay, all right! Let'S keep going! Let'S keep going! Okay, so for this, install you'll need a weaving cap and your hair, i'm using the organique water curl in this video and then i'm also using a water wave closure. Now you will see why using this closure wasn't a great idea, but um hey it's all they had the water curl is in 30 inches and then i use five of these clips. Everything that i use will be in the description i went ahead and i put the clips on the sides and the back seriously. I just found wild salmon is actually wild caught sandwich and y'all. I'M sitting up here watching this video about how to do keto using dollar tree products like yeah. If y'all are trying to do keto watch this video i'll put it in the description, but it was a real, really informative video anyway. So i'm going ahead and i'm sewing the closure on first, but i'm doing um that kind of stitch just making sure it's really neat really tight, really flat. Y'All can see that look at that stitching, perfect, perfect, perfect, all right y'all. So this is the second bundle. Hopefully i don't need any more hair, but if i do it's only ten dollars all right so and now i'm just going to go under the weft, i'm not going through the weft with my needle and thread and just completing the construction of the wig. All right. Y'All, so that is it. This is what it looks like i'm. I think this is going to be. You know some some good going out here. What i'm going to do is i'm going to fill in these spots right here, like i said before, because this is so short i'm going to go in and glue in tracks on top of these tracks and then the empty spaces like right here and stuff like That i'm going to fill that in as well, so i'm not just going to have some hair left over because i'm going to use all of it because i want it to be full. So, as you can see, i did cut the closure first and then i went and cut the wig cap. Second, because i wanted to make sure that i cut as close as possible, but you can see that the wig cap is still attached to the closure. For that extra security and y'all, it took me a while to make this wig. I want to say like a couple of days, because now it's sunday and i'm listening to tc nation transformation nation in the building, so y'all shout out to pastor mike powerful service yeah that we had yeah. Overall, i think the whole message was make room for god yeah, you know, and as we do, that uh the things that we've been asking god about the things that we've been needing to show up in life and so yeah. I definitely encourage you to do those two instructions - those two assignments uh, but guys. That'S what we got for you today. We love you guys so much go out and live a transformed life. We'Ll see you guys later - and this is how the inside of the wig looks not too shabby for under fifty dollars. So what do you guys listen to when you're doing an install or making a wig? I'M curious drop. Those in the comments below now i'm using the transparent thread to sew on my clips. I made sure that i sewed those clips on very, very, very tight, okay, y'all, so y'all know i made this wig and when i tried to do the fluff method, it did not work right, okay, y'all, so randomly on my feed. I saw a video from naturally mary and she was basically talking about how to um. You know make a v part look natural right, because at this point i was like yo. This is about to be a u-part, because it is not looking good so back to the construction. I i um put a clip right here, a clip right here, a clip right here, a clip right here right here and then one right here honestly, the one right here, i'm probably not even going to use that so i'm just going to close that so um. Let'S try this method and i hope it works, because i don't want to waste no hair. This would be one of them, wigs that um, you know you put on and you just put a hat on: okay y'all. So what she says to do is to attach the v part to your second braid right and then you're, going to pull the hair through the first braid and she says to attach it like on the braid instead of like right here. Okay, so she says to put it on the second braid, so this is the second braid alrighty and then this is the second braid, okay, okay y'all, and then i'm going to i put these right here. So you know i could go like that and then, if you wan na like when you make your own, if you don't wan na put anything right there and you just wanna use bobby pins, you can do that all right y'all. So this is how to do it. The technique the technique is to put the crochet hook here. Grab some hair y'all. This hair is already tangly. I got ta go get some stuff um. I watched a couple of like uh crochet maintenance videos. Oh, i watched a couple of crochet maintenance videos. So when i go to walmart today, yeah i got ta go, get some um some stuff. Okay, let's see, let's see oh snap: okay, okay, okay, okay, okay, all right! Let'S keep going! Let'S keep going! Okay! Okay! I have to move the little viewfinder. I saw this um, this tick tock video right with this girl. She had bought this um three-way mirror from amazon. I think it was like 50-something dollars and basically you could see you know all around your head or whatever and um. I was like. Oh, i need that. You know what i'm saying and the funny thing about. It is like why, on the um on the damn packaging, it's a asian girl with some damn cornrows, oh lord, but let me know if y'all saw that because i mean like if you do your own hair. I think that you know something like that is definitely definitely needed so come on. Why is this not like coming through? So let me like do the end part. Okay, yeah. So that's the trick just go straight to the end alrighty. So i will do one more on camera and then i'm going to because i mean honestly y'all. This is really just repetitive, like you're, literally like putting the hair through the um, putting the crochet needle through the braid grabbing a piece of hair and just folding it over. That'S it that's it so i'm gon na come back when i, when i finish and then, if i do anything else to it i'll you know show y'all but yeah, that's how it looks so far. I think it looks pretty good like yeah, like it already looked like scalp, and this part right here. Basically, i'm gon na see if i need to put more hair here or if i'm just gon na, do the um the comb back method. So i've cut this part a little bit. I knew i was going to have to cut it because the closure is only 16 inches and they did not have a longer closure. I didn't want to cut it, but i mean it just was not going to look right without me, cutting it, so i'm probably going to have to still cut it some more but um yeah. So this is what it's looking like right now: um yeah, i'm probably just going to have to cut it some more but um yeah. This is this is how it's looking right now. So let me come a little bit closer. So y'all can see yeah. So that's how that part looks so, i'm just going to you know back comb, this a little bit more but uh, and then i'll show you guys the finished product but um yeah. I think it looks pretty natural. I mean nobody's gon na, be all up on your head. Like this, i mean they shouldn't. You know why why they they're close to you so yeah. This is how it looks so far and yeah. I wish i could have kept the length, but maybe when i go back, they'll have a 24 well like a 20 inch closure, and then that way you know i can wear it as long as i want to wear it. Y'All look how much hair i had to cut off. I should have just bought the freaking 18 inch good thing. The price difference was only like a dollar, but still i wanted some long hair, but in my next video i'm doing um, i got this gobo curl y'all. Now that one yeah that one's gon na be long and it's gon na stay long, so yeah, okay, okay, yeah, that's how i was looking so far. This is how it's looking so far. I feel like like it looking like this like once. You know it. It starts like filling out and stuff like that. As far as like you know how you know, synthetic hair starts getting you know like old and stuff, like that, i feel like with curly hair. When the hair starts getting old, it starts looking more natural. You know what i'm saying so: um yeah. This is how it looks right now and um hold up okay. So this is how it looks right now. I think it looks it looks good. It looks good. It looks good all right y'all, so i'm do the other side, i'm going to do my face and then i'll. Let you guys um see what it looks like, but yeah y'all. This is a homemade v part. If you want to make your own um, you can make your own, because me personally, i didn't want to spend uh what? How much are they like freaking, i think the cheapest one i've seen is like 200 300 um yeah. I don't want to pay. I don't want to pay that i mean some people. Do i mean i don't and i haven't got a wig sponsorship yet so um? If you are a wig company, you know reach out i'll, definitely review the wig but yeah so i'll be back. I could slay the baby hairs, but why okay y'all, so this is how the hair turned out. Everything that i use will be in the description. Let me know if you like this method. Let me know if it looks natural the next time i do it, i'm going to be sure that whatever bundles that i get the clo, they have a closure, because i went to two beauty supply stores and they did not have a long enough closure. But i definitely want to try this style again with the longer hair, preferably because i paid for it i paid for longer limbs. So i think, okay, so y'all, this side is looking a little bit longer than this side hold up, because i use that other shirt as a marker to um to cut so i might have to go in and cut it a little bit more, but i mean I don't know it looks natural. Let me know what you guys think in the comments. Thank you guys so much for watching, and i will see you guys in my next video you


Comments
Laurie Diaz: Looks gorgeous hunae ✨