$79 Cheap #613 T-Part Amazon Wig| Strawberry Shortcake Hair | Watercolor Tutorial A8 Hair
- Posted on 17 February, 2021
- T Part Wig
- By Anonymous
THIS VIDEO IS NOT SPONSORED 100% REAL OPINIONS I PAID MY MONEY FOR THIS!!!!!
Hello loves, I'm back with another hair tutorial. This was my Valentine's Day hair and I think it turned out super cute! Let me know what you think in the comments also don't forget to like, comment, share, and subscribe! :)
Check out my other socials
Instagram: @JDOLLLLLL @JTHEDOLLLLLL @REALAPPEALBEAUTY
TikTok: @JDOLLLLLL4
Link to Wig: https://www.amazon.com/gp/product/B08F...
Link to Glue: https://imaslayyobaecollection.myshopi...
Wig Specs: 16" T-part 13x 1 Lace Frontal #613 Wig
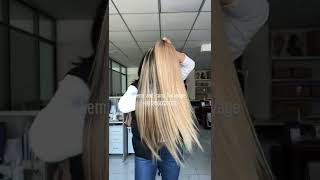
Hello, welcome back to me youtube channel. This is my second time tutorial. Welcome back to my channel in this tutorial. I will be installing a wig from amazon. This is a 16 inch 13 by 1. Tea part lace, front wig. This wig is from the a8 store when opening up the package. The standard beige stocking cap, as well as the wig, was included. The wig did have a factory packaging type smell, but i wasn't too pressed about it as it was going to get washed and dyed in regards to length. This wig is shorter than i imagine it is supposed to be a 16 inch, but since it is the body wave texture, i do recommend going about three to four inches longer than what you envision. As stated before, this is a t, part lace, front wig. So to specifically design for a bust now middle part, if you are looking for any other styles, this wig is not for you on to water coloring, i'm using the adore hair dye in colors, cotton candy and ruby bread, i'm going for an ombre strawberry, shortcake idea. The temperature of the water should be warm, it does not have to be boiling go, but you do want to do this in a plastic container as the die could stain your sink or tub when adding dye to the water think about the water to die ratio. As if you have a big tub like me, more dye should be added in order for the color to show up, especially with this light cotton candy color, i added it several times to the tub before it became the color i wanted throughout the coloring process. I made sure to comb throughout the hair with a wide tooth comb, so my ombre would come out evenly onto the ruby red. I do recommend changing your water in between colors, because that cotton, candy color was already saturated into the water, adding the red just made. My hair turn a neon pink, which i was not going for at all. After changing my water, i was able to achieve the red i wanted at that point, but i did not like how yellow the wig was taking some shimmer lights. Toning shampoo, i was able to remove the yellow tones. A disclaimer i want to add is when using purple shampoo and blonde hair. You should be aware that the blonde can become stained purple, which happened in this case. Another way to apply without staining the hair would be to rub the shampoo in your hands until sudsy. Then at that point apply to the hair, because i used all that shampoo and constant scrubbing. I noticed some of my pink hat faded from the top of the hair and it was just the icy blonde color. At that point i decided to go back in and re-dip the hair. You should never feel too proud or afraid to alter your color. You would rather it look even incorrect than blotchy. I wanted to add some red highlights to the front of my hair, so i sectioned off two thin lines on each side that were not too close to the front because i didn't want them to be easily seen but still present. When i comb my hair anytime, you are coloring your hair. You should definitely wear gloves because the dye is bound to stain your fingers. I just have gotten to a point where i've done this so many times. I don't care about staining. I am not a professional, but i do know some of the basics of hair coloring, so just take your time and practice makes perfect. This is the end result of my highlights and after they have set in the foil, for about five or so minutes. I remove the wig from my mannequin head and begin to rinse out any remaining dye since the wig has been washed several times dyed and toned. It needs some treatment. So i'm using my silicon mix to restore the hair back to its original state. You don't want to add this until you are 100 positive. You, like your hair color as this product seals, moisture into the hair. It may be harder to correct coloring errors, be sure to give the hair a good rinse, so any remaining products will be kept off of the hair. I tried plucking this wig on the mannequin head, but ended up just plucking it on my head, which i recommend, because there isn't much wiggle room with this type of wig. It has a very minimal frontal area, so you don't want to over pluck and you want to focus your plucking on the middle area section, since it is a middle part, wig and the front hairline. So you don't gain a barbie doll hairline, because that's what the wig comes with when you are done plucking, it should be a large hair ball. Overall, i am extremely pleased with how this coloring came out. I don't have any regrets and it was super cute in my pictures. So that's exactly what i was going for. It came out nice and even after coloring, my hair, i went through my braid and bald cap process. If you would like to see that in full depth be sure to check out my other wig tutorial on my page, my glue is from amusley obey it's her extra gummy glue. I applied two to three layers, letting each turn clear before adding the next. This ensures a secure bond, i'm going. To be honest. I truly look like a foot right here, so i covered my face with this sticker. I was doing something weird with my eyes, but i didn't want to cut the footage out, so i just left it in, but basically you just firmly hold the front on your head. You see me spraying got to be free spray on my hairline before cutting to ensure this frontal is completely laid down before cutting once dried. I usually use a small pair of scissors or an eyebrow razor to create jagged cuts along the lace. Please do not ever cut in a straight line; it will show your lace and pictures. We can really see it or with a flash on or even in the sun. This is called a line of demarcation. The lace will very much be present. You don't want that at all. There is no one method to cutting the lace as some like to pluck, while the lace is still on, while i like to do it after just take your time and be gentle with it to achieve those baby hairs, i am using my ors. Olive oil. Wig fix spray. I usually do about two to three baby hairs. If i am going for a middle part which in this case i am but you're - welcome to do as many as you like. I straighten the hair to see the true length and i will say this is about a 12 or a 14 inch wig in thickness and length, so i do recommend buying longer than what you really want. But i am truly impressed with the quality of this hair, because this was a 79 wig and i do recommend for others. This was cheaper than buying hair from a vendor or the beauty supply store and should work for a quick style. I was able to achieve this look under a hundred dollars and it looks amazing. I ended up having to record the final look while at work, so these are not my best curls, but i've received so many compliments yo my hair came out so cute and i felt so pretty literally i felt like strawberry shortcake. If you like this, please be sure to like comment and subscribe. Thank you.


Comments
Jane Cinnamon: You really made this look so simple and beautiful
Nivia Abraham: Would you still recommend? & is it full?
Johnae Davis: How long did the wig last?
sherry elie: Is this hair thick or thin