How I Apply & Style A V-Part Wig | Quick & Easy | Beginner Friendly
- Posted on 01 February, 2023
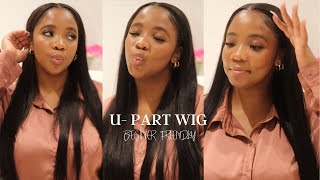
- U Part Wig
- By Anonymous
hey yall,
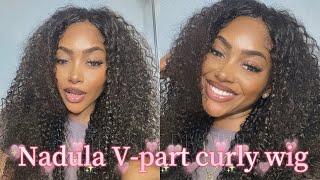
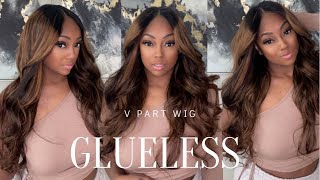
In today’s video, I will be showing ya’ll how I apply and style a v-part wig. V-part wigs are the new U-part wigs in my opinion because they offer the same look with less leave-out needed. If you’re looking to take a break from frontals, but don’t want the commitment of a sew in I highly recommend trying out a V-part wig. I hope you guys enjoy this video, and I will see you in my next one. ❤️
_________________________________________________________
BUSINESS INQUIRIES ONLY:
_________________________________________________________
Hair Link:
https://www.beautyforever.com/beautyfo...
Length: 20 inches
Products Used:
Garnier Sleek n' Shine Serum
Tresemme Hair Spray
Doo Gro Hair Growth Serum
Conair 1 Inch Curling Iron
_________________________________________________________
Connect With Me:
Instagram: https://www.instagram.com/janetakoriki...
Twitter: https://twitter.com/janetkorikin
Facebook: https://www.facebook.com/janetakorikin...
_________________________________________________________
until next time,
peace-n-love
_________________________________________________________
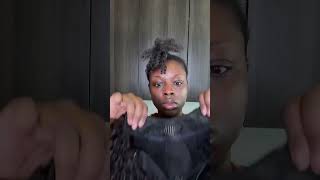
This is hey, y'all. Welcome back to my channel, so y'all know what time it is. We are doing a hair tutorial because what's under this bonnet, it's giving tonight will be the night yeah okay, so we got ta fix that. So today I'm going to be showing you guys how I apply my V part wigs, so I've been taking a break from frontals because um my edges and my hairline, so I wanted a more natural look without having to go, get a sew-in. I was like. Let me try a V part wig and see what they're about so in this video I'm going to be showing you guys how I apply it so right now, I'm just showing you the hair details. I got this wig from beauty forever and it is a 20 inch V part wig First Steps. First, I like to start off with a clean, washed and blow dried hair, because I just feel like it makes the braid down process as well as the styling. So much easier, so what I'm doing here is just sectioning out a portion of my hair. That is going to be my leave out now. The good thing with the V part wig is that you can leave less hair out than you would with a u-part wig. So what I'm doing is just measuring the wig parting to the leave out that I section out to make sure that it's even before I go in and start braiding the rest of my hair, because you want the wig to fit really good and low-key. Look like you have a sew-in. So what I'm doing right now is just sectioning out some anchor braids and what these braids are going to do is they're, going to be the braids that the wig is going to stick to so the Combs that were in the wig they're going to attach to Those braids, so what I like to do is take a little bit of my Murray's Edge, wax beeswax and put that at the beginning of my braid. Just so that I can have some grip, as I am braiding my hair, and make sure that my braids are super secure. I don't want my braids to be super super tight but, like I said we are going to be clipping the wig to our braids. So we want them to be a little bit secure foreign as I'm braiding, my hair, I'm not going to take that braid all the way I'm going to just braid it halfway and you guys will see why later on in the video, but I'm basically just going To braid my hair to about the halfway point and then use my clip to clip it so that it doesn't unravel foreign, so I'm gon na brush some of my edges out just so that if I do want to do a style where I use my edges, That those are out and not braided down and then now I'm going to begin braiding, my braids that are going to go under my wig. So look! No one is going to see these braids. So if you want to do 15, cornrows go ahead and do that. But for me I just need four or five good braids flat braids to go under this wig and we could call it a day. Okay, because we don't have all day to be braiding and sewing um. This is a very, very easy style. So my braids, as you can see, The Parting is pretty big, but the braids are really flat. So I believe I did five braids for this style but, like I said, if you want to do more, go off sis do that, but for me, imma give you five braids, Okay and, like I mentioned earlier, those two braids that I did at the beginning. So what I'm gon na do is conjoin them and use that for the braid in the back. So I just can join them and then started it like. I would start a normal braid, but then just added them to the braid in the back and then I'm just gon na do the same thing to the other side. Now the only thing is when you are doing a V part wig. There are ways that you can braid your hair so that you can interchange The Parting. But for me I knew I wanted a middle part, so I just left my braiding pattern to fit a middle part styling for this wig foreign with some do grow, hair oil and just put that on my scalp, because even though you can take this wig off Every night, if you would like, I don't tend to do that unless it's really irritating me, but I do want to make sure that I'm taking care of my scalp underneath my wig. So this part, when I tell you so easy so easy, so we are just going to clip clip the clips of the wig to the braids and, like I said, if you part your hair correctly, it should fit seamlessly. So there's two Combs on the side as well, and I'm just going to comb those into the braids making sure not to pull my edges too much, but also making sure that it's secure and then there's also another clip at the back of the wig. To add some extra reassurance and that's pretty much it - it should feel snug but not feel super tight on your head. So next we're gon na go on and style the wig. So what I like to do is go in with my Garnier Fructis Sleek and Shine hair serum, and I use that along with some heat protectant. I don't know why. I didn't show that I'm sorry, but I used some heat protectant as well, and with this wig I've been liking. The whole blowout look because I want to look like I got a sew in honestly. I want somebody to be like, oh, my God, girl. Your sewing is so cute, It's a wig, definitely a wig, so I wanted to give that blowout effect. So I'm going to go in with my curling iron. I believe this is a one inch or a one and a half but I'll have the correct details Down Below in the description bar. But I'm going to go in and curl my hair as usual. But I'm going to do something a little different to give me that blowout effect and not give me curls. So I'm going to take some rollers and I got these from the beauty supply store. I don't know how much came in a pack, but they were pretty inexpensive and what I'm gon na do is I'm going to roll that uh curler into my curl and just pin that to my head, and I feel that you know whenever I'm done with my Hair, I let that sit for a while. I just feel like the curls come out so beautiful and they just look so natural and flowy and not as tight um, and I just overall like that. Look when going for a more leave out sew-in type of hairstyle. So I'm just going to go ahead and curl my hair and pin the rollers to my head and do that all over my hair and and what you can do you can do different variations like you can curl your curl inward. You could curl it out facing it's really whatever you want to do, but you you could play with it to to give you the effect that you want and when I get to the top I like to go in with my flat iron and section little pieces Of my hair to blend in with wig foreign honestly, it's mwah I do like to section pieces off and then flat iron it before I do go in and curl, but I just do one pass if I can try to um just so that I don't put Too much heat on my leave out, but here I'm showing you guys just some more step-by-step process on how I curl my hair, so that you can kind of get the gist of the way that I do it. Foreign foreign foreign, all right. So that is how the final curls should look. I usually like to keep these on for a couple hours. It just really depends. I don't like to sleep in them. If I can avoid it, but taking them out. I use that same Garnier, Fructis, Sleek and Shine Serum, and I just rub a little bit on my hands and I just literally pull the roller from the curl and you could twist it as well just to give it a little bit of um. But I just remove it from the curl and let them do what they do: foreign with my flat iron - it's not shown here, but I'm going to go in and just flat iron, the top a little bit. So it can be a little bit more smooth. But here is a close-up of what the curls look like. They just look really effortless and I just I don't know I just really like these type of curls with a leave out hairstyle and there you have it guys. That is the final look. That is how I apply and style my V part wig. I hope you guys enjoyed it. It'S giving grown woman for real for real, and it just gives me a break from the frontals and the glue, and like all of that, so I hope you guys enjoyed this video and I will see you guys in my next one. Bye,
Comments
Lisa Parker: I love this! You look beautiful and natural. Can you make a video creating a side part for a v part or u part wig?