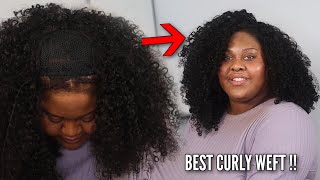
U Part Wig Tutorial | Flat Iron & Style !
- Posted on 13 December, 2016
- U Part Wig
- By Anonymous
| | | SOCIAL NETWORKS | | |
Instagram: @StylesByJLo
Facebook: Styles By JLo
Snapchat: JasminLoreal
Yeah yeah lo loves welcome back to my channel jump right into it. You are going to be needing a stretch. Dome cap, you will be needing thread, you'll also be needing a big sea needle this hair is from my hair closet. First, I'm starting off by sewing the bottom track onto the body of the cat. Now you're going to be careful not to go completely. Do the elastic band you're actually going to sew right through that top layer do not go to the elastic band or you are going to completely mess up the wigs, whether it's a u-part wig, a full wig, do not go to that elastic band. I do not cut the tracks until I get to the top portion, so what your going to be doing is just folding that track over and making it as flat as possible and sewing it toeing it down as flat as possible and just a close-up for you. You'Re just going to keep going through, I so overhand, but you can do it underhand. You know everyone has their own method of keeping it as flat as possible to track to the wig cap or to your clients. Heads just keep using that same method. All the way, throughout the top, all the way till you get to the top of the way just keep sewing the track horizontally across until you get to the top portion, keep using that photo over method, not cutting the West will prevent or will minimize shedding and Also, it's easier to reuse the hair again, all right now, once you've gotten to the top, you are going to form the tracks you're going to throw the track down into a you into a. U it's going to look just like a Longview part, and this is going to be where the your client or your whoever, whose hair your doing that's going to be where the natural hair comes out, to lay on top to create that natural look now it depends On how much hair you want to leave out, you can make the you as small as you want it, or if you're going to be leaving more hair out for versatility you can you can make the you a little bit bigger, but today I'm going to be. I'M going to be making it as small as possible, so I can leave out as minimum as possible you - and this is how I look once: are you sewn in all of your tracks, in that you at the top? Now what I'm going to do next? Is you are going to be so careful not to cut the thread? If you cut the thread, it is going to be a hassle trying to get this wig back together, because the tracks are just going to fall apart and your way all that work is going to be selected, so be very careful how you're cutting out that extra. That extra part of the cap at the top do not hit the thread. Hey girl. I am doing this. You part on my friend, janae everybody say hey boo. All I'm doing here is partying where, where she's, where that hair is going to be left out at the top, which is it's going to go right in that middle section, where the you was at the part that you cut out, because this is a quick tutorial, All I'm doing is actually making two Ankerberg they're called anchor braids, which is the braids that you're going to so that you part one. You don't have to sew on every you part, but today she wanted her sewn in so I'm creating to anchor braids, which is to small, firm braids and the front portion. And it's going to go all the way to the back, to the nape on both braids and then the rest of the hair. You know because we weren't really who we were kind of rushing. We just do a couple of big braids in, but you know you can do it as neat and as small as you like, honestly, the smaller the braids are the neater and the flatter it'll be. But today we were rushing, so I went ahead and threw some big braids in and it still turned out that girl get off your phone. Can I beat all my clients? Yes get off your bones. Lift your head up here is our completed wig and I'm just positioning it to where I'm going to sew it down and I'm going to use the clips as well to hold it in place. While I'm sewing around the leave out - and I do so in the eyes - I saw the top portion first, so the part of the? U part of the? U part wig, that's open at the top, I'm going to go ahead and sew that down first, so that if there's not a lot of space created between the leave out and the way and Jesus, please excuse my nails. They were struck by the devil. When I was doing this tutorial and that's what I'm sticking with okay, no really I'm going to get my nails done this week because it looked like I got in a fight and the other person won. So here I'm just going to go ahead and flatten or use the flat iron to straighten her leave out. Now I don't know you know I use some type of either curl wax or heat protectant to get the leave out as straight as possible, and these flats are the bomb that was Pro so I'm just flat ironing her left side over over the top of the. U part wig and then I'm go ahead and do the other side - and this is my friend y'all. I'Ve got wondering and go ahead and slick them. Edges beau use the edge control gel, whatever you choose to use, but yes, like them edges that is important and I'm just combing down all the little flyaways making. It look very neat and sleek at the top and boom mmm. Who is this? Yes, girl, slicks and wave move that hair rule. I'M crazy all don't mind me, but this is the completed. Look to the! U part: wig! Thank you for watching. Please press the subscribe button below tell a friend, so the family member come back again and thank you for watching us.


Comments
Nichole P: I love this video, you did an amazing job!!
Caitlyn Kreklewich: absolutely gorgeous
Keshia &Vee: I need this in my life. But don't think I can do it myself. But I'm definitely going to try.
Pink Amour Boutique: yassss you give me lifeeeee
Jeleen Ellis: