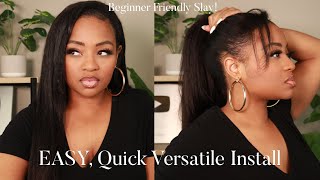
Beginner Friendly: Middle Part Quick Weave,No Braids, No Sew Ft. Curlsqueen Hair
- Posted on 31 January, 2023
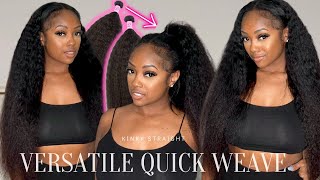
- U Part Wig
- By Anonymous
Detailed steps on how to install a middle part quick weave with minimal leave-out. This method requires no braids and new sewing.
▬▬▬▬▬▬▬▬▬▬▬▬▬▬▬▬▬▬▬▬▬▬▬
Use Code YTDL to save $$$ OFF
I am wearing 18 inches weave bundles in light yaki texture from CURLSQUEEN .
Shop the same #lightyaki #bundles #weavebundles #extensions #leaveout #sewin for #naturalhair
https://www.curlsqueen.shop/c839AA69
√ Luxurious Upgrade 150 Grams/5.3 ounces per bundle
√ Easy styling & Hold curls very well
√ Longevity: at least 1 year with proper care and maintenance
√ Hair can be colored and bleached
√ Double wefted hair extensions
√ Tangle free and minimal shedding with proper care
Connect with Curlsqueen :Instagram: https://www.instagram.com/curlsqueenof...
Tiktok: https://www.tiktok.com/@curlsqueen.com...
limited time free tape in / microlinks install now : https://www.curlsqueen.com/find_top_ha...
▬▬▬▬▬▬▬▬▬▬▬▬▬▬▬▬▬▬▬▬▬▬▬--
GO FOLLOW ME!
❄ I N S T A G R A M➜ http://instagram.com/dionalatia
❄ T I K T O K➜ dionalatia
- - - - - - - - - - - - - - - - - - - - - - - - - - - - - - - - - - - - - - - - - - - - - - - - -
Serious Business Inquiries Only: [email protected]
- - - - - -- - - - - - - - - - - - - -
Foreign welcome back to my channel, I'm Diana this video. We are working with curls, Queen their information will be below in the package. They sent me this cute diamond brush um and a really nice Bonnet, like a super thick Bonnet, that I will be replacing uh moving forward, because this one's really really nice - and these are the bundles. These are two 18 inch light Yaki bundles that I'll be using for this install. So let's go ahead and get into the video. So I washed my hair the day before and just put them in some crazy braids, so excuse how it looks right now. But the first thing that I'm going to do is just part out where my leave out is going to be I'm going to do a middle part for this style. So I just want to make my part in the middle first and then just leave out a little bit of hair on the sides. I don't want to leave out too much because my hair is thin, especially once I flat iron it and if I leave out too much, it won't look proportionate to The Weave. So I like to do minimal leave out with my installs foreign. So now I'm just going to tuck away my leave out with a bobby pin to get it out the way and now I'm going to brush through the rest of my hair, to kind of straighten it out a little bit now for this style, I'm not going To braid my hair underneath the cap, I usually do, but I wanted to do something a little bit easier, something that's beginner friendly. I understand like not, everybody knows how to braid, or sometimes a braiding can take a lot longer so doing this method is really simple. All I'm doing is putting my hair into a lower ponytail and and I'm making sure to leave out my edges um. Now you can leave out more hair on the sides if you want to. I just wanted to do minimal leave out because I don't know I just don't like trying to blend my hair too much with the weave, especially on the sides. I just like this method because it's a lot cleaner. So now I'm just taking some Eco style gel and helping well not helping putting it on my hair to help slick, my hair back just to make it smoother and easier to and make it flatter on the side, so that when I lay down my wig cap, It'S not like poofy. Now, I'm using these really small hair ties to tie down my hair because they're not as bulky they're, almost thin like rubber bands, but not as thin. It just helps my hair lay flatter foreign. Then I just split my ponytail into two sides. Two sections - and I just braided each section and then I bobby, pin that um to my head. Just so it can stay flat. You can do like a small bun um, but buns to me are kind of bulky at the back, even though you won't see it honestly. I just I prefer to do it like this, because it just helps it lay a lot flatter. Next, I'm just taking my basic wig cap that I got from the beauty, beauty, supply store and I'm putting it over my hair in the back. But I'm leaving out my edges on the sides. Any excess wig cap that I have I'm just sliding it towards the back like towards the bottom. Just so it's not like just sitting in the middle of my head, because I can be kind of weird just to get it out the way. And now I'm going to take a rat tail comb and just pull out a little bit of leave out in the back um just in case. I want to pull my hair up into like a small ponytail, but I didn't want to do anything dramatic this time, but now I'm going to take my white eyeliner pencil and just Mark out where my leave out is just so. I know where to stop when I'm gluing my tracks down now to help protect my hair from the glue I'm using this morning. Glory hair protectant as well as got to be free spray, and I'm going to put both of them all over the wig cap. Except for where my leave out is so I like to start at the sides like of the cap and I like to apply the most products there, because I got some on my shirt. That'S so I like to apply the most product there, because it helps keep the wig cap in place, and you know when we blow dry it it's going to get hard, so I kind of want it to well - and I kind of I wanted to like stay Here so it won't shift. So I just apply a lot of the morning glory on the sides and then I follow up with, like a whole bunch of got to be free spray on the sides, just to make sure it's super secure. And, of course, I do my whole entire head. I don't apply as much of the morning glory to like the crown of my head. Honestly, I still get some, but not as much as I do like on the sides. I really apply mostly got to be free spray in the back um, just because that's my personal preference honestly. So I'm using this light, Yaki textured hair from curls Queen, and look how much hair that they give you on the freaking lips. It is a ton of hair like it's it's a lot of hair, especially since it's like a shorter length. You get quite a bit of hair on your bundles foreign by measuring the tracks from ear to ear. At the back, I'm going to cut it and then I'm going to glue it. I'M using the 30 second hair Bond glue 30 second glue and I'm going to apply like a medium sized lighter. I want to say thin because I really don't apply a thin layer. I apply like a good amount to the track. To be honest, you probably don't need a ton like not a lot but like a good amount to the track um and once that's done, I'm going to apply it now. I know like people are wondering: how can you do this? You can't see the back your head. The answer is you're going to have to feel your way. So what I'm going to do is hold um the tracks in each of my hands and I'm going to feel where they should go from ear to ear. Just using my fingers, you can you can feel where there's cap and where it needs to start and end. I would say before pressing it down hard just make sure you like the placement of the track. You can check with the mirror and then press it down. So again, I'm taking the track and I'm going to feel where the last track was and I'm going to move it up and measure from side to side at the very back of my head. I don't really worry about going to the very very end of the cap, only because it's the very back and nobody can really see it, but once you get near your ears, you want to make sure that your tracks are going from one end of the cap To the other, or else you're going to see cap, so I'm just going to apply the glue and then I'm going to blow the glue for like a couple seconds, not even 30, and then I'm going to flip the track to the back feel where I put The last track and then put the new track right above it. I leave a small space, probably about like a fingers. Width apart, maybe not even a whole finger. It really just depends, but especially in the back I like to put them a little closer together, um and space it out like that, as you can see, they're pretty close the hardest part is going to be when you get to this lump in the back, because You'Re going to be like well how the heck do I apply a track, easy you're, just going to put it on top like don't don't try to do nothing extra, just measure from ear to ear, putting the track on top of where that bump is making sure It'S still spaced appropriately, you don't have to skip the bump entirely. Just act like your head is flat and measure the track and put it right over the bump um. So then, again, I'm going to apply a good amount of glue to the back, I'm going to blah blah, not blow dry it Blow on it for a couple of seconds and then, when I get ready to apply, I like to look in the mirror I like To start with one side, first I'll press that side down and make sure it's stuck and then I'll slowly walk the track across the back of my head feeling where the last track is just to make sure I apply it straight. If that makes sense, I usually take my time at this part, because this is a little trickier since it's not flat it's bumpy, but as long as you take your time, walk the track across slowly making sure you're putting it in the right spot. You should be good to go mmm so now I'm ready to start on the second bundle. As you can see, the first bundle got me pretty far. I really just have the crown of my head to complete um, so I'm just going to continue the same method, but now that I'm near the top of my head, I'm laying the tracks more. So in like a u-shape just so when I pull my hair back you're, not seeing cap you're not seeing tracks you're, just you're, seeing nothing pretty much um. So now I'm going to apply the glue to the track and then apply it apply the track in a circle foreign. So once the track in the back hits the white line that white line in the back, I'm going to start applying my tracks vertically. So, as you can see here, this last track here hit the white line in the back, so this is going to be the last track that I apply in a u-shape. The rest of the tracks are just going to be in straight lines going from front to back and that's so I don't cover my leave out area, it's kind of hard for you to see what I'm doing, but I'm just applying the tracks going from front to Back from the front of the cap until it hits that track in the back just in a straight line, I didn't have to do too many like this, because it wasn't a lot of space. But I did wind up doing one on each side and, as you can see here now, all of the space is covered. Oh now, it's time to cut the excess cap off making a very sure not to cut your hair, because you will be extremely mad, but I'm just using my fingers to feel where I'm going also looking in the mirror and just cutting off the excess cap. Foreign. Now on the sides, I noticed that the cap was lifting just a little bit, so I took some glue and I put some on the track and I'm going to glue it down to my head now. This is where a lot of people would like sew. Their cap down to the Anchor braids which you can do, but I didn't have any braids so since I don't have any braids, which I honestly I wouldn't do that anyway, if I did have braids, but I'm just going to glue it down, and this is going To help it stay in place, so the install is complete like the install itself. The only thing that's left now is to style your hair. I did put Biosilk on my leave out, but I left that out. Please ignore those little fuzzies. That'S left over from the hair protectant um. It got on my fingers and then it got in my hair anyways we're gon na ignore that but yeah I'm just going to flat iron, my hair and brush it in with this brush it in to blend it um. This Yaki, of course, Blends really well with natural texture. Yaki honestly is taking it back to the day back to the beauty, supply store Harry Yaki days. That'S exactly what this is, but this is human hair foreign. Now I'm just taking my flat iron and running it through the hair just to make it extra silky and smooth I'm curling the ends under like I'm bumping the ends just a little bit just to give it like a little something something but, as you can see, Um, the hair is kind of already, naturally, layered, of course, because of the way we applied the tracks, but I didn't have to do any cutting at all like if you want to. You absolutely can, but I didn't put any layers in this like this - is just how it looks um. I really really really like this Yaki texture, like I low-key, slept and forgot about Yaki and Yak, even the girl holding it down since day one and we forgot about our day ones, but this Yaki hair is like super thick. It looks very natural to your natural hair. I like it because it's like an in-between from like that, kinky straight hair and like super straight hair, you know what I'm saying like you don't have to flat iron it as much as you would with like kinky straight hair, and it stays straight pretty much and You can still see the texture, even though it's flat iron, so that that's what I like about this hair, but I didn't have any issues like tangling or shedding, or nothing like that honestly, I just put it in if I ironed it and it went about my Business but anyways you guys thank you so so much for watching this video and that's it adios till next time.
Comments
CurlsQueenofficial: Thanks for your sharing! You did a great job!