How To Make Headband Wig For Beginners; No Skills Needed ! | Kellz Buzz
- Posted on 20 September, 2020
- U Part Wig
- By Anonymous
How to make HEADBAND WIG for BEGINNERS; NO SKILLS NEEDED ! |
Hey guys welcome back to my YouTube Channel #kellzbuzz
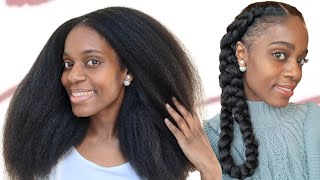
In today’s video ill be showing you #howto make your own #headband #wig , its somewhat a #trendy #hairstyle right now. Hope you enjoy. Also check out part 2 of the video on how I install the headband wig plus review.
HELP ME ON MY ROAD TO 1K!!! Don’t forget to THUMPS Up this video! & Subscribe if you’re new!! ( ITS FREE)
————————————————————————————————
‼️Don’t forget to hit that like button & Subscribe ‼️
My Recent Hair videos:
Cute & Easy Awkward length hairstyle
How to use AloeVera Prepoo for Hair Growth
Trendy Cute Back to school hairstyles
How to cornrow you hair DIY
Hi guys welcome back to my youtube channel. You know it's a girl kells and about the title of the video. You know what is going down so today i'll be showing you guys how to make your own headband wig, simple, affordable. You can practically do it at home with just a few simple items remember to like comment subscribe to my channel, okay guys. So let's get started okay, so i actually went into the beauty store to get this um wig dome cap because i didn't really have any so. This is basically a spandex dome cap. I paid 3.95 for it um, that's jamaican and um yeah. So basically, i'm just going to put it on the mannequin head, so those two sections are normally where we use to judge the front and the back of your head. So i'm just aligning it to the front and the back of the mannequin head now guys. The hair that i'll be using today, i've had it for about um three years i bought it and um. I basically neglected it. I had it like wrapped up in a bag far far away and because i saw this star trending, basically on youtube. I decided. Okay, let's use something that i have without having to actually purchase something new. So, as you can see, it's a bit old and i'll be using this glue in the video. Now you can use a glue gun if you want, you can sew it on. If you want, but i thought the easier method for me would be to you know, use the glue which is not like. I had a sewing machine or anything to sew it. So, okay, so guys we all know the traditional method of making wigs is to go from side, to side side to side and to reach the top. You get more creative, but no, that's not what we'll be doing today base, because i want our updo. What we'll be doing is to um bring the tracks to the opposite, um direction and set it up that way. It has an easier flow when it should be. You know in the updo so i'll be basically going around the head in circle like a destroyer, if you know that hairstyle, basically, it's like a destroyer all right, so i am just you know, setting my equipment properly guys as you can see. I do not have a wig stand, so basically i have to improvise. You know. Creativity is something that i can just you know. Think of because you know when you don't have what you need. You have to get creative all right guys. So now i am just gluing the top section of the wig to start install, so i'm basically gluing enough so that i don't have to actually be really going um around all the time. So you just glue enough to bring it straight around and then just rub. It into the wig cap and as you go along, you just hold the hair, and you know you just add the glue to it and keep on going around. Basically guys if you want to prevent like um any you know the glue from showing underneath you can always put a plastic bag under the wig cap. First, so, basically guys i've gone through one bundle. This is basically one bundle, and it's already looking fuller already, as you can see all right, so this is actually the part where it starts to get like really messy, because the hair, as you get to the top the hair becomes in the way. So you have to be parting it out of the way to actually get underneath the other tracks in the middle, so yeah, here's a close-up of how it's looking. What i should have done is to get some clips to just clip those sections out of my way, but because of time urgency i didn't actually get around to that. I just continued because i had a whole lot planned for this day, so basically that's how it looking it's not home daughter or anything. That'S like looking all rubbly, but don't worry guys. I got you covered all right, so yeah, i'm just here. You know continuing to glue the tracks and to bring it around just look closely at what i'm doing guys. As you can see guys, the tracks is getting in the way, so this can get a little bit messy. You just need to take your time and bring it around, especially if you glued a lengthy portion like i did so it might be easier for you just to glue a little bit and take your time to go around, but i glued a good amount of section. So that it can cover quick all right, so, basically guys, that's all that's a close-up of how you glue it on when it is already on the wig, and you have more left on the bundles. So, basically, i'm trying to get this here all the way and recommendation the reason why i would recommend getting some clips to get the hair out of the way, because, when you're trying to skip the hair, it might end up in you having a bigger space. With than you um wanted from the hair, so the tracks would be too far apart, so it's good to get it out of the way so that you can properly align them so yeah. Basically, that's how it's looking now um. It'S feeling really full to me. So yeah, let's now add the headband onto it. So i put, i placed the headband over it and um i'm starting to sew on from the middle section of the headband so that it can be. You know you can bring it back. No guys! I didn't. I started off pretty good, but then, as i went into it, i think i started to to um to sew it too big like look at this. It should have. What i should have done is to make it really closer to the edge of the headband, because you will see what will happen at the end guys because it made it a lot more difficult to be straight because it's like the su-in, the sew-in is overlapping. So, basically guys this is almost the end of the video. I hope you like it. This is basically how the hair is looking um. If you want to see how i install it, you can check out my next video, which should be uploaded soon so remember, to subscribe, hit the notification bell to know when it is uploaded and how i install it. How i review it and tell you my feelings about this here so yeah, thanks for watching guys, you


Comments
Smarter with Aye Tv: Always wanted to do this! Need to make some room/time to make my own wig. Great skill set! Keep it up!!
Sincerely Timia: Great tips! I’m looking into making my own wigs eventually so this vid helped!
As told by Bree: This is so simple and affordable. I never make my own wigs I just buy affordable amazon wigs but this is better. I will definitely be trying this soon. Thanks for sharing!
The Williams Life Chronicles: Wow! Great tutorial! I have ALOT of hair sitting around, I am definitely going to try this!
Oh So Angel: This is a great video! I really need to take the time to do this! ✨
Yaa Dodouwa: Great video! I’m going to show it to my friend who wants to learn how to do this badly.... waiting for the installation video
JessiJ's Family Cookbook: You make this look so easy. IT'S very detailed so i may give it a whirl
Tizu's: this is a really helpful video .thank you for sharing sis
Young Family Squad: Seems really simple. I tried to make my own wigs and I can never get it right
Sikiru Atinuke: This came out so beautiful nice one
Elisabeth Glasco: Wow I didn’t know how easy it was to make your own wig
TiffofallTrades: I think it came out good. I never tried to make my own wig
Christina Forrester:
Monique Dee: You could sell these! You are talented!
Keva Carrion:
Jboi Entertainment: Ok I don't wear wigs but im sure this will help women who so
Maxine Graham: So easy
Beautiful Jaye Meeks: New subbie