Soft Waves U Part Wig Install From Start To Finish Ft. Julia Hair
- Posted on 14 February, 2023
- U Part Wig
- By Anonymous
►Use My Exclusive Coupon Code : YTB20 For 20% OFF
►Buy Now, Pay Later with After Pay+PayPal, 4 Interest-Free Payments, Flash Delivery
●▬▬▬▬▬#JuliaHair - Always keeping young & vitality ▬▬▬▬▬ ●
Direct Link To The Hair In This Video ➤ https://st.juliahair.com/f924u
Length: 26inch
Texture: Body Wave
Wig Type: U Part
Color: Natural Black
Affordable & Soft 12x4 Body Wave Wig ➤ https://st.juliahair.com/f9268
Full & Changeable 13x4 Kinky Straight Wig ➤ https://st.juliahair.com/f9269
Cannot Miss | Best Sellers In Julia Hair ➤ https://st.juliahair.com/f926b
https://www.juliahair.com/➤ Super Flash Sale: https://st.juliahair.com/f926c
Best selling on Aliexpress store➤ https://s.click.aliexpress.com/e/_oDSD...
Amazon Julia Hair➤ https://amzn.to/3TypXX4
Subscribe JuliaHair monthly giveaway on YouTube: https://bit.ly/3h1x09x
Follow IG @juliahairwigs: https://www.instagram.com/juliahairwig...
Inquire Now: WhatsApp number: +8615038958671
#Juliahair #Juliawig #bodywave
P R O D U C T S U S E D
C O N N E C T W I T H M E:
My Website
Hair Appointment Booking
https://wynnejean.com/pages/hairtour
Instagram @WynneJean
https://www.instagram.com/wynnejean/
Facebook @WynneJean
https://m.facebook.com/WynneJean/?ref...
Twitter @WynneJeann
https://twitter.com/WynneJeann?s=09
For business inquiries [email protected]
F A Q:
Ethnicity: African American
Height: 5'7
Age: 23
Measurements: Bust 36'' Waist 26'' Hip 38''
Shoe Size: 8
F A V C A M E R A G E A R:
Camera - https://amzn.to/2NJcPPs
Camera remote - https://amzn.to/2CDAsm2
SD card - https://amzn.to/2Qim76w
Umbrella lights - https://amzn.to/351lJxv
Soft Box Lights - https://amzn.to/2O9zzXF
Full size ring light - https://amzn.to/2XcmDo4
Traveling ring light - https://amzn.to/2XaDLdQ
Traveling Tabletop Ring Light - https://amzn.to/2NJbisG
Lighting & Backdrop Kit - https://amzn.to/2OgmTP4
Backdrop - https://amzn.to/2CHxA7W
Mic - https://amzn.to/2KlQrcJ
*This video may include affiliate links / paid promotional content & product placements. However, all opinions are my own*
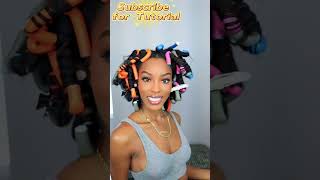
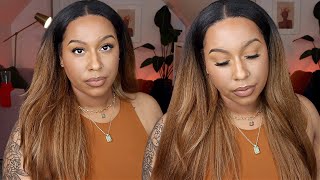
Foreign, if you're new here and if you're returning, then hey girl, how you doing in today's video I'm using this. You part that Julia hair sent me today's video is sponsored and all the details about the hair will be down below in the description bar. I'Ve been becoming a leave out girly, so I want to use a U part today and kind of have a little bit more wiggle room with the styling. So I'm starting off with my hair, already clean and Below dried and I'm parting It Off from ear to ear. I'M going to braid all the hair behind my ear back, because I know for a fact that hair will be put up and then I'm going to use the hair in the front so that I can switch my parts up throughout the week. If you haven't yet seen my video on my braiding pattern for when I'm wearing wigs, then definitely check that out, I switch a lot between frontals closures, u-parts V parts, and it's just really easy for me to switch my hair up when I braid it this way. So definitely go ahead and check that out for a more detailed tutorial, I'm going ahead and parting it in half and then split in both of those sections into two parts so that I have four braids in the back and as I braid each new braid, I'm Grabbing the end of the last one just so I don't have a lot of random ends swinging around under my wigs. It just keeps everything a little bit more neat. Thank you, foreign. On the last braid, I've tried to kind of finesse it and put all of them into one, but I couldn't because my hair is kind of thick, so I'm going ahead and just crocheting both of those ends through my braid in random places. To be honest, I just wanted to be really flat in the back and I can't see a girl so to be honest, I'm kind of winging it as long as everything feels flat and I don't have any random braids sticking up. I'M cool accidentally left my braids down and literally had like Cleo braids sticking out under my wig before, and that was just unacceptable. So this keeps it a lot more manageable and now we can go ahead and work on the front. I know I want to wear a middle part today, so I'm parting, my hair right down the center because off bat. We know that we need that and I'm gon na go ahead and part out my edges as well. Just because I want this wig to look like a sew-in, pretty much so having edges out really adds to that natural look and feel I can kind of tuck it behind my ear and give very you know, I'm shy, but I'm cute Vibes. If you know you know so, I'm not parting out very much of my edges, maybe just an inch or three quarters of an inch, nothing too spicy, and once we have that sectioned out, I kind of Twisted it out of the way we can go ahead and Prep our wig to install so we can get a feel for how much hair we need to leave out the wigs always come with this extra lace. In the back, I like to trim that off and then once I have that trimmed off I'm kind of just placing the wig on my head to get an idea of how much hair to leave out, and once I have a basic idea. I kind of just part some hair out and it's trial and error. To be honest, you part the hair. You try the wig on see if it works part the hair try the wig on see if it works. I'M happy that I didn't edit this part out. So you guys can see how much trial and error goes into it. You don't just automatically know how much hair to leave out you kind of want to play around with it and continue to try it on until you have the perfect amount of hair out, because if you don't, then your wig isn't going to lay right and the Last thing you want is a lumpy, you part or a lumpy wig in general. That'S just not the goal here. There'S an extra clip right behind the part that I'm going to go ahead and take out it just irritates my head: if you like, the extra security go ahead and leave it in, but we're gon na do our first rough try on and it wasn't quite right. So I'm adjusting it a little bit and then we'll try it on one more time again. So now that we have the leave out perfect, we can go ahead and braid the front of our hair. I like to do one braid like right behind my edges, just because there's a clip or a comb in that area, and I want to give it something to hold on to so pretty much we're adding the anchor braids first and then we'll figure out something to Do with the rest of the hair, so I have two anchor braids down my edges for the comb on the sides and now I'm placing two more braids around my part, and this is where the Combs will sit. You don't want them too tight, though, because if it's super tight, your combs won't be able to go through. So, if you're not the best braider. This is your time to shine the loose of the braids low-key, the better you want it tight enough to give your wig some grip, but not so tight that your hair is going to be like uncomfortable. If you had a u-part, wig or a V part wig, and you you're familiar with putting Clips on your braids, you know it can get real tight, real quick. So I finished all the braids for the top, and this is what they look like. I'M going ahead and crocheting the ends through the back, just like I did the rest of the braids and it's no Rhyme or Reason. My hair is just kind of thick, so I'm trying to make sure to keep it as flat as possible. So I do my best to kind of feel it out, but if you have someone to help you, that would be great all right. So this is the finished braiding pattern. This is what we're working with I'm gon na go ahead and take out the Twist on my edges and just flat iron that hair, because it'll be a little bit easier now than later foreign. And now it's time to pop the wig on I'm placing the Combs around my part first and then I go ahead and place the Combs behind my edges and in the back, so that everything is nice and secure. You cannot tell me this does not look like a bomb sew in it's given a fire super flat sew in and the hair is so pretty. I love the waves, we're going to kind of play up the natural waves and how we style the hair, but for right now I'm going to go ahead and flat iron. My leave out first foreign before we get into styling the hair, I'm going to apply a little bit more heat protectant, I'm using the John Frieda frizzies and just applying it all throughout the hair. And then I also put a little bit of a wax stick on my roots because the flyaways were not given to style the hair, I'm using my curling wands. This is one that I got off Amazon. It actually came with a few different attachments, so it came with a few different wands in different sizes and it came with the crimping Barrel. I love this curling iron I'll go ahead and put the link down below. If you guys are interested in it. I'Ve really been trying to downsize, like all of my beauty and hair products, so having a product that I can use in. A lot of different ways has been super helpful and it's a low-key cute, so yeah I'll link that down below. If you guys want to go ahead and check it out, I got it on Amazon, but I'm going through and I'm just wand curling the hair going all towards the back. I wanted to give beachy mermaid vibes and then I'm using my little small flat irons to go ahead and curl any smaller pieces that I couldn't get with the wand without burning myself, because that's always the goal and per usual. The last step is baby hairs. I'M going ahead and using a little bit of edge, control and soothing my baby hairs on the side and just polishing up the edges. In general, I've been obsessed with scooping my sideburns. Lately, I'm not gon na lie. It looks so cute, especially when you know do the little like I said, the little I'm shy, tuck chef's kiss so after combing the curls out. This is the final look. I hope that you guys really enjoyed today's video, I'm running a little bit more of that edge control over my hair, just to make sure everything stays nice and Blended, and I hope that you guys like how it turned out. Do you see how flat it is? If anybody asks it's a sew-in, the hair is gorgeous. I love the length and it blends perfectly. So I hope you guys loved today's video and I will see you guys in my next one bye, babes


Comments
Kathy G: Wynne, you always come out with the best hairstyles
Julia Hair: You make this unit super gorgeous! Thanks for sharing!
Crystal: So pretty!! Can you do a video on how you maintain your natural hair, especially when heat styling? Also how do you get such a smooth blow dry bc my hair is thick as well and I can never get it to come out that smooth lol
tvrwvin: loving it
Janay Roberson: Cute❤
Jertonya: Hey boo, I didn’t see the link for curling iron. I could have missed it tho. Can you share please
Jaylyn Paredes: Is this only 150 density?
Nia Marshall: Why are you so pretty? What the hell?