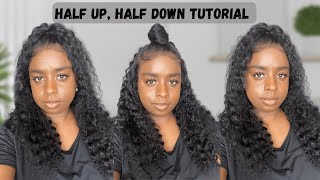
How To Install A Lace Wig Without Baby Hairs| Here'S The Trick- Beginner Friendly ! | Cashni Tv
- Posted on 17 February, 2023
- U Part Wig
- By Anonymous
Hey yall, all of the products that was used In this video is listed below on my Amazon store front.
Thanks for watching & be sure to hit that bell notification ! stay blessed an In good spirits
Collabs / sponsorships
Email- [email protected]
Add me on my socials
TikTok
https://www.tiktok.com/@cashnii?_t=8Xn...
Snapchat
https://t.snapchat.com/LyUOT5Xn
https://www.instagram.com/cashniii/
Check out this Idea List on Amazon: Wig Essentials Must Haves by Cashni Davis
https://www.amazon.com/shop/cashnitheo...
#Nobabyhair #Wiginstall #wigtutorial #wiginflucer #hairinfluncer #Amazonwigs #Amazonmusthaves # Amazoninflucers #Cashnitv #cashni #flawlesswiginstall #nobabyhairwigtutorial #howtoinstallawig
#lacetrick #lacehack #howtohow to installdiyinstallationdetailed wig tutorialNo baby hairswig install no baby hairswigs for black womenwig reviewAmazon influencer programamazon affiliate marketinghow to make money online
Foreign, what's up y'all welcome to my channel. As you read about the title, I will be showing you guys how to do the no baby, hairs, wig and style tutorial. So if you want to see the finished result and how I got this balm, no baby hair tutorial make sure you say so: okay, okay, enjoy the video make sure you like comment and subscribe and hit that Bell notification for me: okay, bye, okay, y'all, so jumping Straight into it, you can see, I started off with 10 braids and my scalp is greased. Now I'm gon na go in with the gossip gel and I'm gon na just brush the hairs all the way back, and this just helps to make sure that none of your edges is in the way when you get to laying your cap in and start putting Glue around your perimeter certain things all day after all of that is blow dry and it's all Sleek back you're going to take a cat, and this cap was a little too small. But I had to work with what I have because yeah um but yeah. So now, you're gon na just see me cutting out my ear tabs. I like to cut from behind my ear um, just because it helps like, with the stretching of it basically just cut two holes around the earlobes, and this helps with getting your cap to be flat. Now I'm gon na go in with the sprays of choices guys any of these will help hold down your cap and basically, what I had was the got to be gel. The Evian spray and the red bottle, or the regular got to be sprayed in the yellow bottle between those all of those work best when they are blow dried in a nice layer of the gel or the spray is applied onto the cap. So now, what you're going to see me doing is taking a popsicle stick and I'm going to be placing the got to be gel right above my um hairline like right above it in a little bit on top of it. So probably like an inch or two um is where I'm going to be put in the Gus feature, and once you put the product all in front of their hairline, what you want to do is take your blow. Dryer um I like to switch mines between hot and cold, but you're going to want to put your set a timer for probably about 15 to 20 minutes. I did have to put mine on 10 minutes because I have somewhere to go but just know the longer. You allow the heat to sit and actually like melt the cap or melt the legs, the better outcome. It will give you, as far as in like actually melting the lace in or when it comes to the cap, just sticking, especially if you're going to use this spray like it needs to be dry, not tacky, not wet, it needs to be dry and stiff. You see me doing now is taking my Foundation color and I'm gon na be placing that all on top of the cap, and this just help with giving like the illusion of like a scalp. So when I go to put the lace wig on when I go to part my hair it'll, look like you know my real scalp, so now y'all. Let me cutting the cap into four sections. You will need a good pair of scissors and some razors to do this part. I don't know where my other scissors was at, so I was working what I had, but once it's cut into four sections: you're gon na cut off the excess of the cap with the razor. Now you don't need the cap to sit on top of your hairline or on top of your baby hairs, but it needs to be sitting right in front of itself, maybe about like an inch. I do kind of have like a medium hairline, like it's kind of close to my eyebrows, so I can't go too far down, but I like to stay up in that range um by me, not allowing this cap to dry the whole 15-20 minutes. It is dry, but, as you can see, it didn't get to melt into my skin as it normally would. So all of this excess cast of you know white. We see I'm going to be taking the got to be spray and I'm going to spray it all. On top of where you see it at and blow dry it, and it should come out looking like that um, that's! If you know you mess up you, you didn't let it drive the whole 20 minutes, which I recommend let it dry. But I took some alcohol and some witch hazel and I cleaned off my forehead because you needed to be clean. You don't want no makeup or no excess glue sitting on top of your forehead. This is the wig you guys. I did order it from Amazon where they sent it to me from Amazon, and it will be linked on my Amazon storefront and basically, I'm just measuring it. On top of my hair um, you know seeing where I'm gon na place it and just you know filling it out. Next, I'm going to be carving out my ear tabs. So what I'm going to do first is cut off the access lace, so I can see because it was like touching my lashes and in order to cut out your ear tabs. What you want to do is take a comb and you're literally going to carve your ear tabs out and then you're just going to cut them out. It'S really simple, very you know self-explanatory. All you want is the same thing. Yeah ten thousand bill as an apartment. Put you inside a G Class, that's just a starter kit, plenty things kind of life, but none of them is the thought of it new piece around my neck, his chess games than Prince Charming disappointment. I stay expected in the pessimists just so they not collecting my specimens down and once we cut out the ear tabs. That is what it should looks like and now I'm just like um measuring where I want to actually place the lace and I'm just seeing it. How it fits my hair making sure both of the ear tabs is cut out properly, which they are so before I go in with the glue I'm going to clean it off one more time with the alcohol and the cotton ball guys. You do want to put the makeup on top of the cap, but also on top of the lace, even though we bleach the knots and everything I still like to go in with makeup on the lace now going out with Erica J hold me down adhesive, I'm Going to be applying my first layer all over what I like to do is put a dot on top of the cat like right on top of the cap, not on my hair, but where the cap ends, I like to put a dot right there and I, Like to put a dot on the skin, it has to be on the skin and it has to be on the lace in order to stick and have a good hold. So now I'm taking my popsicle stick and I'm blending it all out or I'm smoothing it all out so once again, y'all at first, when I first started doing laces, I would do a thin layer, but then my lace will lift within like a day. So I'm like okay, it has to be a little thicker, so I like to place it a little bit on the cat on the end of the cap and a little bit on my forehead. So try that method, y'all and it will give you like the perfect ratio as far as in the width of how much glue needs to be on um, that how much will you need to apply? I only did go in with two layers, because I am a wig influencer and wigs, barely last, like three or five days on my hair, because I have to put a new one on so I just went in with two layers, but I do recommend you going In with probably about anywhere between four and five layers, I know it might sound like a lot, but it actually helps with the longevity of delay now taking the blow dryer on cool, I'm gon na be blow drying it until it turns clear all of the white Glue that you see it needs to be clear when it's clear it will. Let you know that it's ready to actually stick. It cannot be dry down so much that it turns stiff, because if it's stiff and it dry too much it's not going to stick. So I need to be sticky so now I'm taking the lace, I'm going to place it in front of the glue really it needs to sit on top of, but a little in front of if it goes, if you put the lace behind the glue, it's going To be bad business so always put it in front of because if you have to go back in and glue it down your that will be way easier than going in behind and trying to get the glue off. So taking my milk bin I'm going to let it blow dry for 20 minutes. I recommend anywhere between 30 and 45 minutes but, like I said it y'all I was rushing and I have somewhere to go, but you need to blow dry it anywhere between 30 and 45 minutes, because the longer it is able to dry the better. The Melt will turn out to me so yeah y'all. That is what it's looking like once I pop the big um the band off. Yes, your ears will be on fire, but it will be worth it and y'all. I definitely recommend getting um a station blow dryer because I had one but it broke, but I'm definitely gon na buy a new one because you have to invest in your craft. So if there's something you really want to do on other people or even yourself in order to get a Flawless install, we got to get the tools. That'S going to help benefit us in the long run, okay, y'all so going in with the same method. We did when it was time to cut off the cap. We'Re gon na do that for the lace. So I took the scissors and I cut it into four sections. Then I went in with the razor and I started cutting it off section by section now, what you see me doing is taking my baby scissors and I'm gon na literally go up into the lace and I'm gon na cut off all of the excess of the Lace that I see that was remaining on the wig. I do like to go back and forth between the scissors and the razors because, like I said about this, going to be a no baby hair install, we don't need no lace remaining. We need it all to be gone, so you're gon na cut all the way up until where you see the actual hairs, that is on the lace, so all of the little remainings cut it all off. You don't need it like this baby. Now, for the Holy Grail part on how to achieve the no baby hair looks what you want to do is either take your evening spray your got to be spray, your Spritz any holding down spray that you feel will work best for you, spray it on a Comb and literally place it all on top of the lace where you see that white cast is at is where you want to place the spray at. I do not recommend sprinting directly on the lace I recommend actually using a comb or your finger and patting it on two delays. Where you see the cast is at and taking your blow dryer in between cool and hot and blow drying it as you do it. Next, what you will want to do - which I forgot to film it, but I did go in with my foundation, brush the same one that I use for the cap and the lace, and I put it right directly on top of where you've seen that white cast At and on top of the lace put my melt bin on for about 15 minutes, I style my hair, then I came back to the lace afterwards. Always inside, don't worry that I wasted the my hole. Okay, the devil will be busy, but the most high be even busier cause look we're back in Action. It did end up burning because I forgot I set it down and I didn't put the stand up so in the burning, but it was able to get cleaned off and we're back. So thank you on the inside. Are you are using the present foreign, your hair? It looks so Flawless so perfect. Please understand that everybody, hair shape is different, so you got ta, go accordingly to your own head and make it your way. But yes, y'all. That'S literally all the steps that you need um. This is a little style that I went with, but I'm like, I wasn't feeling it for real world, so I just put it up in a bun in the ponytail which I'm gon na insert a little clip at the end, but y'all. This is how to get the no baby hairs, install um, and if you want to see how I bleach the knots or how I plug, please go check out my previous videos that I have and go check them out. Let me know what you think about them, but if you enjoyed this video, please make sure you give this video a like a comment and hit that Bell notification for me and subscribe to my Channel. Please, and thank you hope you all stay safe, stay positive and experience it made the most high continue to bless you on your journey, see you in the next video my loves. Thank you.
Comments
Yvonne: Great job the install looks very natural like it’s coming from your scalp❤️❤️❤️
brown_ skin_lover_queen: It came out really really cute as always
Gloria Winning: Awesome work I love this install especially the bum at the end
Shenelle Littrean: Looks very good on u
Jet jet boo: I keep watching u do ur hair I'm just going say fuck it just do my own hair
Freshh Cutz: yeah cash!!!!