Natural Blonde Crochet Wig Tutorial ||No Leave Out
- Posted on 08 April, 2018
- U Part Wig
- By Anonymous
Mercy’s channel https://youtu.be/IEVWMz_KquA
For business enquiries: [email protected]
I’m currently not selling any DIY wigs. I’ll announce on my channel when I begin selling.
Subscribe to my MAIN CHANNEL to see what I do when I’m not making wigs:
https://www.youtube.com/channel/UCTssn...
If you have any questions you can DM me on Instagram or twitter
Social media links
https://www.instagram.com/sandieslays
https://twitter.com/sandieslays
As always, thank you for watching, and have a nice day
Equipment
- [ ] Knit picker https://amzn.to/2yVVScD
- [ ] Lace https://amzn.to/2yVfKN5 (Amazon Link)
- [ ] Needle & Thread https://amzn.to/2ySgToL
- [ ] Mannequin head - Canvas https://amzn.to/2DolfY
- [ ] Mannequin head - polyesterine https://amzn.to/2ySmlHU
- [ ] Mannequin head short stand https://amzn.to/2zwdXh1
- [ ] Mannequin head long stand https://amzn.to/2PdrPqX
- [ ] Elastic band - https://amzn.to/2zxmv74
- [ ] Pins for wig making https://amzn.to/2DmnzPR
- [ ] Dome cap - https://amzn.to/2Pa8VBi
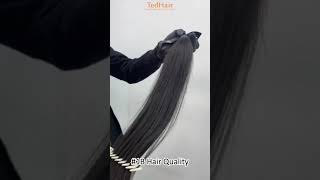
Hi guys welcome as my channel so today I wanted to show you how I made this crochet wig and the hair cost me under five pounds, and I only used one pack. It'S a similar hairstyle to my most natural crochet week, which was in black. But this time I wanted to try a lighter color, so I went for this brownish blonde dish and yeah. I hope you guys learn something from this, so this is a collab with another youtuber. She goes by the name of mercy and she's, also based in Nigeria. So I feel like this is a great opportunity for anyone who lives in Nigeria to find out where you can buy equipment, because I know some of you struggle to find nitpickers and lace and stuff like that. So I hope her tutorial is helpful. So, let's just get right into it. These are equipments that I use. I get them from my hair shop or Amazon, and these are just average prices and it might cost you more might cost you less so yeah. So to begin with hair prep. Sorry, for my voice sounds a bit recipe. My throat is so sore right now. If I really want to get this tutorial out because I recorded it ages ago, but yeah. So this is the head I use and I only use one pad. It cost me less than five pounds, which is super cheap, so yeah. So first I get one twist and then I cut the end. I would definitely recommend doing this just to make it easy to unravel, and then I also cut the middle. I would definitely recommend cutting the hair in half, because if you leave it long, it's going to be way too much to handle. So once I cut it, I basically unravel it like so, and then you end up having two separate strands of hair. So what you want to do next is take one strand and just brush your fingers through like this, and I do this just to make it easy to separate. If you try to just separate straight away, the hair is going to get tangled and you're just going to waste her so next to make the wig cap. What I do is, I saw some lace down onto the wig cap, make sure your recovers inside-out when you're doing this, and also I go for this upside down Y shape, just to reduce the time I'm going to spend on the lace section, because you don't need That much, ladies and you don't need to be ventilating too much in order to create that natural-looking middle part. So this is the outline that I go for, and I would definitely recommend this. So next you want to cut off the part of the wig cap that you no longer need and we can move on to crocheting the actual wig cap. So it's equation of the wig cap shouldn't. Take you no longer than three hours, and here I'm going to show you the fastest way that I do it. So I loop the hair onto my three fingers so the last three fingers, that's where I hook. That'S where I loop, the hair onto so my three fingers act as my hair holder and then my thumb and my forefinger are the only two fingers that I use to crochet the wig cap. So what I do is I push my nipple go through the wakeup loop, the hair on to the hook, pull it back through, and then I use my two fingers, my thumb and my forefinger to pull the rest, the hair through to create a knot, and I Hope this helps this does increase the pace because you don't have to keep picking up hair and then coming back so yeah. So here I just finished the first strand and I moved on to the second one. So, as you can see, you don't need too much hair. That'S why I'm able to use just one pack, so once you get to the very top, you need to make sure that you ventilate the perimeter of the lease so that you get that smooth transition from the capital East and also, please make sure you do this Part so that you can cover the black with cap underneath because the hair isn't black. If you use back here, it's not going to be too much of a problem, but because I use the color thirsty. I have to make sure that I do this part. So here's how the hair looks once I'd finished, creating the wig cap and you can leave it like this, but I just feel like the middle part, is a bit too wide. So I decided to go in a knife and Talay and it shouldn't take you no longer than two hours because we're only working with a very small section of lace so to Venson eight I loop, the hair on one hand I loop, the hair on the forefinger Of one hand, and then with my other hand, I hold the nitpicker, I'm right-handed, so I use my right hand and I'd recommend holding it like how you right. So if you ventilate just push on it, picker through the lace and then loop, some hair onto the hook, don't try and do one or two hair strands, because the hair is just too thick and then pour the nitpicker back through the lace and then use the Exact same hook to pull the rest of the hair through to create a knots. So here's how my middle part looks once I finished and it looks a bit bold, but it's because you can't see the dark roots because the hair is so light. The after you finish, you can add hair mousse, I like to add hair mousse just to tame the cars a little and yeah. That'S why I'd recommend you choose Hermes and then, after that I just cut off any frizzy ends and that's pretty much it so here. I'M just trying on the wig, so I use got to be hair spray to lay the wig. I just spray it onto the front and then I lay it using a scarf, and here I was just adding some dark roots. So I used some brown eyeliner and also brown mascara. I wouldn't recommend using black, because the color difference is just too harsh. I could just look really weird, so I definitely recommend using brown. So this is the brown mascara. I did try black, but it just looked so weird, so I definitely recommend using Brown and that's pretty much it. So I hope you guys learn something pull up pull up, so I like to put my hairdryer on the top section just to flatten it out a bit just so it doesn't look too bulky, so I definitely commend doing that and yeah that's pretty much it. So here's how the hair looks and I'll definitely be back in a few months time to give you guys an update I'll also be doing updates on my other crochet wigs. I'M just wait until I finish all my exams and all my uni work and then I can just jump on YouTube and be a lot more consistent. So here I'm just quickly showing you guys how I take off the wig. So what you need to just get some water and then just push it against the middle part. Where you put your got to be hair glue and then you can just take it off. If you try to just pull it off, you'll definitely lose some hair because the glue is so strong yeah. Thank you guys so much for watching. I hope you learned something from this and also make sure to check out Mercy Channel the nice day.


Comments
Xiao Yun: The color : YES ! The texture : YES ! The curls : YES ! The length : YES ! The makeup : YES ! The instrumental music in the background : YES ! YES SANDIE YESSSS !!
Sandra Igboke: You should have noticed how much I love ur videos. U slay on a budget. I seriously love ur style. It’s not that u are broke but u chose to challenge urself!! Keep being real girl. I’m inspired!!!!
Tina Ikujegbe: You are so good at this. And when ever you are not wearing the wig, you can just part in sections and twist it, and unravel it when you want to wear it again, with that, you can always have beautiful curls. Thanks for sharing.
Bushy Bashy: Amazing work!! Your wig looks fabulous!!! I wish I could do that! Thank you so much for sharing!!
CraftingWithAprilD: Another great video! Thank you for sharing, love your methods.
Veronica Abuede: TRUE CONFESSION: I watched about 4 of your videos, downloaded non then watched this one & GOT HOOKED. I now have 6 of your videos on my phone...hehehehehe.....love your videos, love your simplicity & love this hair! You look like a million bucks! :-)...KEEP BEING REAL!
Pink Petal Magik: This is so pretty! Good job!
Peyton Pendleton: Great job, beautiful Queen. It looks amazing!
Cynthia's Life Corner: *Girl I swear I always like before I watch. Thanks for such a wonderful video. You go girl. God bless ur handi work. *
Lisa Love: Your videos have taught me so much! I know you prefer middle parts but can you show us how to do side parts... I tired my own but its a bit of a challenge. A tutorial would help a lot! Loll
Kiyah Costa: Wow! Great job!!!!
Deja Calvin: How long does it usually take you on the lace ?
KOLOUR CASSETTE: Lovely colour and texture. Where can I get the knit picker? I'd love to try this.
Aaliyah Webbe: Amazing!!!!
Beautyloon: U're so on point. I love Ur explanation,, the colour of the hair, and the way the hair looks on you. Dear I must add that you are beautiful.
Sofiat B: Girl I love this colour on you ❤️❤️
Kelsey Harriott: Love this one
kenni: the intro and the hair
Ashley Rainbow: You are very talented
serious: This is amazing
Barbra: Can you do a tutorial on one with ventilated side edges so it can be pulled into a ponytail.
Falon Viard: question how long would a wig like this last i know this hair tangles pretty easy
Cyrious: You are really good and patient !
Moeisha Dixon: Omg!! This is the best yet
Airythafairy: Can you make a video about how you wash the crochet wigs (if you do) and how you maintain it so they last as long as possible
amara grace: beautiful....nice method. link to the other channel pls
Princess L’amour: Give me some of that patience that you have . This looks amazing
Marissa Morales: Wow girl amazing
ify: Wowcher indeed u slayed that baby
Kayon Mitchell: Great job
CheekyLovesCheeseCake:): You have the patience of a god. Crocheting the part looks super time consuming
Moeisha Dixon: How long does this wig last?
Soulful Starseed: Your videos give me life.
MakeWayForCJ: Ok so if you got to 2:42 and got thoroughly confused on how she sketched out the length and the shape of the lace that she put on this wig, go to her Nicki Minaj Inspired 360 Crochet wig here ---> https://youtu.be/4MMwvZ30B1M and scroll to 1:21. Otherwise you may be all kinds of lost!
edu o.: Very nice video :) I couldn't find the link to the other girl's video tho? I live in Nigeria haha and I'm learning hair rn so I'd like to see hers :)
Naya Ego: Oh wow u good thanks for sharing
Moeisha Dixon: I have another question would double twisting help me get it back to the natural curl pattern. Basically twisting it like it cane can help it get the girl again?
Princess Funlola Oyelude: Beautiful queen
Georgianna Brown: Wow
Sandra Igboke: I’ve gotten d latch hook I ordered. It’s gonna be lace frontal wig everywhere
its mercyolofu:
Classy Fabie: I would like to do my hair like that I m in Orlando where are u located
Latasha Black: I want one do you sell
Nona Morton: Lovely
Lay Lace:
Ada Nzeribe: Hmmm how to find this collabo with Mercy? What’s her channel called??
DivaNy hair: Yasss
Angie McGee: You're just too bad girl!!
Airythafairy: Can you wash these synthetic wigs?