How To: Cut A Bob With A Deep Side Part
- Posted on 25 January, 2017
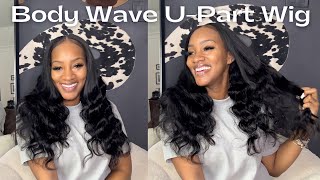
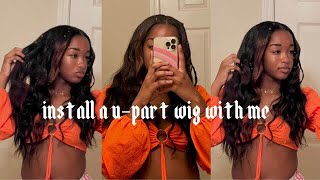
- U Part Wig
- By Anonymous
Hey Beauty!
Thanks for checking my description box! Read below for everything you need to know.
BUSINESS:
Let’s Talk Business…
Email Me - [email protected]
JOIN MY GLAM VIP NEWSLETTER:
Like my videos? Join my monthly newsletter for more glam content. You will receive access to all of my secret giveaways for this year, my favorite beauty tips, updates on future events + more!
Don’t miss out! Join here: http://bit.ly/2jGA77S
FOLLOW ME:
Snapchat: biancacharisma
Instagram: biancacharisma
Facebook: https://www.facebook.com/BiancaCharism...
Twitter: https://twitter.com/biancacharisma
HAIR INFO:
Hair Company - Savon Luxe
Hair Website: http://savonluxe.co
Hair Type: Savon Regal Wave
No. Of Bundles: 3
Inches of Bundles: 18, 20, 22
Discount Code: Bianca
RELATED VIDEOS:
U-PART WIG SIDE PART BOB BRAIDING PATTERN - https://www.youtube.com/watch?v=uJjc9i...
SAVON LUXE REGAL WAVE STRAIGHTENED - https://www.youtube.com/watch?v=PT5LBF...
BEAUTY ON A BUDGET THE U-PART WIG SERIES -
https://www.youtube.com/playlist?list=...
Thanks for reading! Have a blessed day and leave any question or video request in the comments box below!
Hey, ladies today, I'm going to show you how to get a deep side, part top. So if you, ladies, would like to see how I change this look just keep on watching already. So if this clip looks familiar, it is from my Beauty on a budget. The? U part wig series, so, as you can see, I took a wig cap and I'm drawing on top of it with a colored pencil. So this is for a? U part center part. What you want to do is a? U part side part so, instead of directing the? U and placing it in the center you're going to want to draw the you off to the side so make sure your hair is braided underneath the cap and then just trace your leave out braid. If you guys want to see how I braid my hair for a bob - u part, I will include that link in the description box below so make sure to check that description box right here. All I'm doing is just threading, my needle. So what you're going to me is a wig cap in a wig head. You can get both of these from the Beauty Supply and I will list all of the products also in the description box. So make sure you guys check that description box, because it's going to be a ton of stuff down there for you guys to read. But if you are still watching make sure to pin your hair to the wig cap really really, I said if you're still watching, because I really want you guys to pay attention to what I'm doing so. It can be very easy for you when you are doing this yourself, so why I use push pins to hold the hair down. You can also use hair pins. I use that because I really want to make sure that my hair is secure. While I am sewing the hair on to the wig cap, I don't want to have to multitask and hold the hair while I'm sewing the hair, because that just takes away too much work. So this just makes everything so much easier. So now I'm just flipping the hair over, so I can create another layer on top of what I just did, I'm going to continue to do to do this until I get to about half half of the mannequin head. So I have a good amount of space at the top, but I pretty much filled up the sides in the back. So now I am NOT going to add any more layers to one side of the wig cap and I am going to focus on the deep side, bangs side. So on one side of the wig cap. You will see in just a second I'm going to create an L shape, so I can start the bang. So, as you can see, this is like an L shape and I'm going to start to diagonally fill in this gap. If you watched, where my hand was going, my fingers were going, I am just going to be going in a rounded diagonal shape, so I can layer the top and create a deep siding. So, as you can see what I'm doing, you're basically going to go in the same direction until that space closes up and then you're going to secure it with another another track, I did two tracks on top of each other, and then I did. I basically filled the gap to create that you shape so, where I'm pointing I'm going to take two tracks, cut them basically to measure to where I needed to be and cover that you, so I can create a skinny, U shape. Hence the word you part week. You want to make sure when you're done sewing, your, u part, wig, that it creates either a big. U or a little you some kind of you even if V will be fine, but you just want to make sure to create a U shape and I'm pretty much done with the wig. You can see from the front the side, the back, that it looks very, very realistic. Ok, so I have put my hair in a ponytail and I'm just going to pull my hair a little bit out of the bunny tail for the front parts of my hair, because I want those to be the longest part. And I want the back to be shorter, so I'm going to use a hair scissors and here's a pair of hair scissors. We can prepare it's pretty thick and I really want to make sure I cut it precisely. We are going to clean it up afterwards, but I just want to make sure that it's cut in a pretty good shape, so I don't have to do too much cleaning up. I really want this just to be an easy process, so grab your pair of scissors and, let's start cutting, don't be scared just follow along with me. I'M doing this on camera, so you guys should be fine at home, no pressure. You know, let's just hold the ponytail, get a good grip, make sure you have at least three or four secure rubber bands on the ponytail hold. It hold the bottom. Even if you got to like kind of press the hair to make it too wet. Do that but we're going to cut above the ponytail, so I'm so excited. Let'S go alright, ladies! So, let's cut this ponytail off, make sure that you have some really good scissors, as I mentioned before, because I try to use some basic beauty supply scissors and they just did not cut through this thick hair. So if you are going to be using, the salon looks here that I am using. It is amazing your hair will look just like this. The hair is going to look very realistic. Just make sure that you have a good pair of scissors for when you cut it, so please don't pull on the ponytail just kind of hold the ponytail. You know why you cut it because you don't want to alter the shape of your bob. You just want to cut basically cut the ponytail off so now. What I'm doing is I'm just kind of shaping it to my face. You know framing it to my face, cutting off what I want to cut off. I didn't want my long bangs too long. I didn't want it to be too asymmetrical. I just wanted it to look a certain way and then I'm just kind of cutting up words to polish. To give myself like a polished, look and making sure that my ends are cut really really good, but that's pretty much it you guys. I am absolutely loving. This look with the deep side part. I love it. I'Ve never had a bang. This long - and I just like, I said I love it thumbs up if you guys love it subscribe, if you want to see more and make sure to hit the link below, so you can see my description box and everything in it. Thank you guys so much for watching. I will see you in my next one
Comments
Lauren Michelle: Beautiful outcome & you make it look easy! I'll have to try this!
Mel: It would be lovely if you could make a u-part wig tutorial of an angled bob like this
Makeda Imani: This is absolutely beautiful I can’t explain how many times I’ve watched this video.
Twana Pickens-Stevens: I love that bob, you did an amazing job on your hair.
Erica JOY: Omg thank you. Been trying to figure this out. Can't wait to do it!
Valeria Monice: I absolutely love this! ❤️ you did an awesome job
Rarest Rose: Omggggggggggg I love this making mines tomorrow!
Slay Samantha: Very cute I love this
Desiree Williams: Love this!! thanks so much!
Saucé S: So cute getting my hair done like this, this week, But after you cut it how many inches do you think it was 14, 16?
Ayanna: This is so pretty
ARI NORTH: It looks amazing.
Rochelle Bonsu: this is soooo beautiful
Tiffany Smiley: Liked it before I even watched! Lol. Guilty! Stunning lady!
Angela: Great,,,explained ,,,,nice and clear,,,, anybody ,,can understand,,, love this
Kelley Granger: That look is beautiful
Alyssa Brown: beautiful
MillionDolla Ace: Do you sew in the little side flaps in the front?
Aaliyah Bee: How much hair were you able to fit on the wig
Sandra Ada: Can I do this with a closure ?
catmo59: wow. in one attempt
Real QueenLin: Nice
Tarisha Edwards: Do you sell your wigs
Mar T: Love the look ! How length was the longest side of the wig ? About 14 inches ?