Crochet U-Part Wig Tutorial> Italian Perm Yaki Crochet Braid Wig Tutorial
- Posted on 17 July, 2017
- U Part Wig
- By Anonymous
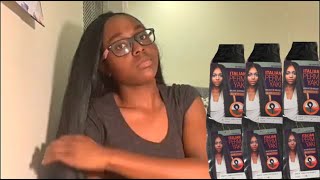
Here's my Crochet U-Part Wig Tutorial using Italian Perm Yaki Crochet Braid Hair. This NEW Crochet U-Part Wig technique is something i put together for a realistic blend just like a normal sew in or install.
::::::::::::::::SHOP:::::::::::::::
➜ SHOP MY NATURAL HAIR EXTENSIONS http://www.naturalbosslady.com
Coupon Code► CURLFRIEND
AUTHENTIC SYNTHETIC HAIR CROCHET BRAIDS PRE LOOPED ITALIAN PERM YAKI http://bit.ly/2so8hQz
*SamsBeauty Sent me 8 packs, I only used 6. The colors were 2, 27, 30 & 33
SAMSBEAUTY IG&FB
follow samsbeauty on instagram
https://instagram.com/love_samsbeauty/...
like samsbeauty facebook page
https://www.facebook.com/love.samsbeau...
::::::::::::::SOCIAL::::::::::::::
+ BLOG: http://www.Rayann410.com
+ FACEBOOK: https://www.facebook.com/Rayann410
+ INSTAGRAM: http://www.instagram.com/Rayann410
+ SNAPCHAT: @Rayann410 www.snapchat.com/add/Rayann410
+ DAILY VLOGS: https://www.youtube.com/user/Rayann410...
::::::::::::::FAQ:::::::::::::
What is my Hair Type? http://bit.ly/1eHF5xr
My Big Chop http://bit.ly/1Jat2Ft
My Wash Day Routine http://bit.ly/1N25mos
::::::::::::::TECH::::::::::::::
Canon EOS Rebel T5 http://go.magik.ly/r/rayann/a0dc/
View Finder via Laptop http://amzn.to/1N9OxJ6
2015 Apple 15.4" MacBook Pro Retina http://go.magik.ly/ml/lb4/
SanDisk Extreme PRO 32GB Memory Card http://amzn.to/1GLsTWe
CowboyStudio Umbrella Lighting Kit http://amzn.to/1CoSleu
Neewer 18" RING LIGHT Dimmable Camera Photo/Video 75W(equivalent to 600W) Fluorescent (Light Only) http://amzn.to/2pcRDme
Neewer 18 inches Collapsible Photography Video Light Softbox Diffuser for 75W(600W Equivalent) Ring Fluorescent Light Flash Light http://amzn.to/2pLmSrq
Neewer 75"/6 Feet/190CM Photography Light Stands for Relfectors, Softboxes, Lights, Umbrellas, Backgrounds http://amzn.to/2pLatDU
Neewer Mini Ball Head with Lock and Hot Shoe Adapter Camera Cradle http://amzn.to/2pcSYtj
::::::::::::::MUSIC::::::::::::::
Production music by www.epidemicsound.com
*This Video is not Sponsored. Some links may be affiliate links!
● ● ● ● ● ● ● ● ● ● ● ● ● ● ● ● ● ● ● ● ● ● ● ● ● ● ● ● ● ● ● ● ● ● ● ●
Brands & PR inquires ONLY http://www.rayann410.com/contact
Rayann410
P.O Box 1845
Griffin, GA 30224
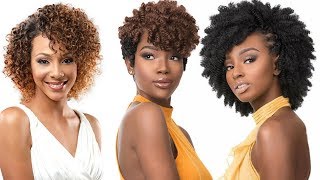
Hey girlfriends and welcome back so for today's tutorial. I'M going to show you guys how to create this crochet. U part wig using this Italian perm, a yucky hair. Today, I'm using a crochet wig cap whip combs from our model model. There is one comb in the nape as well as two on the side. I grabbed a small manikin head to begin and I'm just popping this cap right on that mannequin, so that we can begin and crocheting I'm using a standard crochet needle hook as well as this Italian perm. A yucky hair from authentic same video sent me over about six packs of this, but I only used about four of them. This hair comes pre looped, with an adjustable knot, starting with the lightest color and the nape of my wig. I'M going to go ahead and stick my crochet needle through grab the loop for the crochet hair and bring the end or tail of the crochet hair. Through that loop, I'm going to pull the loop all the way up to the base and I'm going to tighten or adjust the little band. That'S attached to the hair to keep it in place. It'S really really simple and easy to do guys. Just take that crochet needle through pull the loop through stick you're, crushing it'll, do the loop and bring the hair through the loop scoop that knot up towards the base and then tighten with the elastic band. This was my very first time ever using any kind of pre looped crochet hair with an adjustable band, so I did have a bit of a learning curve. The adjustable band is sort of like a little hair types. I cook really really thin elastic hair tie. It'S extremely fragile and will break on you if you're too rough with it. Here'S what one peck of the hair looks like I'm moving on to my second color, which I'll be adding on top, and this is the color number 30, I'm going to use that entire full pack and I'm going to start curving all of my crochet braids around To the front as well, the yaki straight hair is pretty straight, but it's also pretty thick. So that's what two packs of hair look like I'm moving on to my third tag and this tag is a color number 33. I already had an idea for the pattern that I wanted to achieve with, as my end result for this wig. I wanted to have this nice by tri-dimensional type of look. I didn't want to go for one standard, color or two-tone colors. I wanted to have as many colors as possible so that when the hair moves and shakes in the wind you're able to see a lot of dimension and color, now that I've used all the colors, I'm just going to repeat the exact same color pattern. Until I get up to the very top of the wig, which I will be using a color number two for the color number two is my natural hair color. So it's going to allow my natural hair to blend with the wig seamlessly. Now, at this point you can do the knotless method or you can just continue to crochet braiding all the way up to the top. I went ahead and tried on my wig. I left about two to two and a half inches of space at the top, so that I'm able to cut this cap, I'm using my flat iron at the highest degree, according to my manufacturers, packaging and I'm just going ahead and straightening out this hair. This is the most essential step to having a pair look as natural as possible flat ironing. The hair will allow it to have a less of a bulky look and you won't see each and every individual, crochet, braids or pre-sleep braid in in the head. You guys see how everything's starting to blend together and look like a sew-in, or we compare to this side here. So I'm just going to go ahead and repeat the exact same steps on the right side. I got it as straight as I possibly could, but of course, I'll have to go back in and make sure that everything's laying nice and flat. I can already see a few bulky areas, so I know you guys are wondering how the heck did she cut this netted cat without it unraveling. So I started off with the band. I just ran the thread through the actual elastic band first and then my idea is to stitch a straight line going towards the back of this Utah from pretty much going through that little curved area of the you of the swig. So I'm just stitching straight across I'm making sure that I'm grabbing each and every part of the net so that when I cut this cap and nothing unravel as far as my stitches, I'm pretty much just going with the stick. Your needle in the cap and go through the loop to create a knot for every single fit. I want this to be as tight as possible, just like, as if I were to run this on a sewing machine. I want this stitch to be nice and flat and straight and then I'll start to curve around the back of the youth towards the back of this u-part. The way that the net is set up, it's pretty much like little squares or diamonds on this net. So I'm making sure to grab each and every one of those, as I'm stitching, also not forgetting to go through the sections where the actual braids are attached. I'M grabbing every single part of this net and working my way up to the front. Essentially, what we're doing here is blocking off this entire part of the wig so that we're able to cut this cap - and it won't unravel all of those stitches - are going to hold that net into place, so it doesn't unravel. So whenever you cut it, it will hold just fine and, as you guys can see, here is a straight stitch. I'M going in with my scissors to go ahead and cut the cap, I'm making sure to be extremely careful and I'm just going straight down the middle. I skipped over the elastic band because I wanted to go ahead and secure that band, so I'm able to use the band when I cut it as little ear, tabs or tab for me to be able to drip this wig. So I left the band on and I went ahead and stitched from the edge of the band, and I went right back over my entire crochet wig circle. I'M just stitching once again the same exact way looping through going through the loop and knotting it every single time. Until I get all the way up to the front again, this particular step is extremely important to mask away or hide all of your loose and raggedy. In from the net itself, when you cut it and when you finish up that step, you can go ahead and cut that elastic and you're. You part, is pretty much complete to guys. So now, let's get into styling. I went ahead and just cut this hair. The hair layered a little bit weird and we like the jagged edges, so I just grabbed some men's clippers as well as a comb, and I'm just lining up this comb. I just want to a really really blunt cut super super easy to achieve. I just make sure the hair is entangled and then just follow the shape of the comb or the straightness of the comb. With the razor itself, I went back in and defined my little raggedy cut. I did with the Clippers with some scissors, I'm just going back in and making sure that everything is super straight and, of course, because this is a blunt cut, a lot of times. You end up with a lot of weight towards the bottom of the hair. So I'm going to go back in with some hair thinning shears and just make sure that I'm taking out a lot of the weight towards the bottom as well as the top. I want a lot more movement, so I went in through the top. I just went pretty much like in diagonal cuts and it got rid of a lot of the weight in the hair and that's pretty much it guys. I'M ready to finally go ahead and sew down or install this hair, as you guys can see. I got my nice blunt cut, it has lots of body and movement, I can swing it all of the colors are just flowing and showing great. As far as my braid pattern, I do have a separate video on that. I didn't want this video to be super. Super long, so you guys can check that out and see how I was able to measure and see how far to braid my hair back. I just had these two anchor braids. I went through my actual u-part wig itself, not at the end of it twice and then I just went ahead and sold this wig down just like a normal u-part wig. It looks exactly like a u-part wig at this point. As far as stitching I'm going to go ahead and stitch from the hairline all the way back to where that you start and then do the same exact thing on the opposite side, of course, with this cap I did get three combs, so I have two on My side and then one of the names this is going to help to a latest leg super super flat. I just went ahead and stuff those combs in I'm just going to repeat the same exact steps in on the opposite side, I'm going through the braid first and then going through the way cap itself in effort just a few quick minutes, our entire wig and install Is complete left but, not least, to finish off our entire hairstyle is to blend your natural hair with this view part week, so I just pretty much stretched my hair with a blow-dryer and I'm just going to go in with my flat iron and some heat protectant To create a middle part, I ended up twisting my hair with the wig just for a different kind of look, but you can go ahead and straighten your leave out. On top of this new part and you're pretty much complete. It'S the same exact steps as installing a regular view, part wig. So I fully hope you guys enjoyed this new technique that I created. I love you guys and I'll see you guys in the next one.


Comments
Ina D Jones: great job. The wig looks beautiful
Kathy Perry: hi, i love the movement. it turned out really great. thank you.
Sea: The colours are so pretty
Valerie Coleman: Hi Marvellous job. Love the hair and color. Cute on you.
open User: Bruh you can see the crochet knots when you move
CurlyGirlLife: Love it, great job<3
C Love Beauty: you didnt really show the end result or the top of your head at the end or the back and sides while wearing it. also...maybe for a more natural look, split the individual hair pieces for a more realistic blend... idk. jut my opinion.
Dionna Raeillé: I feel like the fact it was already looped made it lumpy
Siarah Monae: I can not & you didn’t show the top of the head
Ashley Crocker: How cute! Oh and what is the name of your background song? I love it!
Love Love: Very creative and pretty
Naturally Naked: Cute!!
Janeen Council: Girl, the colors were poppin! I've seen on some other videos when making crochet wigs,they would use smaller chunks of hair so it would be a smoother look. Smart idea about sewing the cap before cutting...wish I would've watched this earlier lol
DiscountPotato: Nope.