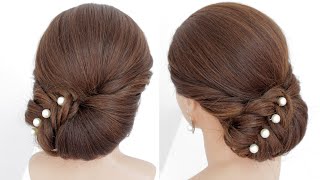
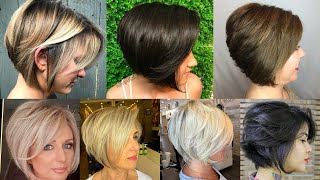
How To! Custom Color Quick Weave (No Leave Out, Frontal Or Closure!)Part 1
- Posted on 15 July, 2019
- Lace Closure
- By Anonymous
#QuickWeave #FusianPart #LimeGreen #Bob #BoldHold #Like #Comment #Share #Subscribe
Products used:
~Tintation- Aquamarine and Lime green
~Pump it up Spritz
~Wonder Wrap
~30sec Hair Glue
~Bold Hold
Contact Info:
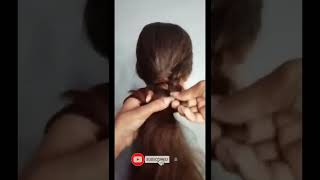
Welcome back glam stars to another, wonderful video, if you're interested to see how we achieve this look stay right here, but before we get started, I want you to go down, hit the like button and then subscribe. If you haven't already so to achieve this blue roots and lime, green tip, look you're going to need the following supplies: the bundle of hair you want to color, preferably 6:13 blonde, and then you'll need to temptation colors, one in lime, green and one in aqua. A color bowl or plates like in my case and color brush and, of course, some gloves to protect our hands. We are going to support that aquamarine color right onto that paper, plate and start applying it to the roots of the bundles, apply the color all throughout the front top roots and then I'll turn the track over and apply that to the same area. On the back. Just to make sure that it's evenly coated, and then after that is done, I will smooth the blue down just to make it look like it's faded a little. So when we put the green in it looks seamless so for our green you're going to do the watercolor technique so you're going to boil some water, then pour it into a big, clear bowl. Then I'll use our lime, green temptation, color and I'll just put about ten seconds worth of color in there and mix it up and make sure there are no blobs of color just sitting at the bottom of the bowl, because that will cause you to have an Even color dispersed on your hair once our color has been mixed. Well, you can go ahead and dip each bundle and I dip it up into where the blue color stops. So that way, you won't add more blue dye into the green and change the tint of the green that we're using get the doors ope and take that boat. It have been you OPM. Is you go baby yeah? We should be closing if you request my chariot. Get the doors open once all of our bundles are colored, I will watch them condition them and leave them to air dry while I'll prep, my real hair for the install. So I am gon na just put my hair in a few Braves to make a nice foundation for my quick weave. So I know I want to do is side part, so I'm going to go ahead and make that part, nice and clean, and then I'm going to make my braids around that part. I got super gay looking at these brains, I'm like. Let me do a live check. Boom boom. Your girl got hair for real breaking all this hair hair. My shoulders on is that good thing I got a bangs. I would have been walking around looking like so I'm gon na use pump it up spritz and spray. All over my braids now I'm going to be using Moroccan argan oil weave, wonder, wrap, and for those of you that don't know what Wonder wrap is. It is a product sent from the gods to protect your hair against the glue. So when you wet your hair after you have a glue in um all of that glue which is rent out here now, I'm going to cause my braids over to allowed them to lie flat. Then I'm going to put a black wig cap over it and blow-dry. It in place, if you spritz it again and then I am going to use some hair glue around the perimeter of the cap, just to lock it in place. If you open, I like to go with the extra step, and so the cap around the perimeter just sold my hairstyle stays now it's time for the fun part so for the install all I have to do is measure the hair where I wanted to lay applied. The glue and then lay it down she's in the Proby jungkook way, she's approaching us. This is so good. It'S totally good. The renegotiate she's close enough come to visit me. She said that she'll only just opened up, so I'm going to constantly be using the pumping of a spritz just to make sure everything is holding in place and then every now and then I'm gon na blow dry just to help the glue dry we should be. Is on my agenda request, my chair, you get and, as you can see to do the bank part I lay the tracks facing forward. So that way I can ensure the hair is laying where I want it to lay shut it down like back open. Ah, better of me: in my personal opinion, there is no science to how to lay the tracks down other than just watching how you want the hair to fall on your face and in your hairstyle and then laying it to go with that first impression: euopean. We should be closer friends if you OPN, engages on my agenda request. My chariot get the doors off me and take the high road. It have been first impression you open, we should be closer friend, Inaba. We'Ve approached the parts I am going to cut the part out from underneath the cap and, as you remember, I glued the perimeter around the parts and around the perimeter of the cap. Just so when it came down to this point, my cat will lay in place now. I'M gon na just lay the last couple of tracks right up to my part, and I'm gon na show you guys how I did the fusion part and the fusion part technique is just where it allows the hair to like it's coming out of your scalp. Naturally. So to do the fusion part I am going to be using both hold lace, front glue and I'm going to apply that right. Where I want to put the hair and then I'm going to measure a track out the size of the parts and then I'm gon na cut the track part off and then lay the individual pieces of hair. On top of that lace, glue like so, and I'm gon na press it in and I'm gon na just continue. This technique into the part is completely done and, of course, blow-drying occasionally so, with this technique on the first layer, it may still look transparent. So just make sure you judge it, it may take two to three layers to make sure your part looks completely filled in so when that is complete, it is time to go ahead and style the hair, so I do want to do this hair in a bob. I want the back to be short and then the front sections to remain longer, I'm going to section off the front pieces from the back and then I'm going to pull it a tool about where I wanted to lay and then cut underneath my hand. If you are not familiar with this technique, you should probably use a hair tie, rubberband or hair scrunchie and then cut from underneath that, just to make sure you keep that length consistent, then I'm going to go in and blend the back to the front so find That good angle, that allows you to keep the link that you want in the front, and it also blended with the back, definitely make sure you go in into a length check, because unless you want one side to be longer than the other, which is not what I was going for you want to make sure that it falls in the same spot, so we have now finished our install in cuts. I'M gon na go in and curl it, and this is our final look. Well, blam stars. I really hope you enjoyed this video today. If you did make sure you give this video a thumbs up, don't be afraid to leave me a comment and make sure you subscribe and always remember, being glamorous isn't what you have is, who you are you

Comments
lex b: I LOVE IT ‼️ Keep the videos coming
Kayla: Great video. I'm gonna try this