How To Make A Closure Wig On A Sewing Machine | Beginner Friendly
- Posted on 27 January, 2021
- Lace Closure
- By Anonymous
Machine made wigs are super fast and can be fun to make , in this video I’ll show you step by step how I made a closure wig hope you enjoy
PRODUCTS USED :
*Canvas Block head
https://www.amazon.com/gp/aw/d/B07G941...
Dome wig cap
T Pins
https://www.amazon.com/1InTheOffice-Pi...
Brother sewing machine
Black wig combs
https://www.amazon.com/gp/aw/d/B07TJWB...
Measuring tape
https://www.amazon.com/gp/aw/d/B078ZJ5...
Eyeliner pencil / sharpie
Hair needle & Hair thread
Don’t forget to subscribe and I’ll see y’all in a next video
DISCOUNT CODES:
Dodo Lashes
Dodolashes.com
Use code “ISHA5” at checkout for $$ off
Smile Sciences
Smile sciences.com
Use code "ISHA2" for $$ off your purchase
♡ ♡ ♡ ♡ ♡ ♡ ♡ ♡ ♡ ♡ ♡ ♡ ♡ ♡ ♡
• LETS CONNECT !
PROMOTION/ COLLABORATION ‣
INSTAGRAM ‣ https://instagram.com/Ishamoywilliams
SNAPCHAT ‣ ishamoywilliams
TWITTER ‣ http://www.twitter.com/moywilliams
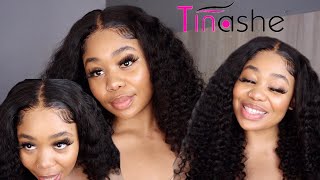
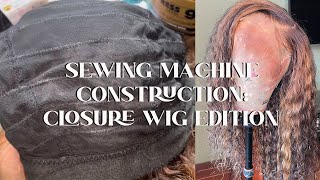
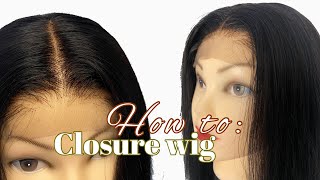
Hey guys welcome or welcome back to my channel. My name is aisha. If you see your first time here and for today's video, i'm gon na be showing you guys how i made my closure wig. So, first and foremost, we're gon na be needing a um wig head. I'M going to link the one that i have in the description box, you're also going to need a dome cap and, of course, you're going to be needing your bundles as well. So the hair that i'm using today is going to be pack here. Um. It comes with four bundles and a closure four by four closure um. It says it's 100 human hair in a bohemian um. The brand is beauty. Elements never tried their pack here before. So i'm hoping everything turns out good. So far, the um, the lace on the closure looks really really nice. It looks you know almost close to my skin complexion and there's really not much shedding on the hair itself. So i'm also going to be using some t, pins and t pins is basically what you see on the wig head right now behind me. I'M gon na explain that further, but i did take some hair thread as well, so for the t, pins, you're, just gon na use that to like stick anything you want to stick on the wig head, whether it's um a piece of hair. It'S your frontal! It'S your closure. Whatever you need to stick into the wig head, that's what you use the t pins for so right now. You guys are going to see that i'm taking the closure and i'm just trying to measure that when you're measuring your closure, what you're gon na do is you're gon na make sure that it comes a little bit in front of your dome cap and by the Way guys, yes, i'm using a blonde dome cap, because that's the only color i could get at the beauty supply. So yeah. You guys see i'm just trying to measure my uh closure and stuff just to make sure that everything sits perfectly and it just it. You know just comes out right so after i stick that down with my t pins at this point, if your hair is long enough to braid, i mean you know, if you're not doing a pixie wig, i would recommend you know doing two kernels in the closure Or even one cornrow um, my hair was just all over the place. This bohemian texture here, which is all over the place so i have it - was really really hard to like um get it together, but i would recommend you know just giving it to cornrows if the hair is long enough and if you can actually manage to do That now, what you guys are going to see me start doing is start to sew my closure down. This is the only part of the wig that i hand so because i'm gon na you know machine stitch. Everything else so yeah just ensure that your closure is fitted in a way that you know it's gon na look good and then you're gon na start sewing the closure down. I used um regular fabric thread for this portion because i really couldn't find my hair needle, but i would recommend using hair thread and a curved hair needle um. I didn't really go too in depth with the sewing portion, but you know when you stick your t. Pins in and you measure your closure and everything just stitch it down to the area that you basically fitted it to, and you just want to stitch it nice and neat, no bumpy lumpy stitches. Just you know nice and neat, and then, when you do that, you just want to snip your thread off and just like that. The first part of your closure wig has been completed. So i'm going to go ahead and take it off the wig stand just to give you guys a closer up, so you guys can see what it basically looks like, but you know there was really nice neat stitches. You don't want to rush this process, especially if you are a beginner like myself. You just want to take your time. You might, if you need to like redo it. If it's not done properly, i mean there's no rush, so you can always just take your time and focus on just getting it as perfect as possible. So now it's time to do the guidelines, i'm going to show you guys, two techniques, so one you can use your tape measure and you can just go from the the end of the cap and you can just go one inch apart. Just make a dot at every inch or you could do what i did and do two finger spaces apart um. But you know you just have to calculate it, based on how many bundles you're gon na use and also, if you're, gon na double your wefts. So as soon as i do that i'm gon na go in with an eyebrow pencil, you can use a sharpie a pencil. Whatever is comfortable for you, whatever you have and you're gon na use, those small dots and you're gon na make some marks to the side. So yeah that's basically self-explanatory, so you use the tape, measure or the finger method and you just decide where the guidelines are and you kind of start mapping out where your bundles are going to go. You want to give it a bit of space because you don't want it to look. You know too lumpy, especially if you are going to go ahead and, as i said, double your wefts, but this is what my um guidelines were. Looking like they're a bit messy they're, not perfect. As i said, this was my first time girl. This was my first time so i'm to go ahead and show you guys the wefts that i'm working with it's it's really really thick. So that just means that it might be a hassle to sew them together, but anywhos for sewing together you're just going to pinch your wefts, you know side by side, you're, just going to place them side by side and use your fingers under the machine to just Hold them together, as you stitch along, as you guys see me doing in the video, so i watched so many videos and, like nobody, really explained how difficult it can be to just stitch the wefts together. So when you put it on the machine, you just want to use your fingers and guide it along. You also want to use a zigzag stitch, because i find that it just does the um the job better, but that that's what works for me. If, if something else works for you, then fine, but, as i said just pinch, your whiffs together put them side by side pinch them together, as the machine sews just guide it along, so that it sews properly um and yeah. Just continue doing that until you get to the end and you guys are going to see me press down on the reverse button on my machine. That is just to basically tie the knots together. You know secure everything in place, so i know the wefts won't unravel and my scissors is is like really really dull. Don'T even watch that, but this is what the wefts are looking like. They are stitched together and they are ready to make the wig. So here we are about to go and sew the wig on the machine, so you guys see the guidelines and everything. As i said, if you have the chance to braid down your frontal, please do so. I just like to sew my frontal on first um, then you're gon na put the hair basically on the guideline. Just like you did it on the mannequin and you're gon na start stitching again, i did use the same zigzag stitch that i used to sew. My wefts together at first, can be a bit difficult, but i mean you got ta, forgive yourself and just keep going. That'S what i did. I mean guys, i'm not gon na lie. My wig took me like a day and a half to complete, but it was so worth it. So yeah just put the hair on the guideline and start stitching. You want to make sure that you keep the stitch or the mushy needle close to the weft, because if you know if the weft is far away from the needle, then it's going to kind of shrink. The cap. I don't know how to explain it, but just keep the needle on top of the weft, because it's a zigzag stitch. It'S gon na go from left to right. So you don't want it to have to stretch too far out in order to grab the weft and then you know just shrink the cap, because it's gon na have a tighter amount of space to grip. It kind of sounds confusing, but i hope you guys get what i'm saying so. Yeah you're, just gon na keep doing that for all your guidelines and as soon as you get to the end off, you know one of the guidelines you're going to cut your hair you're, going to cut the hair and then you're just going to keep going. So after cutting the hair, i still use it. I use it in the next row, so don't be thinking, i'm i'm wasting any hair. No, i put it on the machine again and i just keep going and going and going until i get to the top. So i'm gon na, let you guys watch that for a sec um just so you can see what i've been explaining. So also you guys, while you're sewing the weft to the cap, you want to sew very very carefully because you don't want to accidentally sew um. Anything on the cap, for example, you don't want to sew one side to the next. You don't want to accidentally sew a piece of hair, so just keep like checking. What'S underneath just so, you don't sew, you know you don't sew anything, that's not supposed to be sewn, so yeah. We got to the end of that so snip snip, and this is what the inside of my cap looks like um for a beginner, i'm pretty proud of myself. Of course, you know you have to go back in and clean up your work, so you want to snip away at all the excess piece of thread um. Just anything, that's not supposed to be. There just go ahead and snip that away you. So my favorite part is actually cutting away the closure. I always well i'm gon na say always. This is my first time i would recommend, leaving it until the last part of the process. When you have everything sewn together, that's when i would recommend cutting away the cap so basically you're cutting under where the lace closure is um. You guys can see. I do have some. You know some mishaps with my stitching. That'S what i was kind of explaining that you know when you don't have the weft close enough to the needle it kind of stretches. Oh and just you know it just doesn't look as it's supposed to, but this is what my wig looks like with that piece cut off. I'M so proud of myself guys it looks. It looks good. It looks decent. So now i'm gon na go ahead and add some combs to my wig. I actually bought these combs like 2017, 2016 and they've just been sitting in my room, so pretty excited to actually finally use them. I'M gon na be taking some regular, regular fabric thread and i'm gon na go ahead and use that to sew the combs into the wig. So, to be honest, i'm not using any special types of stitching, just regular stitching to make it secure and the part of the wig that i sewed the clips to is basically the top of the band. So on the inside of your wig. You guys are going to notice that there's a bun going all the way around. I don't put the clip at the edge i kind of put it closer inside to the top of the band and yeah guys. This is what my wig is looking like. I did do some, you know some baby hairs off camera, but i haven't done anything to the wig i haven't plucked it. I haven't cut the baby hairs. These are the baby hairs that the hair actually came with. I did go ahead and add some water and conditioner though - and this is what she's looking like this - is how she's coming um i'm so proud of myself. I definitely hope that you guys were able to learn something from this video. If you enjoyed this video, don't forget to give it a big thumbs up like comment share and subscribe and i'll see you guys in another video bye,

Comments
Rebecca Sarah: Them clothing and textiles classes came in handy lol. Tbh This is really cool. Looks way easier than I expected
Kimel’s Journey: Nice!
Anthonette Brown: This is so cool
Fu DIYs: wow, it's good