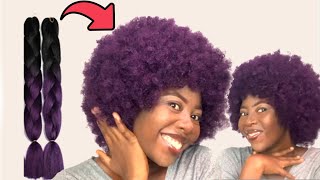
Too Broke For A Lace Closure? Fake It! Affordable $20 Diy Wig Tutorial
- Posted on 26 March, 2020
- Lace Closure
- By Anonymous
In this tutorial, i showed how to do your own lace closure step by step in 1hour. This tutorial is very detailed and very easy to follow. I hope it helps someone out there. If you enjoyed the video nplease make sure to LIKE,COMMENT and SUBSCRIBE to my channel, THANK Y'ALL and GOD bless.
#noclosure#howto#makeawig
Hey guys welcome back to my channel and thank you so much for tuning in for today's tutorial, if you aren't old subscriber. Thank you so much for coming. But if you are new to my channel, thank you as well for tuning in please do make sure to click on the subscribe button and also put on your notification bill. So you don't miss any update from me so for today's tutorial as you've seen earlier. That is the week up WZ and I already wrapped my mannequin edie with nylon, and this is the hair that we'll be using for this tutorial. So after that, I started off by measuring what I would need at ago, and after that I applied my bungee glue on the weft of the wave one. You don't want to do these too much. You don't want to put too much bonding glue on it. If not, everything will look messy or you just want to do - is that you apply just a little bit on the weft just on the width then after applying needs. I went I to glue it on. I'Ve been dreaming about to waking up in my so much so this is the last head that will be gluing down like this and most of the air we use have double waves, as you can see so I'll. Go ahead and split this one into two, then, after splitting it into two I'll just go ahead and cut it into smaller pieces, and I will start doing it sounds like bees doing your lace. Closure yourself is so easy. All you just have to do is just to watch this tutorial and follow. You don't have to stress yourself about it. It'S so easy, just watch and follow, and I'm sure you get what I'm doing and after that I cut out smaller pieces and now use my bonding glue to hold it down like that. That'S how it comes out, then, after that I will open it up like so, with my hands comb it thoroughly and after community I'll go ahead and use my hair straightener to flatten it out, make sure you flatten it very very well and after flattening it out. I went ahead to use my Bondi glue and my girl to be blessings free to glue it down onto my wings, just trying to make sure that it is well secured and make sure to apply a little bit of pressure so that it doesn't come out bulky. As you can see, it's a really really nice finish like it's really really neat, and it's not bulky at all, so just go ahead and comb it thoroughly so that everything be seamless. Can you see that guys can you I went? I had to cut out the west's of my wheel after Cocinita, I combed out the flyaways and then I'll be using this small crochet hook for eight and I'll just start ventilating. My Week cup, like so very very easy. If you are good at crocheting and yo yo D - hey you are using is long thing yeah good to go. This will just be a piece of cake for you. I'Ve been dreaming about picking up put you in. I can do so much for you so much when I was done with hey. I went ahead to use my color to flatten the top of the hair and to make all the flyaways relax, because I used the shutter piece of hair at the front pad and that's just what I'm doing. Hey guys - and this came out really really really really beautiful like. I was really really proud of myself for doing something like this. It'S really really nice and when I was done with the head, I took out the pins the three pins I used to fold it down, and then I took off the cap from the mannequin head to read out the nylon that I used for the week. I wasn't feeling the cause of the hair up, so I wasn't feeling the hair, texture and yeah. I wasn't feeling it at all, so I did something beautiful to this. Hey like I did something really really cute too this week. So if you guys want to see what I did to this week, how I changed this week, how I transformed this week, how I roughed this week I'll be showing you guys what I did to this week in my next upload, so make sure you don't miss Out on that, thank you guys so much for watching. I hope you enjoyed this video. If you did. Please me a big thumbs up, comment down below and also share my video with family and friends. Thank you guys once again and see you in my next one
Comments
TildaCL: Love it Ola❤❤ thanks for sharing this wonderful technique and looking forward to seeing how the final look turned out
Zoe Wora Tangui: Thank you so much it's so simple i Will try it
Lll Andp: Very nice, where’d you get your hair for that price?
Enam Perdlaine: please can u drop a tutorial on how to use that ventilating pin
PHUNKYFIED: Love eet.
Deedee: Great technique! Please what weave did you use?