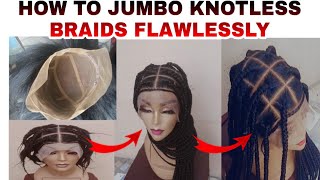
Diy Closure Wig Kit | Hair Included Under $80 | Janet Collection Ez Diy Wig Kit
- Posted on 15 June, 2020
- Lace Closure
- By Anonymous
DIY Closure Wig Kit | Hair Included Under $80 | Janet Collection Ez DIY Wig Kit
Follow @janetcollection on Instagram:
https://www.instagram.com/janetcollect...
Purchase products here:
https://www.hairstopandshop.com/shop/p...+
♥️ LETS CONNECT
IG: @thekeyisme_
SC: thekeyisme
BUSINESS INQUIRIES
MUSIC
Epidemic Sounds
DISCLAIMER: I don't own the rights to the music.
FTC: This is a sponsored video. The reviews are always 100 % of my own.
And what's up y'all, it should girl the keys me - and I am back again with another video in this video. I'M going to be doing the easy DIY wit kit from Janet collection, I'm going to be showing you how to make your custom-made wigs at home. You get everything you need inside of a bundle pack for an affordable price for you to complete a look. So, as you can see, this is the pack that I receive. This is going to be a hundred percent natural version. Human hair, the hair comes with everything that you're going to need for you to style, for you to create the way it comes with your actual needle and thread it comes with your t. Pin it comes with the wig cap as well as some glue for you to glue the lace down at the top. When you are done. Not only does it come with all the accessories and tools that you need for making a wig, it also comes with your closure or frontal. If you decide to choose a frontal or it comes with your four by four lace now I chose the lace in three bundles. I have the body wave and not really sure of the inches, but I'll make sure I put the introduce now in the description box below here. You'Ll see me working on a 22 inch. Circumference canvas block, I pretty much have every size, so the 22 is what I felt the cap fit the most, I'm actually a 23. So I could definitely save. The cap was a little bit too small for my head, but you're just gon na go ahead and pin that down as well as the closure get that in place. I like to pin it down with the T, pin so that you know everything is intact when it's time for you to sew now I did mention that you do get thread inside of your box. However, I did not have any thread inside of mine. I'M sure this was just a mistake on Janet collections in I could have said something to them and I'm I'm more than positive that they would have mailed it to me. But for me I make wigs for a living, so I have all of these other stuff. In my house already, so I'm just going to show you the thread that I use and you're just going to go ahead and sew. The actual closure down is really easy, really simple: you're just going to go in and make sure the placement is good, and then you will be good to go when they start when it's time to start sewing. You also want to make sure, like maybe every five or six stitches, that you go ahead and wrap the thread around the needle to create a knot. This just further ensures that the closure isn't going to go nowhere all right, so I think done with the closure. We'Re gon na move on to the actual sewing the bundles part and I'm gon na be honest with y'all I make weeks on a sewing machine. I have not made weeks by hand in almost two years, so this was news for me. However, I wanted to do it for y'all. I wanted to show y'all how it's done so right now, I'm just gon na go in with a marker. This basically helps you with your guidelines so that you know exactly where the tracks are going to lay so you're. Not guessing what the spacing is you pretty much already outlining everything for yourself, so you can easily maneuver through making the wig and you're just gon na. Take the tracks together to me using the T pins that they provided you. It helps a lot better to secure the hair in place before you start sewing it in. It definitely helps and you're just going to stick the needle through the beginning portion the beginning portion of your bundles, and then after that you don't have to skip this. You don't have to stick the needle through anymore you're, going to loop it through the actual, the actual tracks and then you're just pretty much just sew it on the cast is really easy, really simple. If you need a more in-depth video on how I sew my tracks on my wigs I'll, definitely put it down in the description box below, however, janna collection does have a manual inside of the box. That basically step-by-step shows you what you should do as well. As I didn't even I'm reading it now and it's crazy because I didn't realize that the glue that they gave you in the pack, you can actually glue the tracks down too. You don't have to sew them. So it's basically like they're, giving you a two-in-one option that you can either sew it or you can glue it, and I absolutely love that this is the wig after we finished constructing it. As you can see, this is the inside of my wig and what it's? Looking like very neat and put together and you as you can see, we're going to go ahead and cut the excess cap off so that we can expose the actual lace, as you can see here and after that, we're just gon na go on to styling. I'M just gon na go in with some heat protectant spray. We'Re gon na lay this hair down with my hot comb. I'M telling you I cannot do life and wigs without a hot comb. It makes everything so much better and, as you can see, you're going to see some steam coming from the top portion of the hair, but I promise you that's because of the product is not because of the hair. This hair straightened flawlessly. So I'm just going to stop rambling, I'm gon na, let the video play and I'm gon na catch up at end of the video. So while I'm straightening my hair anytime, I'm straightening hair, I definitely like to use the comb chase method, so you're, just gon na take your comb and you're gon na put the flatter on top of it and you're going to straighten the hair to me, it works. So much better because you don't have to put too much heat on the hair one little swipe down the actual strength of the hair and you're good to go. As you can see, look how straight this hair gosh, I'm just gon na - do that throughout the whole head and then you will see the finished look. I also have a video showing how I install this week using the water resisting ich igloo from Janet collection. So if you would like to check out that video I'll definitely link that in the description box as well, thank you guys so much for tuning into this video. If you could please like comment, subscribe and share, and I look forward to seeing my next video and if y'all hear my voice, I'm telling you it's like one o'clock in the morning, I'm trying to get it together, just drunk me a little bit of tea. So I know it's about to put me to sleep in a little bit, so I apologize but yeah. I thank y'all so much for tuning in


Comments
Sheila: Wow that wig looks fabulous! You are very good in your craft!
Linda Turner: OMG. This is absolutely genius. Great job What is all the products u use on this unit.
Miss Empress: And the bonding glue (well at least the one they sent me) was trash! Straight up water, it took 30 minutes dry w/o heat & 10-15 minutes with heat
Miss Empress: You posted this as soon as I finished sewing mine. We is synced lol❤️
Sabrene Edwards: Do you bleach the knot?
Nashoni Simpson: Nice work
Miss Jenn: are u selling it ?
Samoya Patterson: Where is the video and of the install