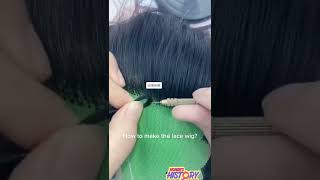
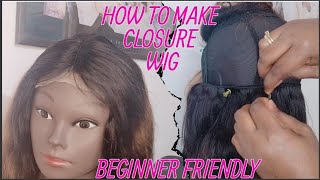
Detailed How To Make A Lace Closure Wig| Beginners Friendly.
- Posted on 26 September, 2019
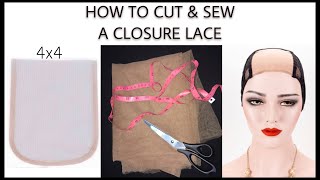
- Lace Closure
- By Anonymous
OPEN ME
.
.
.
.
.
CONNECT WITH ME ON SOCIAL MEDIA
INSTAGRAM: https://www.instagram.com/sethuvali/
TWITTER: https://twitter.com/sethuvali
------------------------------------------------------------------------------------------------------
Check out my Spring Summer clothing trend video
-------------------------------------------------------------------------------------------------------
Be sure to subscribe, like and comment.
#laceclosurewig #beginnersfriendly #roadto1k
Hmmm welcome back to my channel to get barley. So, as you can see today, we are making a week and right now I am just flattening in the closure all right. I don't know who told you that you need to get started with the way you like. The bundles, at the back before you start with the closure. Well, the person was just fooling you, my god. The only way that you could properly make a week is, when you start with your closure and make sure that it's in the right position and on the same level so right now, I am suing it down and I started with pinning it down. But I don't have pizza, I was using needles and well, it works okay. So with my needles, I pin on the four corners of the closure, which is two on the front and two at the back, and then I make sure that it's in the same level and that everything is flat. And then I start suing down. As you could see, as I go on, I remove the needles and then in order for the hair, to be easy to clip down and to come easily, I sprayed it with water, but but then, apparently I didn't record that part when I was combing the closure And I'm flattening it die, but I did use some water too. Oh my gosh, look at my nails. I did not know that there was this bad oMG, but then hey, but, as I was saying in order for you to make sure that the closure is easily calmed and controllable, I use water to just control. Everything. Water is like you guys, even with here like if you want to control your hair, just use water, and then I use the Clippers to make sure that everything is are put together, so that I can see the part that I need to sue. So, as you can see, I am sewing down the gray parts of the closure. Make sure that you don't sue down the part that has got here in it, but the gray parts the little grey lines of the closure - and this is actually very easy. But I just wanted to like show you guys how I flattened down my closures and how I I make my views especially this week, because it's the first time for me to wear it and like people have been asking me on Instagram with how I make my Muse because, apparently it's very flat, so I'm showing you guys how it looks like when you're making it and it's not as glamorous as it looks like on Instagram. It'S actually a lot of work, but very easy, and if you like it, you enjoying it as you can see how I comb the hair, it's very easy when your hair was sprayed with water. Just like everything see how I remove the pins and make sure that sometimes when you removing the pin and then it loses the position so as you can see here, I'm struggling I'm trynna, I'm trying to pin down the the weave I gained. Oh my gosh look at my hair. Oh my lord, oh jeez, Oh bear with me the bear mean he as you can see. Yeah. I am trying to pin down make sure that it's flat because most of the times I was listening to music, you guys, I'm sure my parents almost ate when you pinning it down and then you trying to like shoe it down and then you remove the pins And then and lose the position and loses the position and then you need to like go back and pin it down again. As you can see, I was struggling with that one in front because it didn't one - and I said let you need to take note of that. You need to make sure that it doesn't like go up in musting, because you'll find that, like when you're done and actually a fee, if, if you're showing it and then it keeps on going up and it doesn't flatten to our - and maybe the painting gives a Removing and then you're gon na find that it's going to be it's gon na look like a hill up in your head, and you don't want that. You want so it's gon na feel flat and in the right position. I want to say that it doesn't matter if your closure is not straight, but it does, it really does. I wish it didn't, but guys it's very important, that your closure is straight and everything is level, you don't want CQ and you can lose okay, girl and listen you're, just swinging it all round, and you need to start okay easy as that mm-hmm. I know it most people it's very intimidating to like make a closure, because it seems impossible to make it. It seems difficult because it's a closure, but it's not difficult at all. Literally, it's not it's very easy and I enjoy making weeks you guys these. This is one of the things that I do in my life mostly, so I really do enjoy it. Okay, so before I cut out the thingy, make sure that you don't cut you hear I before I cut it out, I make sure that I I just like cross cross sue the woohoo. I don't know I just like, but make sure that it's kind of a firm. I hope you get because that really I can't explain what I did there, but you saw what I did with that closure. So off-camera I did through the week from the back, and I just wanted to show you how I saw it down all the way up to the closure, and I just going to give you some to you in this video K. So this weave is 20 inches. But the closure is 10 inches, so yeah you have to condition it washer to nan help blow-dry it so that everything just blends together and then iron it so that you make sure that it's flat, even though I am going to show you some tips on how To like make sure that it's flat as you swing it out, but still you need to make sure that you are straighten, learnt and blow dry it so that it like completely get straight and flat. Ah, I did buy it at cheapest G prices, an online store that I discovered on the internet months ago, and when you get their contacts they have a watch up contact that, like you, communicate with them via whatsapp and that's one of the things that makes them Really reliable and like free shipping like it's so affordable because of that and yeah okay. So now I am going to cut down the black lace of the wing cap so that I leave the closure to be visible and I'm also thinking of attaching an L spend on the sides of the wheel so that it doesn't move easily. And it looks like it's a part of your head darling, thin, that's the end of the tutorial. You guys. I hope you did enjoy it and don't forget to subscribe like and comment Shea, and I love you.

Comments
Nothando Magagula: I've been meaning to make my own wig, I always found inserting a closure difficult, now with practice I'll know how too, pls make a bid of how to sew a ear to ear closure
Minenhle Ntanzi: The closure part always gets to me, but great video❤
Lonwabo Mnyamana: Wow you really know your story