How To Secure Your Wig Using Wig Grip And Wig Tape
- Posted on 25 January, 2019
- Lace Frontal
- By Anonymous
If you are interested in purchasing any of the wigs or toppers that I have reviewed or will continue to show on my channel, check out my new online store! https://tristastresseswigs.com/
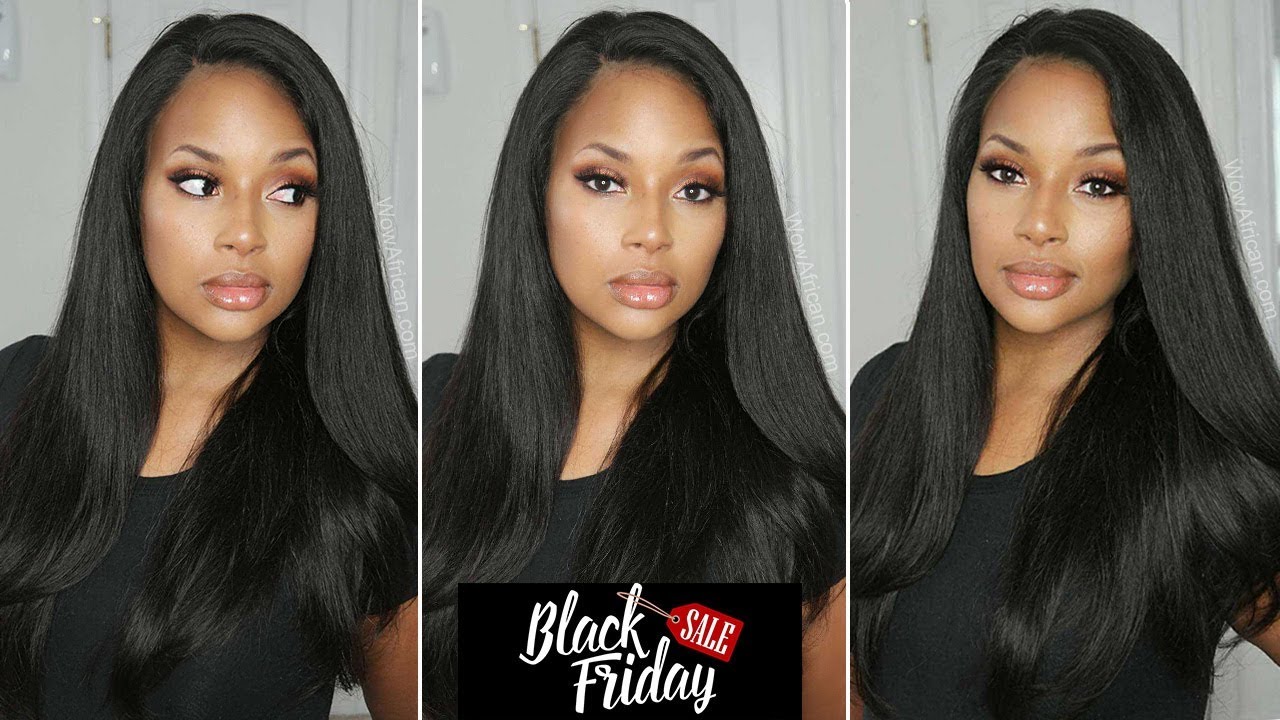
Brown wig in the beginning: Jon Renau Sarah in color Hot Cocoa
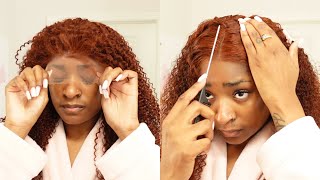
Red wig in video: Jon Renau Alessandra in color Strawberry Syrup
(I have cut Alessandra into a bob style, she starts off much longer)
This video is entirely based on my own personal experience. Please feel free to ask my any questions and I will do my best to respond to you in a timely manner. The best and fastest way to reach me is my Facebook page which is below. Feel free to shoot me a private message.
My Measurements:
Circumference: 21.75 inches
Front Hairline to Nape: 12.5 inches
Ear to Ear Across Forehead: 11 inches
Ear to Ear Over Top: 11.25 inches
Temple to Temple Round Back: 14 inches
Nape of Neck: 5 inches
Neck Length: 4 inches
Forehead Size (Hairline to EyeBrows): 2 inches
Hairline to Chin: 7 inches
My Facebook: https://www.facebook.com/tristastresse...
My Instagram: https://www.instagram.com/tristastress...
Recommended Wig Products:
My Eyelashes
Walker’s Blue Wig Lace Front Tape:
Got2Be Glued Black
It Stays Roll On Adhesive
Helen of Troy Hot Air Brush:
My Steamer:
Jon Reanu Steamer:
https://www.wigstudio1.com/products/wi...
Simply Styling Silicon Silk Spray
Simply Styling Silicon Serum
Milano Standard Wig Grip
Milano Wig Grip Cap
Milano Wig Grip Cap Lace
Milano Wig Grip Standard Lace
GEX Wig Grip Band:
GEX Heavy Duty Wig Head Tripod
Cork Canvas Block Head
Wig Closet Hangers
2 Pack: https://amzn.to/2RFzD4F
4 Pack: https://amzn.to/2uFJdeE
5 Pack: https://amzn.to/2t9iJSv
Thinning Shears
Cutting Shears
Wall Wig Hanger 2 Pack
Scar Away
Jon Renau Shampoo
Jon Renau 4 Piece Synthetic Hair Care Kit
Jon Renau Combs
Estetica 6 pc Synthetic Hair Care Kit
Video Setup / Equipment:
Camera:
Canon EOS M50 Mirrorless Camera
Lenses:
Canon EF-M 22mm f2 STM Compact System Lens
Canon EF-M 32mm f1.4 STM Lens
Camera Tripod
Grey Card
Box Lights
Ring Light
Shotgun Mic
Shotgun Mic / Tripod Pack
Lapel Mics
Hi beautiful and welcome back to my channel today, i'm coming to you with something completely different uh. I am not doing a wig review today for you today. I'M actually going to be doing some tips and tricks on how to make sure that you keep your wig on all day and completely secure to where you don't have to worry about it at all. So if you like videos like this and want to see more, please make sure you hit that like button as well as make sure you hit that subscribe button below. And, of course, there is, if you want to be notified, a bell icon below as well, that you can click on to be able to be notified anytime, that i post a video. So let's get started um. The first thing that i do when i am looking to secure my wigs is: i wear a wig grip, a wig grip that i wear. Let me go ahead and put her up real, quick, the wig grip that i wear is from a company called uh. I'M going to murder the name, i still don't know how to correctly pronounce this bow g b e, a! U g e, boujee, bungie boji, something you see it here. I got it on amazon, um, wig grips so the way that they function is they're meant to be wrapped around your head, as you saw it on me a second ago and as long as you're putting it on the right way, and the right way is how I had it on where this label is facing the correct way up if you're looking at me so like this, this is how you want the label to look when you have it on. The reason for that is that it has this velvet material that is purposefully sewn in in a certain direction on both sides on the back, it's sewn in going this direction so that when it's on your head, when it's on your head, it doesn't slide off your Head as you push it, it's not going to slide in this direction. It'S it's sewn this direction here so that when your wig is on you're, getting like this counter friction and that's how your wig stays on. It'S not going to slide off your head that way. So it's very important that you have your wig grip on correctly. If you have it on inside out or if you have it upside down, this is upside down that feels weird put it on. If you have it upside down, look it just slides right off like it's right off my head. So if your wig grip is sliding off, you might have it on upside down. So what i do before i put on my wig grip. Is i prep my bio hair so skip this step? If you don't have any bio hair, but if you do there's a certain way, i prep my bio hair to make sure that my wigs are going to stay on securely. Let'S talk about anatomy, so put a picture up here of a head for an occipital bone. Some of us have flatter heads than others. If you are blessed to have a nice round head, then you probably don't have a problem with your wig sliding up in the back. But if you do have a flatter head like i do, then your wigs will actually ride straight up in the back. If you have your hair secured in the wrong place, some people put their hair up here and when you do that, if you have a flat head, your wig is just going to ride right up. If you take your hair instead and you put it in a low ponytail or a low, what i like to call long bun, then you can keep your wig secured and also have your your hair hidden relatively well. So i'm going to turn around to show you what i mean by long bun. So what i do here is i take my uh scrunchie and i pull it almost all the way through to the end, like i'm gon na make a ponytail, but instead, if i do it right, but instead i stop and then turn it into a bun. But my bun isn't a little bun, it's a wide, long bun, and the reason why i want it to be that way is so i can tuck it underneath my wigs to make a more flat appearance back here. However, this part here is sufficient enough with the wig grip to keep your wigs from riding up in the back up through the top of your head. So that's the first step i take. Then i secure my wig grip when you put your wig grip on. Don'T put it here, don't put it right on your hairline start just a little further back from your hairline and the reason for that is, if you have it too far forward, you might find that your lace fronts are starting to lift a little bit. You want your lace to lay flat on your scalp on your forehead here. So if you have this too far forward, it's going to be propping it up, and that will have your your lace, lift so just push your wig grip back a little bit. If you have it on the correct way, it's not going to slide okay, so from here. The next thing that i use. If i really want to make sure that my wig is staying secure all day, i don't do this every day. So most of the time i'm just wearing a wig grip, especially if my wig has bangs and no lace front. But if i have a lace front and i'm wanting to kind of pull it back away from my face and that lace is going to be exposed. Then i use walker's lace, front wig tape, this one's blue. They also make a red version. The red version is not for lace, fronts, so make sure you get the blue one from amazon is where i got this one i'll have the link in the description as well. What this does is a double-sided tape that allows you to be able to take your lace fronts and stick them to your head word of caution. If you are wearing makeup, where you want to adhere it, i definitely recommend removing that makeup or maybe putting on your wig first before you put your makeup on. You want this to be adhered to clean dry skin. So, as you guys can see, i have turned my wig halfway inside out that way. I have this all exposed for me to tape. My lace tape to the first thing, you're going to notice that might be a little bit different than yours is that i have this notch cut into my lace. The reason for that is, i have a widow's peak and i have to make sure that my lace is lined up directly with that widow's peak, or else my forehead will be too small. So i literally cut this little tiny notch in my lace to make sure that i always know where to line this up on my scalp. That also helps me to apply my tape a little bit easier. So just take a little bit off. I take about that. Much and i apply it to either side of my little notch here, where i do not have hair on that particular part of my hairline. When i put it on, i want to get it as close to the edge of the lace front as possible, but i do want to leave just this tiny little ridge right there. I don't want to get it right up on the edge that particular part of the edge of your lace is quite fragile and you don't want to be tugging on that get. My second piece here, oops this one's a little bit longer, not a big deal, but it's a little bit longer, and i just put that on the other side of my little notch that i placed here now, because i did get this a little bit longer. I might run into the issue of some of this getting into my bio hair. If that happens, it's not that big of a deal you can get the leave it alone all day and then use your adhesive remover later to remove it. So after you've gotten, this applied you're going to simply peel off this backing. Now, if the, if the tape wants to start peeling off with it, what you're going to do is press really firmly here on your tape and then start to peel it back and it'll start coming off by itself. As you can see, this paper is being removed and the tape is left behind press firmly peel it back and it starts to come apart all by itself all right once you've got this you're ready to apply it so i'll meet you back up top. So now that we have our tape secured on the lace front, we're ready to go ahead and apply when you're doing this make sure you're very careful not to get any of the hair in the tape, or else you're gon na have to peel that back one By one and that's not any fun, so let me go ahead and put this on for you and see i'm just going to tuck in my little bun here under in the wig and stretch this over my wig grip. You do have a window of time where you can adjust this and not have to worry about the tape getting stuck in a permanent fashion, so go ahead and adjust it where you need it to be, because i have my notch. That'S relatively easy for me to just go by my notch and then once i get it where i want it to be, i'm going to start in the center and press out like that, press it nice and flat all right now that i have that on. That'S usually where i stop um, i'm not really worried about this thing. Coming off my head at all, and especially when the hair is down like this, you really can't see the lace front. You can't see any tape. It just looks like my hair, at least i hope it does. It does to me. So if you can, you can still see my lace. Let me know in the comments, but i can't see it at least not in my mirror. However, if i was going to take my hair and put it in, let's say a little poof on top of my head, my lace front might start lifting just a little bit and i'm going to show you guys how to fix that. So first, let's get all this hair out, so you guys can really see that lace. I wear my hair like this a lot, especially if i'm gon na go to eat um, because now there's nothing in my face so uh. If you have lace fronts, you can do this, but you're gon na need one other thing, because i cut a notch. Let'S see if you can see it, because i cut a notch for my widow's peak here, you can see that the lace is starting to lift just the tiniest of bits see that comb. You can fix that, though, with hair gel. This has got to be glued in the blue, i'm blue! Okay, sorry, i don't know: colors got to be got to be glued in the yellow container um. This is the styling spiking glue. It does come in both the yellow kind and the black kind. I actually prefer the black kind. I don't have it right now, because it dries completely clear. So i recommend the black one get the black one, but i have yellow for now. So we'll use it for things that are just lifting just the tiniest of bits and you just need to fix a little tiny part. I'M not going to try to go in and put another piece of wig tape, i'm going to use something like this. Now, if you're not like me and you don't have a widow's peak, you could just take a piece one piece of tape and stretch it all. The way across and then you don't have this problem, i have um and completely ignore that if it's not happening to you, but if you do have this little tiny piece, that's lifting just grab a little bit of got to be glued. Put it on the end of your comb here and stick it right in where it's starting to lift like that, then you're going to push it down until it dries. So i just came back uh from charging my battery the battery died on me in the middle. So this has actually been drying. I left my hair on everything on for you guys, even my eyelashes um, i left everything on so i could show you exactly what it looks like when it does dry. So, as you can see where this was lifting before this is now completely uh flush, it's not going to start lifting off um and i can move this around like it's not gon na. It'S not gon na come off anywhere between the wig tape, which is doing the majority of it. This is this is what's holding the majority of the hair on. This is just holding things down for this tiny little bit that was lifting here, but this guy's hanging onto it and then underneath most of the support is coming from the wig grip underneath. So i'm going to go ahead and take this off and i want to show you guys how easy it is for you to remove these uh and how you're going to make sure that you don't hurt any of your bio hair from doing this. So the first thing that you're going to need is some kind of remover, so you've got either like a genre, jon renau, adhesive remover or you could use what i use, which is just plain, isopropyl alcohol. This is the 91. I just find this to be much more cost effective and it it's like 70 cents in comparison to the other products. So this works just fine. The other thing you're going to need are q-tips, so be very careful when you're doing this. If you are using alcohol not to drop your q-tips inside, i unfortunately do have a couple of floaters down there. So rest in peace, q-tips, so go ahead and get your q-tip soaked with some alcohol and what you're gon na do is. You are going to start at the end where it is exposed and just kind of set it in there and honestly. I leave it in there for just a second and that's really working on some of the adhesive and then just start going in and out, and what i like to do also is to take my q-tip and roll it so in and out to start. And then i start to roll it across if you start to feel any type of resistance, you might have some hair in there so be very careful and don't rip your hair. Just lift this a little bit start again until you feel that resistance, and just slowly start to go across this is it'll, be really stuck when you, when you've had it on for a while, like i've had it on for like three hours. While the battery was charging um it'll start to get really stuck, so this will just be patient. It'S going to take a little bit of time, then i like to get up back in here, because this, if you can see the q-tip in there to make sure i'm not getting in my bio hair, you can see these dark brown strands. That'S my hair! There. You go that got stuck and i'm just being very careful to make sure i'm not ripping any of my hair so because this piece that i put on was a little bit bigger, it did get some of my bio hair. It'S not a big deal. Nothing'S going to get ripped out, so i am completely removed from this piece. I'M gon na start on the other side, just get more alcohol as you need it a little bit harder to do this. Looking at a viewfinder of camera and just very carefully work. Your way through until it completely releases all right, i'm completely released now so back back up again and take it off. So it's as easy, as that, as you can tell, i didn't, lose any bio hair. I mean, let's be real. I don't have a lot to begin with right there um, but the tape is still attached to this, so we need to take this off. So here is the tape that needs to be removed, and i also want to call your attention to just this little white spot right here. This is what i was talking to you about. With the got to be glued gel. It does dry white. Now you couldn't see that when it's on my head, but once you take it off, you can start to see that um. So you have to make sure to remove that as well. So what you're going to do is you're just going to get a little bit more of your alcohol and your cotton swab, and the first thing i do is, i start first off to just start putting some of that alcohol all over the tape. So now that you've got that off, you're just gon na start on one end: yeah, i'm gon na have to use water to get that off. Um you're, just gon na start at one end here and start to lift up the corner. Okay, now that you've started it you're simply going to hold on to one side of the tape and just go back and forth with the alcohol. You need quite a good amount on your q-tip. Just go back and forth with the alcohol like this and that's going to release that adhesive, i'm not tugging on the lace, i'm not tugging on the tape. I'M just applying a little bit of pressure to the tape as the alcohol is removing the adhesive all right. Hopefully you can still see it. This is a very large piece. I don't usually use this much tape. This is the one i accidentally got too much on it. Okay, so there's your adhesive and there you go so both adhesives are off. As you can see. There'S no damage to the lace front at all this little piece here right on the front. That'S a little frayed! That'S been there oops! Sorry, this little piece on the front. That'S a little afraid! It'S been there for a while that happened. Whenever i cut the notch in there, but there's no damage to any of this lace, the alcohol didn't hurt the hair at all. Um. The lace front is perfectly fine. It'S just this little bit of white. That'S left over here from the got to be glued that'll. Come off with water, okay, guys so uh. I really hope you enjoyed this video. I hope it was informative. I hope you found it helpful um again, these are just my opinions. This is what i do. This is what i found works, the best uh. I did this for my wedding and i had absolutely no problems. Uh, it was, i was super sweaty. It was florida. First off i got married at floor in florida. We went outside for our photos and we were out there for probably a good 45 minutes to an hour posing and doing different photos at no time did my wig budge at all. I was sweating so that walkers this walker's table will be just fine through sweat. I'Ve heard of plenty of other people that use it when they actually go swimming and they keep their wigs on. So i think you're perfectly fine, it's not really water soluble. It does require something to actually dissolve the adhesive like alcohol, so you're. Fine. This, however, will dissolve in water. This does start to get slippery whenever it gets wet from your sweat. So just be aware, they are better for different things. There'S also other glues out there. It stays is one that people like a lot. I'Ve never used it again. I find that the tape works the best for me and then the hair gel in a pinch yeah. Let me know in the comments. If you have any questions, i will do my best to answer them. If you have any other questions about other topics for wigs that you have questions on, please drop those to me as well. If you have any ideas for a video you would like to see in particular, please let me know i do have a couple. Other videos coming up one is how to steam a wig, how to wash a wig, how to use fabric softener on a wig uh, as well as how to make a wig cap smaller. So i do a few more things in the works uh, so just stay tuned, uh, hang tight and remember to subscribe below and to hit that bell, icon and that'll make sure to let you know every time i post a video. So as always, thank you so much for hanging out with me today beautiful and i hope you enjoyed it.


Comments
Carolyn Cucinotta: This was extremely helpful, thank you for taking the time to help others like me who are new to wigs. We seem to have similar head shapes and widow's peak and level of hair loss, yet I have not had any luck with my wig grip - I think I've been using it wrong! Gonna try again tomorrow. Thanks again! You're great. :)
B. Pink: Thank you SO much, I'm new to wigs, and you have taken alot of anxiety and fear out of this new chapter in my life. Very clearly presented and down to earth, you are a beautiful person inside and out for sharing this with the world! Many blessings to you! :)
Eileen Davinroy: Trista, I’m new to wigs and found actually seeing how you applied the tape and step by step how to remove it very helpful! Thank you!
deborah page: Thank goodness for you and your videos! I have to wear my large topper for my daughter's wedding and was stressing about how to hold it down through the outdoor ceremonies! I got the tape and then wasn't sure about how to use it. Once again, your channel has been a Godsend. Thanks again.
shirley mardis: This is the second video of yours but I've watched. You are wonderful! I love the way you explain things so beautifully, one on one, and in a way that the listener can really understand. Your demonstrations and instructions are just great. I've been wearing wigs for more than 15 years and just in a couple of days you've taught me so many things that I didn't know before. I just want to say thank you and tell you how very beautiful and sweet you are!
Marlene Olson: The second wig (the red one) looks really good on you, both the style and color. Very helpful video, as always!
Marilyn Gold: Trista, thanks so much for this great video. I use a wig grip band and now you've introduced me to two new products to help me secure my wigs. Great job!
Maggie Minnich: LOVE this video. I'm a newbie wig wearer, so this was easy to follow and full of info. Thank you!
janellen19: You do a great job explaining everything!
Sharon Songstad: Thank you for being so open about your hair issues. You have really helped me through this new stage of my life....at first I was afraid of being without hair...but now I'm not. You are my angle!
Jackie G: Thanks for this! I used Got2B and I felt it was too much work. Tape seems so much easier if I put a longer straight piece. Love your videos!!!
Rachael Garnett: This is the best instructional video I’ve seen showing how to keep my wig on. Thank you so much!
Lindy Knisely: This was very informative and I appreciate your user information with wearing wigs! Thank you!
cm duhart: Excellent presentation. Very clear and well explained. Thank you.
Lea Spr: Oh wow. Your tutorials and reviews are always really good!!!! This was so helpful to me. Thank you!!! ♡
Pam Heckman: Thank you Trista. You explain everything so well. You are delightful too. Also, you’re beautiful.
Julia H.: Thank you for this. I have never seen this done before. This information is very helpful. I always have problems so I never wear my wigs. Maybe now I can make it look more like real hair/hairline.Thanks again.
Vicky White: Nice, helpful video. Thank you for doing it for us. ❤️
Alison McPhail: Of all the videos Ive seen, this is the only one that has shown the various methods of keeping a wig on, and how to take it off. Absolutely briliant video. I dont wear a wig yet, but I need to. I just wear a Beanie everywhere. That being said, I virtually never leave the house. Am still in denial and havent decided on a shape or colour, either. I have a small head, kids size. Its all a bit overwhelming for me at present.
Kim S.: I have never really seen tape application before so this was so informative! Might have to give it a try on a couple stubborn lace fronts I have. :)
Sally Smack: The modified Alessandra wig in Strawberry Syrup is gorgeous on you. I think it would be gorgeous on almost anyone. And I wish someone would manufacture this style.
Laurie Ohall - Ohall Kemper Law: Very informative. You are an excellent teacher!
tkraus46: I like your videos, your very informative. I have the same wig grip from amazon, but I kinda like the silicone one I have better just because it feels less bulky. That red wig looks great on u, perfect color for your complexion! Thank u for all the information!
Rachel Kallenbach: This was incredibly helpful, thank you so much!! I actually thought the first wig was your bio hair until you took it off
Shari Potter: You should be a teacher!! You explain so well and great pace! You are beautiful
Colleen Todd: Thank you very much for a complete step by step video!!!! I found it to be very helpful and easy! And may I also ask what week it is that you are wearing?
Blueangel 97: You are extremely helpful. Thank you so much!
Rosemarie Vega: This was SO helpful. Thank you!!
Stacey King: You are awesome. I’m just starting to shop for a lace front topper. You are very informative in your demo. I would like to you demonstrate a lace front topper. Keep ‘em coming.
casey w: I learned so so much. Thank you Trista!
Emily Anderson: Hello and thank you so much for this video. I lost lots of hair porst covid and just got a wig. You have got loads of great tips and advice! Thanks so much! I will check out your videos, especially about washing a natural hair wig. I have to do it and don´t want to reu ruin my precious wig!
Susan Harris: Awesome job explaining everything. May I ask what wig that was? It’s gorgeous!
Suzanne Dawson: Ah ha! I'm not the only one with a flat head! Let me guess: you have never been able to wear the fabric headbands that are made in one continuous loop! I have always felt like I'm weird and deprived because of this? Fantastic tutorial! I have never thought of that trick with making a low ”wide” bun. Trying this one! Most of the time I make a flat bun with flat clips closer to the crown because I always have empty space up there in my wigs and it helps me fill that out. Thanks so much! Learned a lot!
🧿Qween T🧿: This was an amazing video. You’re a life saver. I jus learned something new. What shampoo would u suggest to wash the gots 2 be gel out of the front of the lace wig?
Sally Smack: You said you cut your Alessandra wig into a bob. I love it! Are you a professionally-trained hairdresser? Thank you for the step-by-step demo. I've bookmarked this video for future use. :)
Eileen Rose: Hi Trish, your video was so informative. I’ve not been wearing wigs too long but this has been just what I needed to know about getting my wig to be secure. I started wearing wigs just before the pandemic and I found so many ways to secure my wig that weren’t as helpful as yours. For straight hair line, do I put just one small piece of tape? Also do I need to rinse the alcohol out? Sorry for all the questions but I love ❤️ how you talk to us. Thank you so very much.
Maria Leach: Looks like work! LOL Been wanting to try a lace front wig. So, these tips help. Thank you!
Fritz: FINALLY a wig tut that acknowledges us flat headers!! TYSM!!
Mod-Planet: I actually have had success with a heavy duty double sided craft tape that I had on hand...lol. Didn't have the walkers and thought I would try using what I had on hand and it worked great. Stayed stuck all day here in Florida. I used alcohol to remove it also and let me tell you that stuff was hard to get off my head - I actually started having a panic attack because I couldn't get the taped wig off my head. Pretty funny! A little persistence and all came off with no damage to the wig! Thanks for the video!
Sheryl Bourgeois: Very informative video! Thank you so much
knowthyself: Great Demo!, thanks sooo much for sharing.
Nancy Brewer: Thank you so much for this really informative video.It answered a lot of my questions. Could you please tell me the maker and COLOR of the wig you are using for the demonstration. I have been trying to find this very color for the longest time! Again, thank you.
Mercedes Tapanes: very instructive thank you !!! I really appreciate your time
C Brackett: Thank you for your extremely helpful video!!!!!! You are so AWESOME!!!!! GOD BLESS YOU!!
Chris Boyd: Thanks for this video, it is very informative! My difficulty is with my ear tab area. My bio hair shows directly under and to the front of the tabs when I lean back or the wind blows. Can I use this tape on the moleskin section of the ear tabs? That’s where I need it to stick down to my actual hair. I have used It Stays, and it only works well on the lace front portion.
Connie Jane: I just came across this little Treasure! Great Job Hon! I notice that I never ever get to see the sides of the face and wig fit. Yours would look fine but I'm dealing with a 221/2 Noggin' and didn't find coverage with my first try at with a quality wig. It was hand tied and had full lace ear to ear. Quite a bit of my hair showed on both sides. I couldn't blend because of too much color difference. I really don't want my bio hair to show. Do you think some of it might be the ear to ear lace? Christi doesn't seem to have this Problem (but I never see sides either). I've asked around a week ago, no one has answered me. Interested in your take.
caseyjo2009: I love the hair cut you did on this Alessandra!
Zoila Negro: Thanks so much for the information, I am new using toppers and I have the problem with lace front showing a bit now thanks to you I am going to order the glue I hope I can find it in amazone.
Esse: Excellent. Thanks so very much ❤️
Pam: Looks completely natural. By the way you're so pretty and your nose is perfect!!
Annette Krueger: hi Trista, would there be any harm in leaving the tape on the lace front for when you put it on again? I would think the alcohol damages the lace? thank you
RIMP73: very informative. Thank you :)
jennifer phillips: Great video. I do have a question does this come off easily? I'm afraid I don t want to ruin my lace front, and I need it for one of my pieces that the lace will not lay flat even with it stays.
Belinda Davis: Thank you for your tutorial. I didn't know how to use tape.
VioletSky: Very informative! Thanks
Cheryl Christina: Great information! Thank You
Keri Stevenson: Where would you recommend finding the most cost effective nice wigs to start? I am on a budget big time, but my hair is no bueno! It’s getting worse, this is going to be a part of my life, and I need to come to grips with it, and get moving. I love your videos, you give me hope.
Vivi Vivi: Very helpful. Thanks!!
Deborah McAdam: Great video. Thank you!
Toni Stark: Great job of explaining. My problem is not only a flat occipital bone but my hair is not thinning it’s just cut short. So how do I secure it with no bun in the back? Another question...is we cut the lace front off so why is it important in the first place? Might be a dumb question but I don’t understand. Does it just make the hairline more “natural”? Thanks in advance! ♀️
Stella brown: Good job, thank you so much
Kathleen Simonds: Thank you for the tip.
Melanie Burns: What shampoo/conditioner do you recommend for wigs?
Ally star 80: Wig grips are always too big for my head. I need a child size. Love your videos:)
Diana Mincher: Many thanks for all your help!
janice Zachar: Subscribed!!!❤ You are amazing. Is there a way to make a big cap bigger/deeper. Big headed person here
Rebekah Miller: Thank you for sharing. How often do you go through the process of taping? daily or only for special occasions...have you ever accidentally slept in it?
Jessica Burgos: Is the tape and glue water proof? If not what would you recommend to use?
carol albers: I like the reddish Bob on you Thanks for the tips
Cassandra Lesh: My head is relatively flat in the back. I did not realize that this was a problem until I tried a wig grip. The wig stuck to the wig grip but the wig grip would not stay on my head. And at the time I did not realize what the problem was. I have been pulling my bio hair up on top. now I make a ponytail right at the base of my head and that secures both the wig grip from riding up as well as The wig. Thank you ever so
Donna S: What color is that red? It's the closest I've seen to my bio hair and I'm super excited about that lol
KA Pirk: I need some clarification. I thought alcohol was bad for synthetic fibers and we shouldn’t use hair care for human hair because it has too much alcohol in many of the products. I’m new to wigs also, and confused about this.
Qlty Grl: How tight do you make the wig grip?
Paula LastNameGoesHere: I can't get wig grips to stay put ever since I buzzed my bio hair all off. They slide right off my pin-head lol
Judy Anne: My hair isnt long enough for a pony tail....my wig + my grip rides up in the back:-(( even my nubby head band rides up in back
kusum: Thank you for such helpful vodeo
Leslie Brubaker: If I have a flat head in back, and no bio hair, how can I avoid slipping in the back? Tape?
NervousHarpist: I wish I could wear a headband or wrap or even a wig/stocking cap when I wear wigs but my ears are far back and my head is small. Everything slips back and off. It makes me sad. I don’t know what to do, because I would love to wear a wig.
Ang: Trista, I have a flat occipital bone & I have the hair loss also on top but my hair has grown out enough (from shaving my head), to make a low pony, but I feel like ppl can see the “bump” on my straight, light blonde, low density wigs. I’m Terrible using the tape. I seem to get it all bungled in my fingers before I put it on, I prob need to do my wig 1st, I didn’t think about that. Thank you for the all great Reviews! Any suggestions for ways to secure my hair that won’t make it into the low pony tail? I am using a lot of Bobbi pins at the moment & hope it’s not going to damage my wigs but unsure what else would work better. I do wear Milano Wig grips & I have tried Beaugee & Gez ?idk if I spelled those right, brands on Amazon, I love the cute pulled back hairstyle & wear that a lot. I had a bad experience w/the got2b glue but I think I used too much. It pulled the little bio hair I had at the hairline out by the roots! But I am sure I used it wrong. YIKES! I see how to use it now & will use it sparingly from here on. Thank you so much. Love your reviews.
Pat G: Have you gotten a Luvme wig? They are tight for my flat head and have a thick elastic band and have too much hair. Have you thinned them out? I just got it. I'm 69, too.
Michelle Boyes: Very pretty on you!
Amy Crosley: My bio hair is looking just like yours and is also falling out. Do you have a certain type of hair loss? If you don’t mind me asking. I don’t know what’s going on with mine
Janean: Great video, You look beautiful as a ginger!!!!!!
Sona S: I have a silk lace base topper 6x6 so it looks like my scalp. Does the color show thru?
kirbynancy: I love your wig what is the name and make please
Elizabeth Grabowski: I need tudoring on thinning my sinthetic wig
janice Zachar: Jon Renau is expensive. BUT I love your videos
Pat G: Can you recommend a wig meant for swimming. So sucks that the water emphasizes baldness.
bhola saitwal: Madam your eyes are very beautiful
Commenter Dek: Why tape and not glue?
E V: Will the alcohol hurt a human hair wig?
Jake A: Strawberry syrup is sooooooo your colour!
bhola saitwal: Madame I am from india good morning
bhola saitwal: Madam you are look like a indian Actress Hemamalini Hemamalini act in movie ' Shole ' this movie india 's Biggest movie every indian know this movie are you seen the indian movie Shole you watch a movie Shole than you see in the movie your look like Actress Hemamalini