How To: Full Lace Wig Cap| Start To Finish| Detailed
- Posted on 11 November, 2022
- Lace Frontal
- By Anonymous
hello beautiful people, you are welcome to my channel
Materials used:
swiss lace
measuring tape
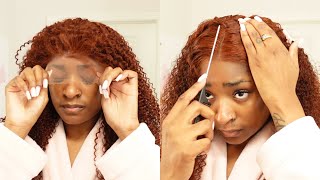
eye pencil
scissors
pins
wig cap
#diy #howto #wigs #closure #frontal #braids
Music in Video:
Song: Lost Sky - Where we started (feat. Jex)[NCS Release]
Music provided by NoCopyrightSounds free Download stream:
diy,do it yourself,how to,how to make,wig,wigs,braid,braids,french braid,braiding,box braids,knotless box braids,how to do box braids,closure,frontal,full lace,full lace wig,
Foreign across my video, you are very welcome in this video I'll, be showing you how to make a full lace. Wig cap from start to finish. If it sounds like something, you're interested then keep watching we'll be using Swiss lace, eyebrow, pencil scissors, pins measuring tape and the wig cap just to find somewhere. That finally feels like home for the frontal part of the wig, I will be taking 12 inches by nine. The next thing I'm going to do is to fold it in half, pin it down before cutting out the filter, now foreign for the back of the of the cup I'll be taking sweat and cheese as well by nine. Also give me, after that, I just fold it in half. Pin it down then cut out the lace before cutting out the red spot of the lace. At the back. I will be taking the measurement of the one that the lace I will be cutting out. I took two and a half inches ten five, two inches at first I took one and a half, then a little added, half two inches deep. That'S where I will start my curve at the back of the head for the middle list. I will be taking ten and a half inches by five and we also turn it in half and I start my cotton from three inches. Thus I left two inches cutting the from the three inches. Then I just curved it as you can see in the video. After that, I will be removing this uh, this scrap from this wig cap and the back, which is the where you hook the strap to I will be removing it. The wig cap is still very useful. Okay guys, it's still very, very useful. Do not throw it away, you can add in an elastic band and you can use it for another week. Okay, so the next less I'm cutting is the one that I will use to cover the adjustable strap. So, let's start sewing. You can also sew this by hand. Okay, if you watch closely guys, you will see how I placed the lace here. The straight part of the middle lace is what I will be sewing together with the back one: okay, the straight part when sewing these guys. Just so carefully, because I I speed up the video, that's why it's looking like that, I'm very fast look just so carefully! You have to turn the the the middle is just turn it little by little, and you see that it will end at the other side of the of the back one. It'S just the same thing. Okay, just continue to turn it little by little, and so do not rush it. I did it twice after sewing this first one, then I still go back again and sew it again to secure it very well in case you cannot get a full lace cap where you live, or you cannot order a full lace cap, it's better. You just get all your measurements and you take them to any tailor around you for them to help you and sow it. That is if you really want to make a full lace wig, but getting the lace is stopping you from making the fullest weed. So this video is for you, I did um everything here, both the cotton and the sewing every part of it and getting the airline everything. I did it in this video, a previous video about the fullest cup. So if you have watched it before, it will not be a problem for you making it this time, even with the speed. I did not speed it too much. It'S showing that at the front, which is at the for the front, I'm just going to create a dark um at the frontal, choose them at the left and at the right side of the of the cup. So I'll just create a little that there now. I will be sewing the the front and the back part piece together. I will pin it downstairs, so I will know where to start my sewing from so I'm just taking the measurement again to be sure that it's uh 11 and a half inches okay, because from my the ones part of my ear at the back to the other, Is 11 and a half inches, while also the front from one part to the other, is also eleven and a half inches. So I've added the two layers together to get the measurement again to be sure before sewing it down. So I will know where to start my sewing from. I will also sew it um twice after sewing for the first time, then I will still go back again and sew it for the second time guys. You do not need to have a sewing machine before making this full-less cap. If you really want to all you are making it for yourself, you can use a needle and thread the thread that have the same color with the lace you are using. Okay, just use your needle and thread, but do not double the thread. You can use a single needle and a single thread to sew it because after ventilating, it's just like tying the the list together like the front piece and the the back piece is just like tiny together when you ventilate on it. So we do not need to double it. When you are sewing it, you can sew it back and it's it's for yourself. You are the one that will be using it. Just sew it by hand take your measurement and sew it back and, and you are good to go. Oh the more. I swim, the more I'm thinking. Okay, now guys I'll be taking 15 inches from the front to the back of the head before getting my hairline. The next thing I did is to fold it in half. That'S the two sewing part at the ESI should be on the same line then before pinning it down, so I will be taking two inches then another two inches then, before the remaining part at the ear, which is no longer up to two inches, then I'm going To draw it starting from the middle, I did not draw it straight. I'M just trying to. I just tried to curve it to the first line. Uh. The first point, then I take it up again, then bring it down a little to the second point, then, take it up again and bring it down to the last point at the ear. Then, after doing that, I will flip. It then just trace it out. At the other side, foreign, I will be taking one and a half inches. That is where my drawing will start then going to the back, I'm not going to draw it straight. Rather, I will slant it Elite, you downward. Okay. Just to find somewhere that finally feels like home, I hate all this overthinking, the more I swim after that. I will just sew the the lace, the lace I cut out earlier, so I will sew it together. I will sew it before. Putting my strap make sure that the lace is bigger than the scrub a little, because you do not want to soak through the scrap so after sewing, I just turned it inside out before putting the scrub and after putting the scrub, I sew it down to the List I will slow it down to the list to secure it first before putting it to the wig cap, see what I mean soon: okay, just wash Ed. I swim. No more! I'M thinking foreign! I am okay guys! You do not want to make a mistake of sewing down the strap facing upward. The hook should face downward, so you can hook it to the next one, I'm going to um so um. I will be sewing this one down, so you can hook it. Okay, you don't want the hook to face up or where you hook it to, for the the adjustable strap to to face inside the lace, so do not make that mistake at all. I is if you found this video helpful. Please do not forget to subscribe turn on your notification Bell, so you get notified whenever I upload a new video like share and comment also like and follow my thing. If you are returning subscriber a returning viewer, you guys are the boss thanks for always stopping by. I do really appreciate your support. God bless you the more. I swim, the more I'm singing. Take me somewhere unfamiliar, bring me back so where we start Ed feel free to check out my other videos, and I will see you in my next video love. You


Comments
Unique Uche: Nice one,av missed ur videos