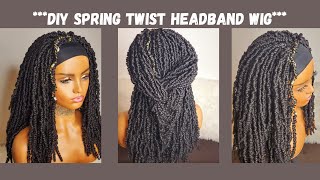
Diy Satin Headband For Women | How To Make Satin Headbands For Natural Hair | Yele Stitches Tutorial
- Posted on 03 February, 2021
- Hair Accessories
- By Anonymous
This video is a tutorial on how to make your own satin headband for your curly natural hair. I show the step by step on how to cut, and sew together this African print headband. I also put in all dimensions for each piece to be sewn together. This satin head band is great for curly hair, natural hair as it prevents friction on hair, reduces breakage and is so soft on hair!
Instagram: instagram.com/yelestitches
Website: yelestitches.com
To get this already made headband, go to:
https://yelestitches.com/product/afric...
TOOLS USED:
Rotary Cutter:https://www.amazon.com/dp/B000BNLLHW?r...
Cutting Mat:https://www.amazon.com/dp/B004RB8HS0?r...
African print satin fabric: https://www.etsy.com/listing/941928486...
Hello: everyone, my name, is yelly of yeti's teachers. Yelissa just is a female fashion brand that makes female dresses, clothing, of course, and accessories, and today i'm gon na teach you how to make this satin lined headband. Look at it, it's twisted in the front. It has elastic here and it's completely made of satin. I know you like it. I know you want it all right, okay, so let's dive in and let me teach you how to make this come on yo to make this twist headband. We are going to need three pieces of fabric either using satin or cotton or any other kind of material that you like that you think, would be great for your hair. I use satin because i think it's so nice and so soft and so smooth on my hair, so for the three pieces where i i'm right now cutting the first two pieces. Now the first two pieces have the following: dimensions: 18.5, inches in length and 8 inches in width 18.5 inches in length 8 inches in width. You can always put seam allowance around it, so you can make it 19 by 8.5 or 20 or 19.5 by 8. It doesn't really, it doesn't really matter as much as long as it's within that range. It depends on how wide you want it. So how long you want it now. These are the first two pieces that i just caught and we are going to stitch it. I put it aside for stitching the next piece is going to be the small piece. This small piece is where our elastic is going to pass through. That is, is like our tunnel for our elastic anyway. So this small piece is good. Is the the dimension of the small piece is three inches wide and 12 inches long now, because i'm cutting it unfold? I just need to measure three inches wide and six inches long, because it's unfold when i open it up, it's going to be 12 inches. 6, multiplied by 2 is 12. for math gurus out there. I hope i'm doing you proud, anyways, okay, so i am cutting it out with this. My nice result that i bought from amazon i'm going to link the i'm going to link the products below the razor and the mats. They have been so good to me. Anyways. We are moving on to sewing our pieces together. So the first one is the longer piece, the 18.5 inches by eight inches, and you see that i folded into two - and i am sewing it down and i'm going to repeat that same process for the three pieces that i just cut. I'M going to also put in the product link to the satin fabric. If you are interested in it and the product into the elastic. I feel like the elastic that i used it's a little bit. You know stiff, but if you want something softer, you can always get something softer, and also remember that starting freeze, starting to become anyway, zigzag right is is, is is okay, so, like i said, we are going to measure about five inches or six inches and cut It out now we are going to use a safety pin to pass it through the pipe. Now this safety pin that i'm using is a special kind of safety pin. I went on amazon to look for safety pins and i didn't know that i bought nap napping pins. You know like the pins that i used to hold baby napkins for their for that you know diarrhea. That was the kind of pin that i bought. I didn't know i i just looked for strong safety pins, and that was what i that's. What got delivered to me. It was strong, that's what happens when you don't read description of products. Please read description of products. Learn lessons from me. I read the description of your product before buying it. I didn't and i got napkin office pins. They work very fine. I actually like them, they're pretty strong, it's just that they don't go through smaller holes. They can only go through holes like this or pipes like the one i just did now. The next thing you do is to lay down your already your longer pieces and put them across each other like a cross across each other like a cross. Okay and then you see it's already forming your twist headband by the time you finish this headband when you step in anywhere, they will turn on and look at you look at you one more time, so we're going to fold one side and another side on the Elastic on the smaller piece elastic, i hope you saw that i'm going to fold one side, another side and then stitch it. I zoomed it in so you could see it clear. I hope you actually saw what i did so after stitching one side, we're going to repeat the same process for the other side of the headband. If there are any questions at this point, please let me know in the comment section: if there's anything that was not clear to you, please let me know i'm an upcoming youtuber and i'm trying my best to show all the process. But if i skipped anything or you didn't get anything, please let me know in the comment section and i'm going to work on needs for future purposes or even make something similar. So you can see the way i did it now we're going to repeat that same process. For the other side, you're going to place your elastic directly on the other side like you're, just moving in the same motion and just putting it on the other side and then you're going to fold it the same way just fold it the same way. The same way you did the last one. I hope you can see this one. Even if you didn't see the last one, my hands keep blocking it. I don't know why? That'S why i zoomed it in the last time, but i hope that you got it from the last zoom that i did last zoom in that i did and now you can you you can understand the concept of what it looks like on the other side. So this is me repeating it again, so you can see exactly what i did. I just keep repeating and repeating and repeating so you see it better alright, so i move it directly on the other side, then i fold it one side on top of another side and then i stitch it. Yelling is stitching, so our beautiful twist headband is ready. Look at it. Oh look at our sweet baby. Oh looking so yummy yummy, yummy, yummy, yummy yummy. This abandon your head. Then everybody will be telling you to turn around when you wake up, it's so pretty anyways. Moving on! Yes, i'm back. I hope you enjoyed my tutorial, please don't forget to like share and subscribe and comment below comment. What you want to see on my page, more content, or just you know, say hello at me. If you try this, if you make this, i love you to tag me on instagram yeah stitches, so we can rock our headbands together.


Comments
NengzCrafts By YourHand: Love your tutor ❤️❤️❤️
glam like: Love your sewing machine
Felisa Blackmon: Thank you SISTA
Aisha Albert: Love your personality
Johnson Dorcas: Its the intro for me
Damilare Ayomide: It’s the vibes for meeee
Onigbindeh Bukunmi: Can you please finish the composed song ma........too much vibes mehn❤️❤️❤️❤️
Delolu tv:
Keishaanne Powell: The back ground music was cutting out what you were saying