Tools For Cylinder Hair Extension Installation | Hair And Compounds Review | Celebrity Hair Stylist
- Posted on 14 December, 2017
- 6D Hair Extensions
- By Anonymous
Hair and Compounds Presents - Episode 3: Cylinder Extensions Setup with Joanne Morrison
Joanne shows us how one should prepare to install cylinder extensions; filling us in on all of the tips and tricks she has learned throughout her career!
Check out Joanne!
https://www.instagram.com/jomohair/
https://www.facebook.com/Jomohair
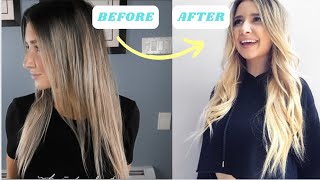
This is a little different from your average salon setup, because I have this a nice large table here. I have these things called placards which actually hold the hair so that, when I pull out to put them in it keeps the hair, nice and separated. For me, I have the magazines on top in order to keep the hair down and to prevent myself from pulling a bundle down that once these are my little latch hooks that hold the cylinders. For me, the cylinders will go around my models, hair. The extension will be placed in the cylinder and then I will clamp down. These are the pliers that I use when clamping down the extensions. These are basic jewelry, making pliers. I like thin nose at the tips. Um everybody's got their own way of working with it, but I, like a nice fine tip to clamp down. This is a little different. It'S got a little stronger torque to it and I keep two pairs just in case. I'Ve dropped one and also pliers do break, and I did have a pair of pliers break on me and one time years ago. That was the only that I had so I always come prepared with a number of them in case that comes again. This is a piece that we won't be working with today, but it is very important for what we're doing this is how you open the cylinders to move the hair up. There'S two small holes in the supplier. Maybe I should play something, maybe a little better and you place the cylinder in there and we'll pop the back open into a circle. It'S a really fantastic piece of equipment, and you can also clamp down on the extension. But it's pretty thick and rounded, and I just prefer to have thinner too. I keep a number set to come with me in case one fits the floor. I don't have to get up, get back down. Sanitize it keep working. So I just roll up having a lot of things available time, so you can see there's a lot of two's here, a lot of duplicates. So let me ask you: are there any specific products that you recommend that you know help the application go easier or anything that you use to prep the hair before? I don't really actually use a whole lot on the hair, because I don't want a buildup. I don't want any kind of silicone based product down there. I ask that the models put the conditioner towards the ends of their hair. Only I want them to have clean dry hair. I don't want somebody to come in having shampoo their hair three days ago and having a lot of oil on it, because with this technique with the cylinder, if there's too much product, if there's too much conditioner, if there's too much oil on the hair, it will Create a slip - and I never color the hair the same day that I put the extensions in never do that, because the color will also create just a little bit of layer until you give it that first shampoo. So you want to have the hair as clean as possible and what you will get the best results, because then it's just the hair, the extension and the lock the ends of the hair, like that a conditioner is fine. So how do you begin this process? I begin, oh, you know there's one thing before we do that. I want to show you because I talked about this earlier. I talked about shadowing the root. What'S the extensions, so these are the hair pieces that I shadowed the roots with you can see. I made it a little bit darker to kind of blend in with hers and then have the lighter hair come through at the end. Let me show you over here, so it's just shadowed and I took varying shades of color a 7n and an a 10. Can you see from that there you go and put them through a different length. Some are a little shorter. Some are a little longer, so we got to blend through on her and you guys are so lucky because I had to pick this hair earlier and I colored it myself and it took a little over an hour and a half. Now here in compounds sells pre shadowed, root, hair you're, so lucky that you don't have to do thickness. You can do it if you want to. If you want to keep coloring it yourself, but here's the thing it takes more time. It takes more energy. You have to pass that time. The cost of your time, along to the client so by having the pre shadow group, which works really well, with the current hair trends of slightly ombre hair, a routier look, you can avoid the work you can avoid the expense and yeah. I look forward to the next time that I purchase a shadowed root instead of spending a couple Albert's working on it, hi YouTube family. Thank you for watching. We hope that you enjoyed our video today subscribe to our YouTube channel for more videos like this, and the latest updates in the hair extensions industry. We'D also love to hear what you learned from the video today. Please leave your comments below and we'll see you soon.


Comments
Hair & Compounds: Key Takeaways: 0:00 - 2:36: Joanne begins by showing us the tools she plans to use for the cylinder extension installation. 2:36 - 3:49: Joanne specifies the ideal condition of the hair before installing the extensions. 3:49 - 4:35: Joanne shows us how the color of the root of the extensions are darkened so that they will blend more naturally. 4:35 - 5:29: Joanne explains the advantages of Hair & Compounds pre shadowed root hair. 4:30 - 5:50: Outro