Paint Hair Like A Pro (Digital Painting)
- Posted on 31 March, 2020
- 6D Hair Extensions
- By Anonymous
A digital painting tutorial on how to paint hair.
If you liked this vid then give it a thumbs up and subscribe to the channel! :)
• Clip Studio Paint Brushes - https://gumroad.com/l/iTkAA
Instagram & Twitter - @ ericanthonyj
Email - [email protected]
--------------------------------------------------------------------
• My Store - https://gumroad.com/ericanthonyj
• Patreon - https://patreon.com/ericanthonyj
--------------------------------------------------------------------
Music: Chillhop Records - https://chillhop.com/
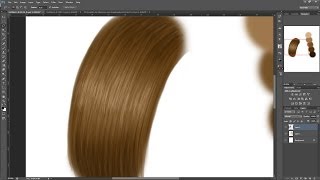
So in today's video I want to talk about painting here. This is a painting. The one you can see right here is a painting that I've done about a year ago. I would say I made it for a tutorial for my Instagram page. So basically, I made a step-by-step out of this and you can basically see the steps right here. So let me just show you so we have the block in and then just adding details as we move on, and so I'm gon na break this down and I'm gon na redraw this piece right here and just explain each step as I take them, and I Would say, let's just jump right into it and get started so the first thing that I'll do is I'll change the background color of my canvas to this dark grey. Alright. So if we go back to to this painting, you can see that my first step before adding color was just a very simple sketch. So let me just turn off the background as well, and you can see that it's just a very simple sketch, and basically this is just the outline of the hair. So just a rough silhouette, it doesn't even look like hair at this point. You could probably think it's a dolphin or something I don't know, but people wouldn't be able to tell what we're going to paint at this stage, because it's so abstract - and this is exactly what we're going for here. So let me just turn the background on again and we'll just do this right here, so we're just gon na do a rough outline again. I'M gon na turn the painting back on because we're not going to focus on these individual steps as I've taken them here, which is going to repaint it completely from start alright. So, with our new background, I'm just gon na create a new layer. This is where I'm gon na draw or where I'm going to sketch on and I'm gon na take black as my color for the sketch and also a simple brush, so I'm gon na use this brush called digital pencil. I believe - and so these are my custom brushes, you don't need to use them for this tutorial, but if you want to have the exact same, brushes then feel free to click. The link in my description, it'll take you to my Gumroad and that's where you can download them. So what we're going to do is we're going to limit ourselves to maybe three brushes, so we're going to use a standard hard round brush with pressure for the size and opacity. So just a very simple standard round brush for the sketch and also for painting, then we're going to use an airbrush for for some simple shading here and there to soften up some areas and we're also going to use a blender. So we're going to limit ourselves to get three brushes. As I said, you can get all of these brushes at my gumbo story, but you don't need to use them because cliffs, your paint comes with some very good brushes. You just need to kind of experiment, see which ones work for you and then just get started so anyway. So having the digital pencil selected, we're just gon na do a rough sketch, so we're gon na do exactly the same as what I've done before and just focus on a rough outline of this piece right here. So what I'm doing, basically just to show you what just to kind of make it clearer for you is I'm looking at the extremes. So we have this corner right here and I see that hair is kind of flowing like this and downwards and all the way down to here. So basically, this is the shape that I'm focusing on right here. So it goes up kind of like this, and also you don't need to do an exact copy of my illustration. We'Re not trying to copy it one by one we're actually just trying to learn something from it. We'Re just trying to get some out of some information out of it. You know so kind of like this. This is more than enough and it doesn't even have to look nice. You can see it's very rough and that's all so we kind of have this eagle shape. It could be an eagle if you look at it, so I'm not sure how an eagle actually looks, but it could be an eagle um, but it's not it's. Actually, some hair it's anyway, so now that we have to sketch what we're gon na do is we're gon na fill the sketch with a flat color, so we're gon na create a new layer, pull it below our sketch and then just fill this entire shape weight. One flat color, so I'm gon na pick the selection tool the lasso tool, then I'm gon na select kind of a mid-tone for the base and then just fill it with your color. So now that we have the base shape for this, we're gon na create a new layer, and this is the layer where we're going to focus on the shadows, the most prominent shadows and also on some hue shift. So we're going to add some more color to it, just to kind of make it more pop and to make it more vivid. You know, because if we're only going to use two colors or one single color tone, it's going to look very lifeless and boring. So we need to make sure that we're adding some life to it and some variation so anyway, so we're going to focus on the most prominent shadows and let me just outline them to you in the final piece. So we have a very dark shadow right here. Going down, we have one up here and then some smaller ones right here and we're just going to focus on them and quickly block them into our sketch. So with this layer selected, what we're going to do is we're going to turn it into a clipping mask. So the way to do this, you select the layer that you just created and you want to hit this small icon right here, which says clip to layer below if you're in Photoshop or procreate, it's going to be a little bit different, but it should be quite Easy to find out online and a clipping mask basically stops you from drawing outside of the shape that's below. So let me just illustrate you if we turn off the clipping mask and if I were to paint on top of this shape now you see how I can draw outside of it, but as soon as I turn on the clipping mask it locks it into this Shape that's below my current layer, so I can't draw outside of our base. You know like the base being the base color of our hair, and now I can't draw outside of it because we were locked into it, and this is what we want at this stage. We don't want to draw outside of it. We want to be locked into this shape, so let me actually clear this layer again and let's start focusing on the shadows so the way I pick the color for the shadow as I select the base color, then I make it a little bit darker and just Shift to hue a little bit and now we're just going to paint it in roughly so again it doesn't need to be perfect, so just have fun. Relax and yeah try to have a good time, and you can see I'm being very loose here. Just kind of indicating where these shadows go to because the thing is when you're painting, hair or if you look at hair, if you try to study it and analyze it, it's not very predictable, it's very random, so you need to be spontaneous and then random as Well, when you're painting it to make it look as natural as possible. Also, what I'm doing right here is: you can see how I'm painting and then I'm erasing the way I'm erasing so quickly is by hitting C on my keyboard and by hitting C you're. Basically, switching B between the foreground, color and a transparent color and the transparent color allows you to erase with the same brush that you already have selected, and this is just a very quick way to switch between an eraser and your brush. And I do this all. The time this is one of my favorite features in Clips your paint, I believe many others have it as well, but Photoshop doesn't, which is a bummer but anyway. So this allows me to switch between my foreground color and a transparent color and the transparent color acts. As an eraser, so just hitting C allows me to switch between the two colors very quickly alright, so I just keep going and I keep adding some shadows in there anyways now that we have this, so these are the most prominent shadows. What we're going to do is we're going to select our shadow color, make it even darker just to kind of pronounced them even more and just make them a little bit darker in some areas. You know just adding some shadows here and there and you can already see how it's taken on shape like it's already getting some form. So if we just turn off the shading layer, you can see how it's getting some form already just by adding these very simple random shapes these random shadows to it all. So what I'm thinking about this is probably the only advanced thing that I'm thinking about right now is the flow of the hair. So I know that the hair is starting right here. This is where it grows, and it's making this flow like it's making this movement. It'S flowing up and down so this is all that I'm thinking about the flow of the hair, so I know it's flowing like this, the more understanding you have of your reference, the easier it's going to be and when it comes to hair, it's just all about The flow: where does it start? Where does it end? Does all you need to think about this? All you need to take care of anyway, so now that we have the the basic shadows. The next thing that we're going to do, as I said, is we're going to add some color variation to it. And if we go back to my painting, you can see that there's some different colors incorporated into this painting. So we have some very saturated oranges right here, and so we want to add these as well just to add some life to our painting and to not make it look as boring and lifeless again, very simple. We'Re going to be very spontaneous, which is going to select our base layer and make the color more saturated and then just paint them in you know, and you can switch it up a couple of times, make it more, lighter and brighter and just add some color Rate variation here and there - and you really can't do wrong when you're painting here so kind of like this. I also want to add some some more saturated ones here and there, but be careful not to make it too saturated or not to go overboard. You don't want to exaggerate it too much to where it looks fake, but um also don't be afraid to go bold a little bit. Perhaps you want to add a little bit of some yellows to edit or like more yellowish tones and, as I said, don't be afraid to experiment. So now that we have this we're going to add even more definition to it by focusing on the lighting and so first we're going to focus on the basic lighting on the ambient lighting and then we're going to focus on the highlights. So what we're going to do is we're gon na select our base, color move into the yellow hue and then make it a little bit brighter and then just test out the color, and this is looking pretty good and you can see I'm still using the same Brush, I haven't, switched the brush and we're going to create a new layer for this and also activate the clipping mask, which is going to restrict our color into the shape and then we're just going to paint in the light and now with the next layers. We'Re just going to darken up our shadows where they need to be even darker and we're going to brighten up our lighting, so we're going to create a new layer on top and then just darken up the areas where we believe it should be darker. One thing you can also do is so, for example, you can see that in between some hair there's the background shining through, so what you can do is you can select the background, color and then just paint in some some holes. I would say in between some hair just to make it look as if there's like the background shining through in some areas, and so also because we have the clipping layer turned off. We can paint outside of the shape and we can use that to our advantage to kind of break up the shape, and you can see it's been very simple steps up until now. So basically we have this super simple sketch. I wouldn't even call this a sketch. It'S like a scribble, then we have our flat color, which is acting as our base, then the first layer of shading, first layer of lighting and then just some definition. Okay. So the next step that we're going to take is we're going to select any of these layers and right click and then click on merge, visible layers, new layer, and this is going to merge all of our existing layers into one layer. And it's going to place that layer on top, and so basically all that we've done so far is now on one layer, and this allows us to start blending now so anyway. So now that we have a new layer, we're going to do is we're going to select our brightest area and we're going to make it a little bit brighter and we're going to make our brush smaller. So with this brighter color and a smaller brush, which is going to paint it in in areas where we see the brightest highlights in our painting, like that, we can also add some more darker shadows. Apps switch the color a little bit switch the hue of the color to add some variation, so experiment with the color as well. You don't need to stick to only two tones. You can go in any direction, so you can add some some purple shadows here and there see if it works. You can add some orange shadow. So if we go to Orange, add some orange shadows here and there like really be be adventurous and just try out different things and you'll see what works and what doesn't so, for example, if I go into the blue or into the the greens right now, and It has some shadows. I can see that like this is not working. This doesn't make any sense. This is not what I want. I would say the flow of the hair is probably the most important thing you need to pay attention to and as long as you keep that in mind, you can't really mess up too much. I would say now I'm starting to add some flyaway hair here and there also, when you're, drawing flyaway, hair or hair in general. Try to have continuous strokes. Don'T draw like this, like a million individual strokes, try to use your elbow or your entire arm to create that stroke and let's just turn this layer off and on just to see the difference, and I hope you can see how it's starting to look more realistic. So here it's kind of looking pretty dull and I mean we already have the form you can already tell that it's kind of three-dimensional and that we're trying to paint hair, but I'm with this new layer. You can really tell where we're heading at alright guys. So just kind of wraps it up for this video. So basically, what I'm doing here is I'm just adding more details. More highlights some more shadows and I'm basically just cleaning up the illustration, but we're pretty much done at this point and it's just like the finer details to add some more realism to the drawing, but overall we're pretty much finished. And so I think this was a really good demonstration on how I paint hair. It'S pretty basic. If you look at it at first, it looks super complex and advanced, but if you break it down into simple bits and pieces, the process gets much easier and more logical. So this is something that I say in almost all of my videos: make the process as simple as possible, so break it down into the smallest pieces. That way, it's way easier to tackle the advanced tasks. So anyways guys thanks a lot for watching this video. If you're not a subscriber, then make sure to hit that subscribe button and as always guys, I love it on my fight and so peace

Comments
ericanthonyj: Are you also under quarantine???
Hermit Unicorn: The longer I look at it, the more it looks like a majestic hairy eagle.
☆grace ☆: me: *thinking it’s done* him: “now it’s starting to look like hair” me:
erickmojo: “You really cant do no wrong with painting hair” Me: HOLD MY WACOM STYLUS
sepiaswirl: I'm really appreciative of these videos, they really show me that I definitely have no idea what I'm doing yet which makes sense, since I've only been trying digital painting for about... two weeks. I like that you just show us everything you do and don't speed everything up, it allows me to take a peek at your brushes and brush sizes and how you use your layers, which really helps me. Thanks so much!
Dark Kud: your tutorials really helped me a lot!!! (including the skin shading tutorial one) Very easy to follow. Thank you very much for sharing this. Hope you and your family are safe! :D
An Nguyen: Amazing tutorial!!! Thanks, Ericanthonyj! This is what I want from a tutorial: a process with a clear and short explain "why-how" to do this! I hope more videos like this from your channel for anything in digital painting/drawing!
Gatzy uploads stuff: Dude, you literally saved lot of my time by telling about the C shortcut... I was struggling with mask tool in clip studio as I was using eraser tool with different brush settings to remove portions of the mask off!! I did not look too much into clip studio features as it was so much similar to photoshop but this helped me out a lot, thanks!!
Dackson Flux: In clip studio paint, you can go to the line tool. There's actually a lasso subtool that auto fills your selection. You can actually select transparent which lets you quickly cut away excess painting.
Gillian Lemke: I love the way you explain your steps, your thought process and your shading choices, it answered so many of the questions other tutorials haven't yet. Thank you for this great video!
Tordn't: for those using procreate, for shadows you can use a technical pen and lower the pressure to zero for a similar result
Philip Tetteh Okai: Thank you for taking the time to paint this in real time. This is the most helpful I've seen
18 Run Hirun: Thank you very much, This tutorial help a lot!❤️ At first I thought it look really complicated and hard to draw, but you make it look easier and understandable☺️ Btw i love your drawings it’s beautiful, I will practice more and be as good as you! I didn’t use this app but i’ll try this on another app hope it work. Ps. English isn’t my native language,if i wrote anything wrong please pardon me
Aituar Manas: Thank you for the amazing tutorial. Photoshop actually have this feature too for the long time. You just select brush mode to clear and you can delete with the same brush :) I just made a shortcut and use it all the time instead of original eraser. Default shortcut is alt-shift-R
Sima Samigura: Thank you a lot this is really instructive and helps me a lot ! As always, incredible job, I love it
Claudia Parrigi: Thank you a lot for the tutorial, i’ve always had problems with paint hair, it didn’t seem natural, you’re very good at explaining and you simplified the process, it helped me a lot, now I finally figured out how to make hair!!❤❤
Eagle Town: Me: “I wonder how he paints/erases so efficiently” Eric: *explains how*
LizzPixx Illust: Painting my hair has always been a concern. Thanks to you, it's a YouTube content that makes a lot of reference. I'm still immature, but it helped me a lot. Thank you.
Karo E: “You really can’t do wrong when you’re painting hair“ Me: “...“ *Discards painting*
Gabriel Palmer: I love your reassuring style of explaining it. "Don't try to make it perfect..." Thanks!
deartotheheart: Its really great to see you work as you draw, thanks for taking the time to redraw and explain (with explanations of the order of your layers, how to create the clipping mask, color selection, emphasizing flow/use of reference, etc.)! A shame, but I get so far and then it just looks like spaghetti :D Still, I honestly think this was so helpful and one of your best tutorials that really took us step by step, thanks so much!
Jessica S: This is great—it just goes to show that art need not be overdone to be awe inspiring.
franzi: thanks a lot for this tutorial. Most tutorials do speedpaint and don't mention anything about the brushes they're using and then it gets very confusing. But your's is truly step by step and I can follow easily. Exactly what I needed :D
Jai Krishnaswamy: Love your tutorials, thanks for doing this
BommeltjeNL: Thanks for this wonderful tutorial. You made my day with this one In the beginning of the video you had an elongated image with all the individual steps and text beneath it. Can I find that image somewhere online? Thanks a lot
Aurea B.: Previously I tried out your skin colouring tutorial and it was so great and so simple It's like a complete turn around in my drawings and learned so much. I can't wait to test this too. I already have some plans in my mind <3 Thank you still and again.
Shannon: Question for you. When you're rotating the image to accommodate the strokes, is it the actual image being rotated or are you just moving the view around?
Flux: I already knew about most of this method but the erasing technique that you use is just amazing. I will now cut my painting time in half.
Ana Alice: Comecei desenho digital recentemente, me deu até um ânimo de treinar agr
minecraftvidzlol: I found you today and you are amazing im a new subscriber and i love your videos very informative and easy to follow along
Romain Giov: Best video ever man, I struggled so much with hair but now it is no simple ! Thank you !
Egglord Educates: The shading on it is so good AHHH Thank you for the tutorial
Julia Bibi: I'm just at the beginning of the video but I'm SO happy and I want to say THANK YOU. Finally I have found the tutorial I wanted
Sketching Scottie: This is awesome thanks for the tutorial!
Robert Jackson: your painting videos are the best I've found thus far. thanks. I feel like I can finally learn how to do digital painting. How about painting some other subjects, like seascapes, landscapes, and cars?
Lee Dunning: Thank you! Really excellent tutorial. I actually feel like I might be able to take a stab at this.
Zizu: This is a very good tutorial. Thank you! :)
Fan Fei: With PS, you can change the brush mode to clear to have it instantly become an eraser. The short cut for that is "Shift+Alt+R". To switch back to normal brush is "Shift+Alt+N".You can also set a custom short cut in PS settings to make switch between these brush modes faster. Great video, thanks a lot!!
VitDraw: Thank you very much for your tutorials, they have helped me a lot...
Steven Rak: This is the kind of hair tutorial that I always waiting of Tysm
Shep Gibson: This dude is the Bob Ross of digital painting. So calming to watch :)
BiomimiArt: Love this! So shiny!
Red_Vibe: This video is so helpful. I've always struggled with hair
Caildyn: I just love it. This helped me a lod, as i struggled to draw hair before i found this video. Thank you for sharing :D
David Hruaia: a great example of the more time you put into it,the better the outcome
asmaa mohamed: Thank you so much that's so useful to me❤️
K B: This is one of the best hair tutorials Ive seen. Thank you
a r: your tutorials are so helpful!
Maria St Illustrator: this is so helpful.. i love it.!❤️
PZAXR: Photoshop actually has the transparent switch now, think you have to press the tilda ~ key.
Sean Landa Vlogs: I feel like im watching “how to build modern house on minecraft” LOL
Captain Q: Thank you so much! This helped me a lot - subscribed
Irish Sunshine: Thank you so much. This was really helpful.
Francine's Place Blog: Great tutorial, thank you!
XxSajraxX: very nice tutorial! Thank you.
Khmu Prince: Great tutorial video. Thank you for sharing. I just subscribed your channel!
M0rrby: Very useful tutorial :)
MarSH: my place is lockdown right now, and im trying to learn digital painting(procreate)..can u also create a tutorial (tips) on how you draw and paint with a reference on the video..a simple portrait.. btw, love this hair tutorial...
Nyanwr Roxie Lovely Moe Kyun: I love your creativity is imagined surpassed
Nikos Tzekas: in photoshop u can hit e to use the eraser tool or if u work in the same layer choose ur base color as ur secondary color and toggle between em using x key 8:33
Robert CUMAHIG: I've always had a hard time painting the hair thanks for this
Ichigo: thank you so much for this tutorial <3
Lucky DR: "When trying to so continous lines, use your elbow or your entire arm" Me: Holds breath to make a continuous line
Fizalia Art: Amazing tutorial video dude! help me to improve my digital art skill
Anão do 4chan: Blessed. Thanks for the easy to follow tutorial.
Mina Soran: Me: *sees that he is drawing the exact hair style I have right now and my hair is the same exact color as this* Also me: *looks around for a secret camera *
Witch Echeveria: this was helpful! could you make a tutorial on how to draw natural 4a-4c hair?
Lakbay ni Begz: I'm new so it is a Great Help for me.. ! Awesome! I hope you can upload more videos! Stay Safe and Stay Home!
iamlandis: This is so useful thank you.
Toy Box: Thank you very much!It's very helpful!!!
zainub farooqi: Your channel is a LIFESAVER I'm actually enjoying digital drawing more now?? Bless you TT
Zoe: Any advice for drawing messy/curly/layered hair? How do i acheive that natural look when the flow of the hair is altered/nonexistent?
PatchesRips: Yeah, I'm totally amazed that after all these years, Photoshop STILL doesn't easily allow you to paint with transparency! It's such a dead cinch obvious feature; almost everyone else has it. But PS still seems to expect you to open up the blending mode for the brush, switch it to Erase, and then switch it back again. :/
John Diebitus: THE TUTORIAL IVE BEEN WAITING FORRRRR <3
Bia Jubram: Love your tutorials
Arna Mallari: will you please create more anatomy tutorial? it's very helpful
Razial41: Wait I’m confused I use photoshop and when I do merge visible layers it merges them all together. Yours seems to merge them but keep them all seperate at the same time. 12:12 is there way to do that in photoshop?
Mary Black: You're my savior. I'm drawing a more realistic piece right now and I'M TERRIFIED of drawing hair Thank you
Schlutt: Do these brushes also work with Adobe Photoshop? Also, this might be a totally stupid question. But are you smudging the gray back into the hair or are you erasing?
Lisa Ing Art: Very nice tutorial !!!
Yuzuru_Chan: 4:11 Him: *Draws eagle* Me: am I learning how to draw hair or eagle?........
i'm just a human: Thank you so much for this!
Hubert D: Just amazing !!!
ART ANIME LEGENDS: Beautiful artistic work I subscribed to your beautiful channel
Nicole P: Hey. Great tutorial! Are you doing this on a tablet? Can i make those same hair strokes on a laptop?
Cranma 01: Thank you so much for this video!
anita lin: Amazing!
Mad Wolf: In photoshop we can make a layer mask after making layers of different colours like dark to light then we can paint with black and transparent with white
ACMW: do you just draw the stray hair thats flying out or do you use a certain tool?
rugamba christian: Awesome tutorial
Diego Hiroshi y sus Videos: *This is awesome for my characters* :)
pftghostly: Tysm i actually know how to draw decent hair digital art is actually really hard to do especially hair but this helped me sm ty
Daniel Bazak: Live the content!! Please keep it going!!!
Eli Prime Gaming: Your videos help me a lot if you can make a video on painting details in the eyes
Filip Sochor: Ok, so I watched this and was like "cool, I can do that on my painting, good" and closed this to try. It went awful, and I thought "this dude was lying, the whole thing is just so much more difficult... lets watch it again, mabe I'll see what he did there" and watched the whole process again, while trying it myself. And now I have to say - DAMN is this a well done advice, thanks a lot. Here, take my sub and like, I am all Yours now. What more can I learn from You? :D
Meyene Etuks: Really helpful. I dont think photoshop has that "merge all 2 new layer" option. I might have 2 check out clip studio lol
Mariia Nikeshkina: Thank you for the video! Gonna try it today >_<
Super Sic-O: im a portrait airbrush thats wants to go digital ....your style is amazing ...TEACH ME
Sketchista: great tutorial!!!
Femy Ceanne Ombega: Since I'm stuck in quarantine, it pushed me to do digital art to kill time