Hairbow Diy: How To Make Spikes For Hair Bows
- Posted on 31 January, 2019
- 6D Hair Extensions
- By Anonymous
Come back tomorrow for Part Three: Surround a bows
Need Part One? https://www.youtube.com/watch?v=yBoIoR...
Supply list: http://www.themommycraftsalotblog.com/... (older list)
Some of my favorite hairbow tutorials:
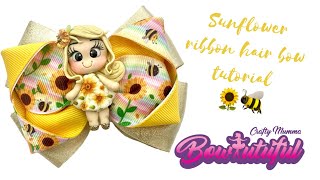
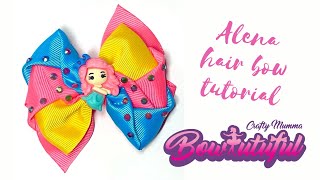
DIY Sweetheart hair bow tutorial https://www.youtube.com/watch?v=NSx2bv...
DIY Stacked Ponytail hair bow tutorial https://www.youtube.com/watch?v=mCeJ_j...
DIY Elegant Stacked TURKEY hair bow tutorial https://www.youtube.com/watch?v=w54PtE...
DIY TWISTER LOOPS hairbow tutorial https://www.youtube.com/watch?v=aGzZxa...
DIY Dalmation puppy bow https://www.youtube.com/watch?v=B8TLY0...
DIY Tiny 3 inch Stacked bow https://www.youtube.com/watch?v=i4RKyo...
Lalaloopsy Hairbow DIY https://www.youtube.com/watch?v=LZgY8M...
FROZEN FEVER hairbow DIY https://www.youtube.com/watch?v=AeSX3b...
My Little Pony hairbow https://www.youtube.com/watch?v=Y2cULs...
Shopkins hairbow tutorial https://www.youtube.com/watch?v=QWAiyR...
Minnie Mouse hair clip DIY https://www.youtube.com/watch?v=IbQ0QZ...
Triple Twister hair bow tutorial https://www.youtube.com/watch?v=KH8tK_...
------------------
Find me on Instagram: mommycraftsalot
------------------
Hi, I'm "Mommy". I also answer to "Linda" :) I'm a homeschooling mom of 4 (ages 3, 10, 12 and 16) that loves to craft. I craft a lot. I post videos throughout the week unless some sort of KID-TASTROPHE happens. Hey, I have a lot of kids. It's bound to happen :)
What will you find on my channel? (Lifestyle content) You may find family vlogs, crafts, hauls and mommy rants. I also enjoy collaborating with other creators! Come back, you never know what you will find :)
All right part, two of our simple stacked bow making process is the spikes we're gon na be working with spikes. Today, it's not my favorite part of the bow making process, because it is the most time-consuming you have to trim and you have to steel and you have to tug and you're just so it's just a lot going on with the spikes, but they do make your Bows look pretty so we're going to be working on those today and I do have a list of supplies that I'm working with today. You will need your sharp scissors. You want to make sure you have sharp scissors when you're trimming your ribbon. Definitely don't let your family use your scissors to open their popsicles like mine, has done in the past, but we're not gon na discuss that right now. Well so got my lighter because you're going to need to heat seal, I've got thread and again I use an upholstery thread, it's a really thick thread and you can tug and you can pull and it just doesn't break like a normal thread. Alright and of course, I've got my needle and again, I use a longer thicker needle to go through all of the ribbon. You'Ll need a thick, a thick needle with a thick thread, and if you have it, you get your thimble out, but you know what I just winged that bar, because I don't have one all right. I'Ve also got several alligator pinch clips, and these will help you hold your spikes together when you go to spray them, so these are great little hands, you need extra hands and, of course you will need a ribbon and for spikes. I like to use 7/8 inch ribbon. You can use a bigger or a smaller width. It'S totally up to you. I just prefer a 7/8 inch ribbon and of course I do have my glue gun over here and I am working with the fine tip. The fine tip is best for what we're going to be doing to. If you don't have it, that's. Okay, all right, I think that is all oh and you might want to grab your little little pin with the little ball right here too. This is also gon na, be like an extra hand for us right there, all right, let's go ahead and get started on the spikes. First, you need to determine which ribbons you're going to use. Now we need to trim these ribbon pieces to determine how long you want your ribbon to be. I like to figure out how wide my top bow this one right here is going to be, and then I, like my spikes, staying off at least half an inch outside of this top bow. So if this measures four and a half inches, I want my spikes to measure five inches, so I would trim them into five and a half inch pieces and then once I trim and heat-seal, they will be like half an inch outside of the topper bow. I hope that makes sense. I don't like them to be too long because then they just flop and they hang over, and if you do them too short, of course you can't see them and what's the purpose of going through all that trouble. If you can't see your spikes, so we are going to trim these pieces, I have trimmed to each one into six inches six inches in length, because I want them to be about five inches when I get done trimming and sealing all right. So, as you can see, I've got an assortment of red and I just pair them up. Let'S see how many do I have. I'Ve got two three, four: five, six, seven, eight nine ten eleven pieces. Yes, that is an odd number um, but one of these is going to go in the center of the bow, so we'll have pairs everything will be paired, but that one piece in the center so I'll just get pairs of everything and then the one in the Center now let me show you one that I did not do enough pieces all right. This is they'll, say: 2, 4, 6, 8 9 pieces and you see there's still gaps right here. Alright, so I'm going to redo this one and do it with 11 it'll. Be more full and rounded all right! So that's what I do with that one - and you can see this so you just want your spikes to make like a circle, a circle of spikes, all right. So here's one that I did for a purple see they're all paired one on each side, he's in the middle and then right here in the center, all right so there's some purple ones, and then these I did the other day and not quite sure why I Didn'T finish the bow, but there's that one you can see: there's no gaps, just a circle all right, so we're gon na go ahead and get started like I said, I've already trimmed my ribbons and now we're going to put them together and fan them out. So we can get a circle and then we will put it together all right. This is going to okay, so you can go ahead and trim your ribbon and heat seal all these pieces before you put everything together and fan it out or you can get everything fanned out and situated and then start your trimming and sealing process. That is totally up to you, I like to trim and seal. At the end, once everything is put together, I'm going to take my little pushpin and I'm gon na start layering my ribbons on top of each other and again it's whatever placement. You want yeah. So you just do a pair at a time you want to line up both pieces of ribbon together, make sure it's even and then we're just gon na fold them in half crease it right there in the middle and then we're gon na. Take the little pin and we're going to insert it in the middle and again this pin is just going to help. You know it's just going to help everything stay together until you get ready to actually crease and form the spikes all right. So two two two two and then we're going to do the one on the very top you, okay now our spikes are together, see loop in all right now. What we're going to do is we're going to start Fanning everything out. We want to start at the bottom and I'll just form an X C with the bottom two pieces, one to the left one to the right and do that with every piece and don't worry about them. Being you know, straight or together we're just painting everything out. We will keep doing this until we are all the way at the top to the left, to the right to the left, all right and then this one is gon na go right there in the middle all right - and of course you know it doesn't look like Our perfect circle right now, don't worry we're going to work with that. Alright, now that everything is on either the left or the right side, now we're going to start piecing this bad boy together and you're just going to go up here and you're gon na work with your ribbon pieces and I like to just barely overlap the pieces And you don't want them on top of each other, because you just want them barely touching edge to edge, see what I did right there again. You don't want too much over here, but you don't want them out here. Where you got gaps, you want a edge to edge edge to edge, and you want to do that over on this side as well so edge to edge, and you want to make sure that everything is uniform. If you've got like a dot with a crown and a red over here, you want to dot a crown and a red plane over here. Alright, so go ahead and fan everything out how you want it to look, remember edge to edge and this little guys gon na go in the center. Don'T worry about him right! Yet alright go down to the bottom and just fan everything out, because we want a circle, so just touch edge to edge edge to edge and don't worry if you know something looks uneven. We'Re gon na trim everything up alright. So it is starting to look like a circle. All right stay, alright. So this is what you're going for you want a circle. You don't want gaps. You want everything, just barely touching all right. There we go okay, once we have everything situated at least for now. I am going to press down, be very careful, I'm going to come underneath my spikes and then I'm gon na bring it up. I'Ve still got the little pin in the middle, but I'm going to take my needle and thread and I'm going to sew just a few stitches in the middle and I'm gon na. Take that out now, like I said just a few in the middle, to hold everything together, so we won't have to use that that pin alright. So I just go in and out about four or five six times just right there in the center and like I said it would be great if you had a little thimble, because it does get difficult with the thicker ribbons, all right, I'm gon na. Do this a couple more times, so I don't have to worry about anything coming apart and I should not have clipped my needle and thread off yet so I went ahead and we threaded the needle again because we have to crease this this bad boy. Alright. So, like I said just putting those stitches in the middle, you could take out your little pin and it just helps alright. So if anything shifted go ahead and give it a tug and get it back to where you want it remember, we want it to look like a circle and I think that's about where I had it all right. Now I'm going to go ahead and tie this off in the middle just pick it back up, be careful and we are gon na come to the middle right there and I'm just going to fold it in half and see how your my crowns. They kind of line up, I don't know if you could see, because my fingers in the way, alright so just pinch it together in the middle and we are going to so. Let me show you alright see I just pinched it in the middle and everything kind of folded. Folded up come on, it's like a pom-pom now, alright! So I'm gon na take my needle and thread and I'm just going to go right here in the back in the center, and this is gon na be hard, just poke it through there. We go come out alright, so there it is in the center and I'm gon na come at the top and bring it down through the middle, see your middle and we're gon na bring it back around the back. Now here's what it looks like all right now. I'M gon na come up here and we'll press down, I'm gon na press the center and I'm gon na pull my needle and thread. I'M gon na hold everything down and I'm gon na pull my needle with my thread and it's gon na cinch everything up, but you want to hold tight all right here. We go, you don't have to cinch it too tight we're gon na bring everything together and then I'm gon na take that thread and I'm gon na go back around and wrap it one more time before tying it off all right and you can pull it tight. Now I hope that makes sense. We'Re gon na do another one in just a moment all right, so I'm gon na just come back here and push it through there's a thread and then we'll tie it off all right now we're gon na! Take it off this together, all right after we tied it together in the middle. Don'T worry if some of these ribbons shifted, that is normal, we're still working to get that perfect round shape. Now you will notice that some of your ends are not even so. What I like to do is I just like to go around and trim everything up, so they are even like. Those are good. All right now comes the time-consuming cards we are gon na, go and trim everything and seal it. So I'm just gon na go around to each side. I'M folding in half the ribbon and just going to do a slight V cut and some ribbon is difficult to work with. If it's got like a print, so be careful not to use your lighter too much or it will just look wonky all right. So go around and trim up every end, and then we won't be going close. One close will be one step closer to the finish line you all right. Everything is trimmed up. As you can see, we have little ribbon pieces everywhere and if you are a bow maker or if you're new, to bow making be prepared to find these little pieces of ribbon everywhere everywhere, I'm not even kidding. I found a little piece of ribbon in my water cup one day, but you'll find these everywhere. Alright, so everything is around. Now we are going to glue our loops together, just slightly not too much glue, all right. Here'S where you're going to be using your alligator clips, if you need them, we are going to have to again line everything up, remember edge, to edge fan everything out, make sure it's all even and as you get them fanned out, you can use your clips and Just clip the two pieces together just like that see well look like like that. Alright, so I'm just gon na go around and I'm gon na ban everything out and then we'll glue it together. Okay, now we're going to take our glue gun and we're going to come around and we're going to glue these ribbon pieces together, we're just going to use just a teeny tiny bit of glue. You don't want anything too bulky, but you want to come up under your ribbon and again you want your edges to meet and you'll just add just a little bit of glue right here underneath to the top of this by just a little bit and then press Down and then it will stay, and you want to do that all the way around these spikes right here up the corner, remember edge to edge press down and okay, don't worry about your glue strings yet and take care of that in just a moment. All right lift glue and then press down, but make sure you're lining those edges up and just do that all the way around. Okay, we're almost finished. Thank goodness here are the spikes. I need a little a little little pull there alright. So if you have glue strings, take your lighter and just go around a little heat, no go away, alright! So here's the spikes, here's what the back looks like got a little glue, but that's that's! Okay! Little icky glue alright, now last step good still with our stupid, quick look of stuff. Now take it all right now, if you see something that needs to be fixed like these right here or kind of sticking together, just take your clips and clip them while they are drying. Alright, alright, there is the spice. Now. What I like to do is take something heavy, whether it being like an old book, of course, you'll want it whatever it is. You want to use, you want to make sure it's. You know something that you're not partial to because it'll get sticky and what I like to do is I turn my spice over and I will press something down on top. This is just a canvas, but I'm you can take a book or something heavy and jam on top while they are drying and then when they dry and you flip them over, they will be flat. That'S just what I like to do. You can do what you would like to do, but that's what I would like to do all right. We'Re gon na make one more set of spikes just because, and I'm gon na try not to talk as much during the process of those so stay tuned. Alright, but that's all it is making spikes like. I said you could put your glue down, spread them out, clip them whatever you need to do to help you get that perfect round. Look okay! We have red spikes and purple spikes. Now we need pink spikes for our pink bow so step one and again I'm going to try to work more and talk less. So if you need additional detail, just I guess rewind and watch the first half of this alright but step one. We are going to figure out what ribbon we are using, which I have three different prints. Now we're just going to trim up you eleven pieces of ribbon measuring six inches in length. Pushpin remember to about to fold in half find the center and are you you now it's time to fan everything out you now you want to give everything good and straight edge to edge. Now we are ready to grease the center you'll need thread and needle, but first we are going to add a few stitches in the center. Be careful pick everything up pressing down in the middle. You can now remove your pin and search your needle directly in the center and go in and out five to six times now go over and adjust everything again making sure everything is straight. You can tug it pull now we're going to pick it up. We'Re going to fold just like that now we're going to take our needle we're gon na go right here in the center again and we're gon na bring that needle through now we're gon na come right here at the bottom, the bottom middle, the bottom middle, we're Gon na bring that needle and thread right through the center and around the middle and then back down through those top two spikes wrap it around all right now, it's just loose, take your hand, hold everything flat together, press down really hard, take your needle and pull That thread and it's going to cinch the middle now we're just gon na wrap a few more times. Don'T poke yourself with the needle like I just did all right, take it and wrap it a few more times and then we'll tie it off in the back. After you flip it over no worries, it's not going to be. Even this is the part where we take our scissors and we trim, and then we heat sill every piece of ribbon. Okay and once it has rained ribbon pieces. You know you are finished trimming and sealant all right once that part is finished now we are going to again cut here, fan the ribbon pieces and if you need your clips clip and then we will glue everything together and we the finished oops. I forgot one. Oh, how did I do that? I did alright. Let'S remedy that situation so now we'll go around and pull everything together and then glue it and we will be finished. Hallelujah praise our Lord. You all right, spikes are finished. Take your glue gun, get all the pesky glue. That'S hanging around now we're ready just spray them flat, all right guys. That'S gon na wrap up part two of the simple stacked, boutique bow. If you are moving on to part three, please see the next video, if not have fun, making your spikes

Comments
Elizabeth Vallely: Really enjoying these videos on making these bows! Thank you very much for sharing and teaching us how it is done!! God Bless Hugs Liz x
maria lucia aguiar: Incrível eu amei. Muito obrigada!!!
Martina Hinojosa: Awesome just awesome, love everything you do.
Carrie Chavanne: I found a little glue to tack each spike to its neighbor keeps the spikes perfectly fanned out. Doing it that way I only use 9 pieces for the spikes and it's just as full.
alohablondie: Could you use fabric starch instead of the stiff n quick?
lammy is cool: Spikes are my least favorite part of making bows... But that tool you used in a previous video seems like it would make making spikes easier.
Krista Taylor: Can you do a video on how to make a big teddy bear into a puppet? We have a 3.5 foot teddy bear that I'd love to make more fun out of