Female Topper - Wefts And Lace
- Posted on 12 May, 2015
- Clip-in Hair Extensions
- By Anonymous
This is a topper I made for the lady that I previously made one with full high definition quality. But that was way too time consuming and ended up costing a fortune, so I priced it only at 250€ which was still too much for a topper piece.
So I realized I should find a better way to make toppers because their purpose is to stay on top of your head and cover your thinning head. It is not like a closure that needs to be fully functional and part-able. You don't sew it in your head so you can tilt it to create your side or center parting easily!
So I did some wefts with my sewing machine and you can see the video here:
https://www.youtube.com/watch?v=gIOAg1...
And then I turned it into a topper with only the middle and front part having hair ventilated.
This piece, the way it was done I would price it about 150€. Because it is mostly wefted, less lace and of course the hair is not 100% human so the hair cost is tiny for this specific piece. Full human hair topper would cost more than 150€
Making the topper bigger in size wouldn't increase the cost too much only because the top and front parts are ventilated thus I could have had another 1~2 rows more area with wefts and it would cover ever bigger part of the head, of course more hair would be needed and this is the only thing that would increase the price slightly.
If you are interested in something like this mail me at [email protected]
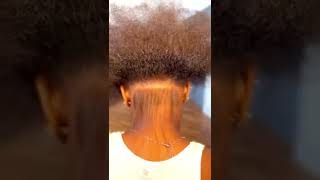
Hello, everyone. This is the super week major and today, in this video, I'm going to show you how I'm trying to turn this wefted hair that I did in my previous videos and turn it into a topper. This is not going to be closer because closures need to be ventilated, but the reason I want to make this is because, in this specific blend, if you have watched my previous videos about the the top of the I did, it was for a lady in London And she requested it to be about 4 to 5 inches. I mean four by five and it was full high-definition single strands single note. This was a huge piece and it took me so long to make so eventually it had to be very expensive. Of course, it was slightly under priced based on the time we do be to make, but she had to pay 250 euros just for a topper. So I promised her that I'm gon na try to make the same blend of hair with the one that I did with the other topper and this time I'm going to make left's and then I'm going to try to make some tracks and first of all, I'm Doing this as a trial and error, because I really want to see if I can make an affordable topper, I don't want the topper to cost 250 or 300 euros. I want it to cost around 100 to 150. So what I plan to do is fill the perimeter with weft everywhere and then I'm probably I'm going to leave some space here to have like a high definition, hair, that's going to fall in all directions, so it can actually spread apart and in the front I Plan to have not only don't have a same as you can see she wants to have banks here in the previous one. She had a same as well like a fold like this, but this time I just decided not to make it like that, and of course, this area is not going to have a clip. It'S going to the clips are going to be all here. It'S going to be, you know flat, and I plan to put a little bit of hair, ventilated, it's not going to be fully made with left's some areas going to be ventilated, but the whole process should take like couple of hours to make with everything from the Weft making to the base making - and I just did the base with my sewing machine - I couldn't find identical thread to the lace. This is a little bit. It'S creamy right, but it's not identical to this, but it doesn't matter in this area. You wouldn't be able to see anything so and also. I cannot stitch with this sewing machine. I cannot stitch with this thread. This is impossible. I have tried it. I don't know why it doesn't want to work. So I'm gon na make some linings with some thread to know where I shouldn't put weft and then I'm going to fill the other area with where to have plenty of this. And then I'm gon na see how it will happen, and then I'm gon na send this to this lady as a gift, as I promised here that I'm gon na make a trial and error just to see because I'm still learning - and this is going to be A gift for her because she already paid a lot of money for a good piece, so this is gon na be a less defined piece still is going to be a gift. So, let's see how I make the markings, so is this visible just from here? Take a look, I just put a little bit of thread - it's not permanent, of course, and I plan to put webs everywhere, except this area. I don't know about the front to be honest with you, I'm not going to make a full high-definition job here. I'M just gon na ventilate, rather bulky hair here, of course, and the most highly finish is going to be here. This area is not going to be too high definition because of the way that she uses the the topper and the way that everyone is using. The top - or they just want this - to spread apart type everything and if they want to have it like in the side, we got a place to the side. I don't expect this to be fully high-definition so as to be able to party wherever you want. This is going to be like that and let's see how it turns out you so in the making of this topper. I just find out that I had a couple of weak points like you can see that this area here, where I have an edge. The hair spreads like that. So I wouldn't have good coverage, and this is even more prominent that I have two different webs. So I decided, but before I put the next weft, I'm going to put a little bit of web link here so as to conceal this. I don't know how this is going to happen, so I probably am going to cut a little bit from this bad web. That I don't like so much and I'm going to be stealing these little areas just make sure that I'm going to have good coverage. So I'm going to measure it first like so I'm going to cut it a little longer than what I needed to be just to be sure that through the shedding, I won't have a big problem. That'S one this one's going to be here and, of course, when I put this weft, then I'm going to put another one like this. On top of that, and of course I need to put one more in here, so you just measure that over here cut it and, of course, to suit in right now so them in okay there, these both sides are kind of similar. To be honest, so, let's just this soon machine has small problem pinching through so many layers of material, but it's doing a good job so far, and just to make sure that this is going to be secure enough. I'M gon na put it one more time like this and run it okay. There is the roll just fell down, so I'm going to cut these two pieces off this piece in this piece as well. So, as you can see now I have a little bit of coverage. You see how it used to be to see if I dream again, this is how it used to be. This is how it is now, and of course I haven't do the same here. Was it how it opens see how it doesn't conceal this area? I'M going to put this little thing over here right now and just cut off. I have a lot of excess thread ready and we moved previously and my carpet right now is just full of hair and full of thread and everything. I don't care. Okay. First, let me put this in there place it where I need it and turn it around. Like so, and it's again, okay of the XS without cutting the hair, of course, so remember how it couldn't conceal very well. You can see now that it doesn't conceal 100 %. Let me just get straight to you. It has a little bit of filling over here, of course, but the more website put the more this area is going to get concealed in this area as well, they're just good for now. So I'm going to proceed in putting the rest of the West and then I'm going to show you how it looks. Okay, guess what I just put all the weft, so you can see from the inside how it looks and I ran out of it now. The thing when working with left's is that look how much I left when working with weft up this amount of hair is a little more than the hair that I used for hair topper, which means that when you're working with webs, you inevitably make everything thicker I Mean I could just let more space between these weft, especially in the bombing in the back of your mind, because I really want a lot of bulkiness in the back, so she can hide her own. You know the back of her, the crown of her head. Everything spreads out there, but I would just let a little bit more space between these. These weft here and here had left a little bit more here. Doesn'T matter so I'm going to be visible and just feel it better, but I mean look at that. You can almost see these waves here, even though I have put more because this blonde hair and of course, I've left the whole front like a be like a level scale here. So I'm going to put hair in all directions here and it's going to be bulky, of course, but I will be able to make this look star the end and natural. At the same time so yeah I will have to ventilate this and then I'm going to come back to you and show you the results. And then I will have to put some clips and I'm going to have to see how I'm going to do that. I'M going to do it by hand, of course, but for now I need to ventilate this area and then I'm going to see so I did I decided to do another weft. This is 19 centimeters, and this is about five they're, two separate weft and the reason why I did that is because I'm just holding the camera right now so sorry for it being shaky. I decided that I don't want to ventilate the whole area. I'M going to put another weft here and then one more here, so it will end up being because I want to have extra hair in the back, so the 19 centimeters will go all the way here. The file is going to go there, so it's over and let's just show you from the inside how it looks I've put a little bit more in the you know the diagonal, because I wanted these areas that spread apart to look better, and this is how it Looks from above this is not a free parting piece and it's a topper. It doesn't have to be in part like here. If you want, you can see, you can't see much, but I don't think it's necessary to part it anywhere else, all the other, the middle, because this is the safest part for you to bought it, and I really feel that I need to do something about the Front just flip it over again. I feel that this is a little bit too obvious, because the thread is a little bit wide and I didn't have any creamy color like this color thread, and this will be too obvious and I didn't want. I don't have a a fault here. What on? Maybe if I hold it like that, oh wow, I just thought about something. Now hold it like that. Just now I don't know. Maybe I'm gon na cut this off. Maybe I'm going to go ahead and cut it right now. Let'S even know you can't see that apart way, can you see it now? Okay, I'm going to cut off this little part over here. I have already molded this with some nail polish. In order, it will not start coming on that, I don't know like do. I need to remove it. Maybe not oh well, I'm gon na send it like this to the lady. Imagine a carriage and she will decide whether she wants to cut it or not. I'M pretty satisfied, I am going to show you I did it fall. It can very easily like look how much hair it is. It'S a lot of hair and you can very easily hide anything beneath that. You can see anything. It has very good coverage ability and you can part it in some other areas, other than just the middle of course, but as I said, it's not necessary. It'S not wise for you to do that. Put contrasts so you can see that what it is, that's how it looks can see more details. Now you can see that the front now a little bit more easier, but I don't know if she wants to cut this part. You can do it. I think I'm going to change like that. I'M going to put clips, of course, and then I'm going to show you how it looks from the inside. When you have the intense background, you can actually see a little bit of the wedding, but if I remove this pretty much everything just vanishes, this is a problem with won't here it doesn't cover very easily. Now the the thickness is a lot in this piece. You can see, look how much here it is it's a lot of hair just for a top, but it's good because it's synthetic and human as well. You can thin it if you want to it's fairly big, it's about 13 centimeters to about 15 centimeters 13 to 15, which is 5 to 6 inches approximately yeah. I'M pretty satisfied with that and if I had to price this, this is going to be 150 euros for a very believable topper with good good definition. Parting. You do have a little bit parting ability, but it's not wise, as I said so yeah. I think it's going to be very happy with this one. You


Comments
Jennifer Martin: I absolutely love your work. Thank you so much for taking your time to make these videos.
Pat Treen: Thankyou sooooo much for this video!!!I have just removed a very badly made(but expensive)semi permanent topper and now feel confident enough to make my own.I watch your videos all the time,and am learning loads!Have just bought some things from your great site and will never buy from anywhere else,especially hair!Very good luck with everything.Sandie.
Dr. Shawna Freshwater: you are always amazing, creative, and detail oriented. I need you to make some wigs for me : )
Eliza Njuguna: Your videos are very informative and easy to follow.
Julio Galindo: I love your ideas and the fact that you try to make it affordable thank you for teaching us also I actually have a tamplet on this type of topper I took it from a old book and instructions are almost the same as yours but wefts sewn in circular pattern kinda like a round closure. I would like to ask if there is a way to change lace front wig to a regular hard front full wig if that makes sense, my lace front is to big for me side to side ventilation and don't want to glue it I want to be able to wear it like a regular hard front wig if you can please help me thank you much appreciated
graziana Pisarra: I've made my own lacetops thanks to your tutorials, now I think I can be more fast with this method: my semi-bald area is quite the same measures of the piece you made in this video and it's hard for me to ventilate all of it, my eyes start to pain, now I can use this method for the back and side part. just two questions: 1)does it loose hair when you wash it? 2) I'd like to buy thinner lace for the future( maybe a 20 den to have the best front!), do you think it will rip sewing?
Angelica king-Iszard: I've been wanting to learn for years. Love, love, love your videos.
Janet Pressley-Barr: Wow, your work is just amazing. Thank you so much for sharing. I am curious why you made this topper in a square shape with corners that are hard to hide instead of rounded edges/lines ? Just trying to learn, thanks!
Jenifer B: I love this!! This is exactly what I've been looking for!! Front and crown coverage with out being a full wig. How about using translucent fishing line for the seams? It's invisible. What would this cost in U.S. dollars?
Ashley NM: wow amazing! so are you sewing straight stitch or zigzag? and you seal the knots with nail Polish? do you have a video for that? where do you buy your lace?
usual suspect: Hello sir. I do appreciate that you reduce very much the density of the hair topper and it is the reason it's looks so natural. But one thing I have not understood : in the middle of the lace, you use ventilating method, without using wefts? I do love your videos, your knowledge and your patience.
SHELLY53100: CLASS IN SESSION! THANK YOU FOR SHARING!
Private: Hi! Thanks for this video. Is there a way you can make a topper with only bangs/fringe going one direction and no hair going back towards the crown of the head? I'm trying to make a clip-in bangs piece but need to figure out a way to cover the weft.
paris rain: You're a madman. a Genius! I loved watching you work. :D
Stephanie Collins: This is so interesting. How did you learn all about wig making?
Drumcat Fano: Do you still make toppers?Do you take orders?If you do what do you charge?
Ana Puzey: Where did you learn how to make the toppers? Where you buy the materials? Thanks for the videos. They are awsome!!
Maria Dalva Dos santos rocha: Amei arrasou
M G28: Hi, did you make another topper of this kind ? Do you have any messages if it wears good and comfortable . I look for a good and really invisible topper
Theresa Roussell: this was very educational, tysm <3
Anne Brown: THANK YOU. I almost fell off my chair when I saw the prices of human hair lace front toppers..200 to a thousand dollars?? WOW.. so I have to find out how to make one. I wanted to make a wig with my extensions and now I HAVE to make a lace frontal for it.. WAIT.... HOW did you get the hair to have a natural looking part?? THIS is why I'm watching videos.. you didn't put that part in here.
Effie Gee: Hi When sewing certain fabrics, like knits, the machine needs a different type of needle, a ball point needle, I wonder if that might allow you to use that transparent nylon thread? Can;t post a link but they're explained on singerco.com's website.
Lorraine Blake: Hi please could you tell me what stich you used from sewing machine and can you purchase this machine from Amazon. Great job
The Nail Tech Files: looks better than most commercial brands
Charlotte White: How do you disguise the part so that the seam doesn't show ?
Juliana Guerrero: i wish all closures were that full
rmxbaby2604: Is it possible to make one of these with a silk top instead of lace?
Babs: You're an Angel!!!
ana morales: hi i just saw your video, is a big job I would love to know how to do, I have some doubts so q I hope you can answer ... what kind of fabric is, it works just the same tone of fabric in dark hair, which is best natural hair or synthetic, fabric used is equal to the capillary prostheses hope prompt response thanks
Dawna S: She is gonna be a happy diva
unicorn Freed: Hi there how can I order the very same topper as this blond one
kirstie pilgrim: how would you attach this piece to your own hair?
David Cabrera: Why is it on a rectangular shape and not oval?
Crystal Thompson: where do you buy the lace
Rose Demesier: If the person wear it with a bang you don't have to cut the thread
hugger1ify: will this top piece clip on attach to the client head?
Chantal Th: Hello, I do not understand the end of the video for finishing the toppervous show us 1 tape with 2 paper how I have to prick them to arrive at the same result as you expect an answer in advance thank you and congratulations beautiful that I was interested to have more information is for my wig and to have a good finishing like you I am all your consceilles but here I am stuck still thank you
Basket weave: People do not want to cut their wefts. Can’t i make a templet wig, mark to know where the wefts had to be cut, sew each end that I’ve cut by machine and make the finish product?
Carol Jean: What material you sewing it onto
Nina Bina: Can you make me one? How much do you charge?
DYI-n-SAVE-FROM A-Z: why dont you nor use a base that will allow you not to see the sewn weft? I make them to. I stopped a long time ago, but the talent does not go away.. the blonde one is light if her hair is not the same color.. you are good at venting although....
dbuckner2000: ALL WAYS ON POINT.
Ines Williams: Hi super wig maker, i think You are doing a super job. I need your help. Can i talk to You on email
Kate Vaise: I dont understand have you make weft invisible un front and top where is parting. I bought extensions but my hair is too short and thin for clip ins. I want to make a topper for myself from wefted extensions. Būt O just dont get it have you make parts invisible :(
justlady1955: I wouldn’t like the front with that thing .. what if it is windy??
Helen and Lolly: You didn’t show how you attached or stitched the top frontal part on your topper. That is the part most people would be interested in learning about.
natalia chanel: ainy number or site ,i need make order for this model plz help me
Nina Bina: Where r you based?
kaylesca mottola: no se en donde me perdi