How To Make A Wig For Beginners Ft. Shein Human Hair | Step-By-Step Guide
- Posted on 04 June, 2022
- Clip-in Hair Extensions
- By Anonymous
HOW TO MAKE A WIG FT. SHEIN HUMAN HAIR | STEP-BY-STEP GUIDE
I wanted to show you guys how to make a wig and some tips and tricks that I use when making a wig. Honestly its one of the most helpful things that I've learned over the last few years and would highly recommend!
FIRST IMPRESSIONS OF SHEIN HAIR:
SHEIN HAIR:
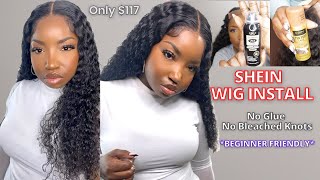
https://www.shein.co.uk/3pcs-Long-Curl...
FLAT IRON:
https://www.instagram.com/kim_g1itz/
FOLLOW ME ON INSTAGRAM
Instagram @Mskingsworld
https://www.instagram.com/mskingsworld...
For collaborations : [email protected]
#sheinhumanhair #sheinhaul #makewig
Hey guys welcome back to my channel it's ms king's world, and today i'm going to show you how to make a wig i've been making all my wigs for a few years. So i'm super excited to show you guys how i do it. I start with two types of pins, these straight pins, as well as these hair pins, and these are super important to hold down the wig cap, a curved needle as well as thread - and this is a thicker thread that i get from the beauty supply store. This mesh cap that i didn't end up using this band that i got from amazon. I actually like bands better than the clips, because i do find that the clips rip out my hair - and i find this - makes your hair sit better and, of course, sheen hair. Guys can you believe it? I have my first review up above so make sure you go check that out, but this is the mesh cap and this is normally what i lean towards using, but it just kind of fit weird on my head. So i went with this more stretchy cap and i absolutely love it. I find that my wig looks straight and sleek and it fits nice and of course you need a wig head to make this on so first, i start with my frontal and i use the thicker hair pins just to pin this down to make sure it doesn't Go anywhere, the thinner pins are nice for when you're putting in the tracks, but the thicker ones just to help you keep the weight cap down are super important and this frontal guys is so bomb. I'M actually doing this voiceover a few months later and the frontal is still looking popping so yeah definitely check out that review, but i actually got a friend to bleach this. They said the knots bleached wonderfully. So that is not something you need to worry about, and i'm just fitting this over the wig cap just to see the placement - and i find the placement of a frontal is super important just because this is pretty much how you lay your foundation is how it's Going to sit so it's very important that you get this part correct and i kind of figure out where the middle of the frontal is place it on the wig cap, the wig cap, but also the mannequin head, and then i kind of figure out where exactly To place the back of the frontal so super important, you see that there's a band around the bottom perimeter of the wig cap and i personally don't like to sew on that because i feel like, if you do you kind of limit the amount of stretch that It has and it could end up looking or like end up fitting too small. So i never sew on that bottom part of the perimeter and i never sew on any of the seams, because that will also restrict you so the back of the frontal. What you're? Seeing is right below the seam, it's not on the seam and it's not on that thicker band, it's right below and it's super important to have that space. That gap that you see in the front, because that's what's gon na allow when you put the wig cap on that's gon na sit nice and flat and leave a little bit extra on the sides. That should be a little bit extra because that's where your band is going to be sewn onto so i usually sew my band onto my frontal so that everything sits nice and flat. So that is like key. I hope i'm making sense and yeah. I do take time making sure there's enough space and then what i do is i go ahead and start sewing now that i figured out where the placement is have a little bit extra on the sides and then i go and start sewing and i try to Get as much of the frontal on the cap as possible, but i also leave quite a bit if you can see so i'm going to start sewing and i think one of the most important things is to create knots in between. So just in case. You know a loose comes, a thread comes loose or someone is yanking on your wig and who knows maybe something comes and cuts the thread. Your weave is not flying in the wind, while you think you're being a hot gal and there's tracks falling off. At least if you put knots in between it, will allow the wig, even if some things or threads do come loose. It'S not completely loose. So i'm going to show you how i actually tie it close up so, as you can see, go through loop, the thread around and pull it so simple. This is kind of what i use to sew the entire hair. I prefer doing a needle and thread over glue, but just loop it around and then pull it through super simple and easy and then also make knots as well. So right now, i'm just making a little bit of a knot. That way, you see how i actually do the hair, so i do this throughout it's not every other stitch is a knot, but every few stitches i do make sure i add knots. So when you get closer to the seams super important that you do not sew on the seams, that will limit your flexibility with the wig. So i go over the seam, as you can see, and that's how i do all my wigs. Then i try on my frontal with the wig cap and see how it sits once i know that it sits properly, then you can go on and do the foundation. So i measure my head from ear to ear and i draw fake ears on the mannequin head as well as the back. I have two lines in the front ignore the top line. I use the bottom line because your head isn't shaped like this mannequin. Why do they make them so skinny? It actually makes no sense. So then, i line up the cap based off of my measurements. Obviously, this mannequin head is super basic. It'S not going to have your measurements and i pull down the cap all the way to that line. That'S right above the eyes, because that's where the front slash middle of my head would be the top of my head essentially, because, like these shapes of the mannequin heads are so weird, so i pull it all. The way down be super careful when pulling on the frontal they are made of mesh. They are fragile and you do not want to rip your frontal like. That is the last thing you want to do then, because i know the frontal at the edge is going to sit at my ear. I pull down the wig cap down a little bit over where my ear would be. That way. I give myself again a little bit more space and flexibility, and then i do that the same on the other side. Trust me, you do not want to make a whole wig and it's too small. Nothing is worse than a too small wig and it's uncomfortable and it's too tight, and it gives you a headache. I'Ve done it before it is the worst. That'S why i try to avoid sewing on the seam and on that front band, because it's honestly the worst thing so, as you can see, this kind of would mimic more of a head as opposed to. If i had actually used the wig head the way it is, then it's going to be a weirder shape and even the back you're not going to be able to like sew the back. So this is my 26 inch sheen, hair and body wave um yeah. This hair is just bomb guys. I can't wait to do a follow-up review, so stay tuned for that. So this is how i'm gon na start um just making sure the back is tight. That way, i'm able to sew properly without having to like it move too much and again laying the foundation is the most important part. So these are the parts that you want to take your time on. It took me - probably, i would say - 30 minutes at least to kind of get this correct, because this was my birthday wig and i was not trying to look crazy, so yeah. I want to do it correct and do it correctly the first time so i'm going to lay the track right above the seam and that's where i'm going to place it. Also. I like giving myself that little extra room with that band at the back and then remember too, you are going to be sewing on an extra band. So if you see that little piece, that's kind of hanging a little bit, that's for your band from amazon that i got the brown band that i showed you earlier so yeah, i'm just gon na place that and then i'm gon na start sewing and using the Same method that i used for sewing the frontal making sure i put the knot in making sure i loop the hair over or loop the thread over the needle and kind of do that so yeah. That'S essentially how i do that, but, like i said, laying this down is probably the best way to get a good, looking, wig and sometimes i'll even take this off and see how it fits now before. I even continue to make sure i'm in the right place, but then, when i get to the end of the track, i never ever ever cut my tracks. I find that it makes it like weird. If you cut it one. If you want to reuse the hair, then you have to figure out what piece goes where and also. I just think that, like when you cut it, it just tends to just shed more so i always fold it over once you go to the end just kind of fold. It use the pins, pin it down where you want it. I think another important thing is creating even spaces. You could be a little bit more gappy at the back. If you don't have enough hair and then be a little bit closer, but you don't want it to be super spacey in the back and then super tight in the beginning. It will definitely create that illusion that your wig doesn't sit as nice. It'S gon na be heavy at the top and the sparse at the bottom. You don't want that either. So i try to make it as even as possible and i just keep sewing so this is how my hair looks with two packs in it. I used three packs in total, but i thought this was important to show you that once you start getting a little bit closer to the front, i'll leave a little bit more of a gap there. That way, you can sew the front hairs with from perimeter to perimeter, as opposed to once you sew you kind of sew in the middle and then once you get a little bit closer to the top, you don't have to leave too much space, but enough space For at least two to three tracks that way your hair sits nicely because that back part is gon na look a little bit more bulky. You do want tracks to sit as smooth as possible, so it's important to have longer pieces at the front so that your hair looks smooth, especially with straight hair, wavy hair. If you have curly hair, it's not so much of a big deal, but i find that this does make your wigs sit as flat as it could be just making, starting with the perimeter at the back, doing a little bit longer strokes. And while you get to the middle, doing the the layers a little bit smaller and then leave really big gaps for the front, so kim glitz has gifted me some items, one of which is this flat iron and it is so bomb at first. I was a little bit intimidated by this because it's so big she has different sizes. I got this size, but i absolutely love it. I haven't worn straight hair in years and this flat iron, i'm it's so easy to just go in and flat iron. Your hair, in literally five minutes, so i will leave the links down below to her instagram. She specializes in short, hair here in the uk, so make sure you go check her out and check out her stuff. So yeah guys. This is the final product. And honestly, i was absolutely in love with this hair. I haven't worn straight hair in years, so it was a pleasant surprise how good this looked and honestly sheen is coming for the girl he's next, so yeah. If you guys, like this video, make sure you like comment and subscribe, like i said, i'm gon na definitely do a follow-up video, so you guys can see how the hair is wearing and tearing and i'll see you guys for another video bye, guys.


Comments
Brandi Elliott: Perfect x
Sher's World: Yaasss