Diy Clip In Extensions For Curly Hair | Instant Highlights Using Extensions
- Posted on 07 August, 2020
- Clip-in Hair Extensions
- By Anonymous
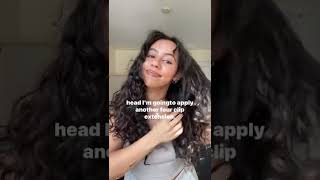
Hey guys pls check out this DIY Clip-In Extensions tutorial for Curly or Textured hair! The hair I’m using is 30” long & I’ll also be adding highlights using no bleach!! Leave a thumbs up & SUBSCRIBE! Enjoy xoxo
Hey guys, thanks for tuning in and welcome back to my channel, so today we are at it again with another diy extension and highlight tutorial. So if you want to see how i go from this to this, keep watching alright guys thanks for tuning in and welcome back to my channel, i am josie if you are new and if you are not new thanks for tuning in go ahead and leave me A thumbs up click the like button or subscribe. So today we are going to be doing a diy do-it-yourself clip, in extension, for curly hair. It'S going to look as natural as possible and we are also going to add some highlights yes highlights, but there will be no bleach, no dye and try to make this as easy and as simple and quick as possible for you guys and then i recently did A diy balayage on curly or textured hair tutorial so i'll have that linked below be sure to go check that out. So what i really wanted to do was a black with some pretty blonde coming through. I could not find a pretty blonde color. Let me take that back. There was lots of blonde colors. I could not find a blonde that was in the length or the type of hair that i wanted. So i'll just show you guys what i was working with. So this is the original hair. I want it because i've gotten it before and it's really good, so it ranges from like 18, all the way to 36 inches. I love this hair and it's italian curl, but this blonde baby. I just did not like this blonde. I feel like it looks cheap and since the hair is not real, i can't even dye it to another color. So that's not going to work for me. So here's the deep wave, which is a different type of curl pattern, but these browns are more realistically a color that i'd like to pick and i think, will look good with my skin tone. Okay, i'm just dropping it. As you can see, the italian curl is a lot curlier and would probably blend and match my hair a little better, but we're going to go ahead and give the deep wave a try. So i'd really like to use all three of these colors. But since i don't know how it's going to come out, i'm probably just going to pick that first and that third one and stick with those two just to play it safe now, you've seen the hair, let's get into the clip-in part. So, typically, when i make clip-ins, i like to do two tracks on one row, so, instead of just one track, i like to double them and have two that creates a more full look, makes it look more natural. I feel like it helps my hair blend more and it stops them from looking stringy or thin, make sure, there's some volume and a lot of texture in there, so it can blend with your hair. Today, i'm either gon na do one black row, one brown and another black, which would be three. I'Ve never tried that um if it's just too hard to get the needle and the thread through there or if it just looks too bulky or doesn't work. We'Re gon na scratch that out and i'm gon na do one row with two black tracks and the next row is gon na, be black and brown, and i'm just gon na alternate from black to brown, black black and brown, black black and brown yeah. Okay, so anywho, let me show you all the hair. So honestly it has a nice curl to it still for deep wave um, it's just looser than the type of curl i want. So here's the brown. This is cute really sandy, so not quite blonde, but that blonde just was atrocious and i don't think it would have looked good with this or on my skin tone. So so next up you're gon na need your needle and thread of course, and then your shias and clips are your cookies one, two three four five six there will probably be a total of six tracks. I got a 12 pack and then a couple of two packs. Let me go ahead and get all this hair out and just size the tracks to your head and then you can go ahead and cut them. Do we think we can do a third track? So this is how it would look with two just the two one, black one brown. I really like how it looks with three, though here's my first two clips got two needles. Threaded very important, too, make sure your clip is the right way before you sew it. On, let me get the first thread through there and i'll come show you what i'm exactly doing. Oh sweet niblets! We are we're about to do triple tracks. You know, maybe that's what i should call this triple tracks diy triple tracks. Oh, you guys can't even see what i'm doing i'm so fake right now, but this is just the first one i like to put the needle and the thread through the first hole and then tie a couple. Knots here is what we have to work with. I'M gon na put it through here and i am shaking a little, but it's because i'm trying to make sure i get in the camera and doing it right so just pull that in there. So i've already done it. I think twice, i'm gon na do it! One more time - and this looks a hot mess right here - i'm gon na brush it and make sure everything looks nice. It'S just it's hard when you're doing it from this angle, not even mine. I'M getting annoying, oh just snap, that back like that. If that happens, okay, i will say with three tracks. Unlike two, you have to really just make sure you are pulling the hair, nice and tight, so we're gon na go ahead and probably gon na. Do this side like five times and then two more on the other side, and i think that should be secure. We'Re gon na go ahead and cut this piece. So this is that one side and we're gon na go ahead and do the next side all right and just make sure to pay attention so that you don't poke your finger and also make sure to grip the track so that they're not loose. So here is our first track, so i do want these to be really subtle, so i'm probably gon na do the next row just two black and then the next one, three again with the brown. But yes, here is the first track extract, like i said, was going to be all black, so i have that one ready to go and sized out to fit my scalp, then the next row, as i promised i was gon na, do three again so with these I'M just gon na do black and brown. I'M only gon na do two tracks, but i'm actually gon na mix the colors on these ones. Because it's the front, you know we want some of that. Some of that gold to pop out in the front like it's britney, the last piece literally, is perfect to kind of fit like right here at the top, the crown of my head. So - and this is all we have left so we got to make it work. All right so we're on our second track, so i'm going to go ahead and just show you guys me doing this one more time because it is pretty self-explanatory, so keep sewing in make sure to hold it tight and firmly and, as you can see, i'm starting To struggle here, sometimes it does get a little tough to pull the needle through just try to not yank it, because sometimes that will break it. And then you have to start over, but again you're literally just going to be pushing that needle and thread through that. Little hole with your clip, pulling it back through and continuing once it's nice and tight you'll tie a knot to secure it, and you have yourself another clip sewed onto that track. I'M just moving this camera all around trying to show y'all like. Let me move. Oh, my gosh, i got my finger yeah, so this is probably gon na be the last one. I do right here. I think you guys get it right. My finger really hurts. So here is the first one, nice long and luscious, and here is our second row. Only two tracks are black because we're trying to be a little subtle smelling some sally. Oh, my hair can handle these three tracks. Handle done, love it. My finger hurts i'm gon na have to come back guys. How did i do this like come on girl? So here was our first piece and we did three tracks on this, so we did black, then the brown and then the black, our next one's. Just a little wider that one was all black because you know you want to be a subtle sally. So that's how it's gon na look once these two are layered. Next one is the biggest clip, so this one is going to go from the back all the way to the kind of side front of your head, and it has three clips. If you can see instead of two, it's the only one that has three clips, because i just wanted to make sure it was secure and it's not gon na be falling down. This is gon na, be the piece for the crown of the head that one's all black. Lastly, are two side front pieces um right here, and i just did one black one brown for these, so i can show so four and then two on the side. So this is all of them with all of our clips that we did ourselves all right guys. So here is the finished. Look i love it. I love the way it came out so instead of highlights. This is honestly. I feel like more like a balayage because they're like randomly just placed since i added more black, but i do love it um. So as far as this hair, this hair is not real hair and it was only, i think, 10 bucks for each pack. I typically like to get human hair, so i can dye it, but i just wanted something fun because i'm going on vacation. Oh i got this hair shorter. I think in like 18 no 20 and 22 inches and loved it. I will say with the 30 inch it like, it sheds a lot more. Oh, it's really tangly. So these are not going to be clip-ins. I probably wear all the time, they're not going to be my everyday clip-ins. These are going to be my fun going out. Clippings, so let me show you all the back really quick. My hair is starting to get out, oh my god, harder to hide with clip-ins or just extensions period, the back next to the back. So i can see the it's just length long. If you can see some of my real hair flyaways in there, i'm sorry, my hair is just really frizzy right now, so it's not blending. Well, i haven't brushed these out either. I probably have to brush why it's not clipped into my head, but that's it guys. I really hope you all enjoyed. Please leave me a thumbs up and subscribe. Also, you can follow me on instagram at josiejadexo.


Comments
breanna comer: I love this. It’s soooo smart
Jody B: