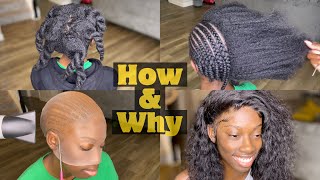
How To Install Kinky Curly Clip-In Human Hair Extension By Tayloralycem | Evawigs Tutorial
- Posted on 09 February, 2015
- Clip-in Hair Extensions
- By Anonymous
This video is originally filmed by our YouTube diva @Tayloralycem. She made our kinky curly Brazilian virgin hair wefts to some clip ins, it's so nice. And in this video, she showed us how she applied the clip ins. Thank you very much!
The hair link: http://www.evawigs.com/hair-extensions...
Sku: hwc013
Hair color: #2-Darkest Brown
Hair type: Brazilian Virgin Hair
Weft 1 Length: 20''
Weft 2 Length: 22''
Weft 3 Length: 24''
Closure Length: 18''
Hair Texture: Silky (Non-Yaki)
Lace Material: Swiss lace
Lace Color: Light Brown
Lace Size: 3" x 4.5"
Enter coupon code: EVAYTB, get $20 off, no time limited.
Follow us:
Instagram: http://instagram.com/evawigs/
FaceBook: https://www.facebook.com/EvaWigs
Twitter: https://twitter.com/EvaWigs
Pinterest: https://www.pinterest.com/evawigs/
Hey ladies, this Taylor, lease here, and I'm just here to show you guys how I install my curly clip-ins. This is the first time I've ever used to clip in so bear with me. If my technique isn't how everyone else's technique is, this is just how I'm doing it and how I feel like it would work. So my hair is fresh from a twist out. I just kind of kind of figured detangled it, but so the first thing I'm gon na do I'm gon na lay my smallest clip in on the nape of my hair, and obviously you can see the length difference from my hair. Then the clip ends. That'S perfectly fine because later on, it will add body and it will make the look look even more natural because it is thick and it is curly. So I'm just gon na add another layer and I'm not taking too thick of layers and taking like thinner layers and the reason why I had a twist out on my hair. Rather than I'm just doing my hair fresh from a wash and goes because my hair shrinks - and I wanted my hair to be stretched but still have a pattern in it and so a twist out, I thought would be perfect. I was gon na. Do a braid out, but braid outs take much longer than twist out. So I decided to do a twist out and, as you can see, that laying down that second row of hair still looks very natural and you can see that layering on top is just gon na make it look even more natural. As I go up on my hair, so right now, I'm just free pardoning it. I did measure my head when I was making the clip in so some of the clips that I have like measured to exactly how my head is. If that makes any sense like, I measured it from track to track and I just cut the tracks to the measurement and then I just put the clip the clips on and I just showed the clips and then and as you can see, I'm just making sure That I adjust my clip, so if something doesn't feel right, I make sure that I adjust, because you don't want any hair snagged on the clips or anything like that. So if it feels awkward, if it feels like it's tugging on some hair, if it feels like it's making your head sore, take it out, redo it and see if it works and if it doesn't work, don't put it in your hair because that's damaging to your Hair, but I was just suggesting because it felt like the clip is loose, and so I'm just gon na add another layer and that one is a longer track because it goes to behind my ears to behind my other ear. And I make sure I made sure that I didn't lay - or I didn't make the tracks long enough to be next to my edges, because I wanted it to be behind my ears and behind my hairline, because it looks way more natural. That way, and if you have a natural hairline, it just looks a lot better than putting it directly on your edges or the front of your head and so just taking the other another track and just doing it again, majority of my clippings have three clips on Each of them, besides the nape clip in the make Oakland hat but my longer tracks and everything like that - have three clips, and I don't know how many clip or hair pieces that I use for this. I just use basically the whole wig that I had from evil, wigs so or besides the closure, but that was like three bundles, so I would say like two and a half bundles was in this were made to make these clip ins. So I'm just going to add another layer and, as you can see, looks very natural now, just imagine if I wet it and then you know actually defined it. It would look much better, but today I was going for the wild look, so I didn't really care if it was defined or not, and so I'm just making sure. I part that and then basically, I'm just going into you formation the whole time. So I'm just parting out a U and working my way up, and it's just like a! U part, so I'm just working my way up, forming a U or a c-shape. If that makes any sense, I'm just making sure that I have it in a ponytail and then I'm just gon na add another track, and this one is going to be a shorter track because I'm going to do a side part. So I don't want it to go all the way across the whole time, so I'm going to make that shorter track right there and then I'm going to do the same. On the other side, I'm just gon na make sure that it's clipped and then I'm gon na actually get a comb and part out my part and sometimes I'll do a metal part. I did do a metal part when I film this tutorial before, but I, like the side part better. It looked a little bit more natural and it took less blending effort. So I wanted to do the side part and I felt like it was easier. My hair texture is a 4a 4b texture, so it's easier to blend in with this curly hair. I won't say this technique will work for everyone, but the way that I do it, I kind of raked the hair into the weave, so it works for my hair. So if your hair texture is like mine, my length, it will work for you, but I don't know I can't vouch for everyone's technique or everyone's hair type. So I'm just gon na say this one. This technique works for me, and so I'm just gon na add another track and just work it around and put it underneath the hair that I have set up for my part and as you can see, that's what I did I lifted up the piece that was Set aside from my part and then I lifted up, and then I put the track underneath and so I'm just gon na add one more in my head and then after that I'm just gon na rake. My hair down, I could add one more, but I just didn't feel like it plus. The one piece that I had left over was too long to put it in my head, at least at the top, so I didn't really feel like doing it. So I'm just gon na add some more of my curl and defined gel, and I'm just gon na. Add that on my edges and then I'm gon na add it on the piece in the front so that I would be able to rake it through the hair that I have in the front from the extensions. And so as I'm working my hair through I'm. Just making sure that I rake it and then I'm just gon na shake my head a few times as usual, just to get everything in uniform and just see where everything falls and if I need to make any adjustments, I will, and so, as you can see, I'M just rubbing my hair just to make sure that I can blend it blend it and, as you can see, I love shaking my hair. I don't know why I do, but it works for me and I love that I can do it. It makes everything, look effortless and so yeah. This is how it turned out. I know I could do a better technique, but this is a cool attempt from my first ever clip ins on my head. I'Ve never used clippings. I'Ve always made wigs for my head, so I hope you guys enjoyed this video and please comment down below if you guys have any techniques that you guys use for your clippings. If you guys want me to show you guys how I style these more also, if you want me to tell you guys how I made these clippings, I can do a little tutorial. I have many ideas for this hair on, because these clippings are so versatile. I can do buns and everything like that, so just leave it down below if you guys have any root. So I hope you enjoyed the video and I will see you guys in my next one god bless

Comments
Debra Miller: Good job my beautiful daughter @tayloralycem !!!
Shamina Boardman: very nice video. looking fwd to others.
Korii Smith: How many clips do you need?