Hair Extension Mistakes| Before And After
- Posted on 10 April, 2016
- Fusion Hair Extensions
- By Anonymous
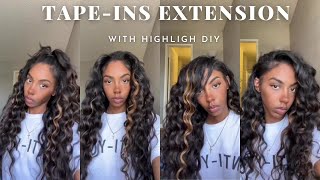
Hi Gorgeous! Here is the video that will save you from embarrassment. This video will show you how to AVOID the 5 hair extension mistakes when installing your extensions. Techniques included!
The after picture is on my instagram page---- @johannasalon
Help my channel grow by subscribing and sharing these videos. Your support is my encouragement to keep going!
FOLLOW ME:
https://www.youtube.com/user/JHH0980/v...
instagram.com/johannasalon
facebook.com/johannasalon
twitter.com/johannasalon
For Serious Business Inquiries ONLY:
IF YOU ARE A COMPANY INTERESTED IN SENDING YOUR PRODUCTS send to:
JOHANNA SALON
P.O. BOX 360135
BROOKLYN, NY 11236
Hi guys welcome back to my channel. So, as you guys can see, we have a new background and I am so excited because I made this it's a very small space like literally like this big, but I made this little background because I wanted you guys to know that I am really dedicated so Making videos - and you know I want to make this fun and cute and classy at the same time, and I just hope that you guys like it because I'm going to be switching backgrounds as you guys can see. I did a purple background in my last videos, but with this one I bought these things from like Target and homeless, and just a little few accents to make the space look cuter and more inviting right because we're girls, you know that's what we like, so not That that's out of the way the video we're about to do today is how to put in your extensions the right way and avoid the 5 biggest mistakes that you can make, while putting in your extensions, so the extension that I'm gon na be using today. You guys have seen before and they're from Bellamy. These are the beach blonde and I colored the roots just to match my hair a while ago. So, as you guys can see from the thumbnail and the cut in the title of this, video is how to avoid the 5 her steaks while putting in your extensions and it's very easy, just use common sense. That'S number one number two is you know when you are putting in your extensions, you want to show that it matches your hair color. That'S another biggest mistake that people do you want to get it as close to your hair color as possible, whether your hair is colored or not, because as long as you get it to a color, that's as close to your color, it would you know, be sort Of seamless and undetectable, or rather the other mistake that you should avoid, is putting in like two or three tracks now I do a lot of extensions on my clients and when I got a new client, they will usually tell me. Oh, I didn't want to track sing or actor someone. You know three tracks and something quick and I'm like girl. You don't know me, I do not do two tracks you're coming out of here with a photo. I'M talking, but you know what I'm trying to say is you're not gon na put into charts, and it's going to look. Oh, my god like natural. No, it's not so just make sure you have enough hair that you can blend it with your own hair, especially if your hair, shorter, you're gon na need more more Wes. If your hair's longer than you can probably get away with three to four to make a seamless and undetectable the other thing, is you know when you're putting it in make sure that you put it you're installing your extensions, you know properly with the right techniques so That way, they really will be in there and they're, not like falling out or they're, not like sticking out out of here or when you're like bending down. You can see it they left in there because that's really like girl, you don't look in the mirror, but I mean those are those are like the common mistakes that people make when putting them in their expansion. So I'm going to show you the right way on how to install with your extensions. Well, these are clipping so there's different methods, but the way we're doing it today is clipping method. So without further to it, you guys can see. My hair is pretty, and I'm going to show you guys exactly what to do to putting those extensions the right way, of course. So now I'm going to be showing you how to prep your hair for the extensions so because my hair is curly and last night I did not wrap my hair. While I was sleeping, my hair got a little frizzy to frizz ball, so I have a few hairs like right here that are kind of frizzy, so the first tip that I'm going to be giving you is, depending on the style, then you're going to be studying Here and depending on the texture of you here, like my hair, is curling and if it touches water or if it's humid outside it's gon na freeze up. So what I would recommend this do a quick pass with a flatiron before you start putting in your extensions. Just so all the hair can be nice and straight, and then, if you want to curl, you want to want it you're welcome to do that. So the first thing I'm going to do is I'm going to just do a quick path of the fluttering okay. So I have already flat ironed my hair rather quickly. So the next thing that we're going to do is we're going to section off the from the top of the ears up, I'm going to section that piece off and then I'm going to take a subsection in the back. So what you gon na do is you're. Just gon na measure out inch to an inch and a half from your knee up to your head and section that off okay, so I'm gon na turn around. I just want you to see exactly how to do the technique, so you guys can get it right. The way I do it, okay so now I have turned around and the first thing you wan na do is you you're gon na divide yourself section, like I told you, you're gon na, take from your knee up about an inch and a half, it's sort of Like minier right here so just make a line across like that and then section that off now what I do with the hair. I take a fine-tooth comb and I tease right here on my roots. You know a few passes. I take a finishing spray like this. One now finishing sprays are very lightweight, so it's not going to be a hard hold. It'S just gon na be enough to have the extensions grip onto that root. So what are we taking my first weft - and this is the one with two clips right here. So you open up your clips. You grab a piece of hair. Make sure that you don't start here. You want to start about half an inch to an inch in and then you just hold your root and clip it right in there. Then you take your other side and it should fall right before your your hair ends, and that was your first left right in there. As you can see, if you you know, you try to test it with your hands, it shouldn't be moving okay. So now we're going to take the next section now this section is only going to be about half an inch. You don't want to go more than that, because you want just face it in as as few as possible extension them. So we're just going to be repeating the same steps old over and over once I get to the top. I will show you a different method, so I've already put in one two, three, four whoops and - and I have already reached to the top of my ear and the reason why I stopped and do that. I actually want to show you guys exactly what to do. So a first section that we're going to do is right on top of the ear, so we're going to go about an inch on top of the ear. An inch is really like. You see the first line on your finger. That'S basically a guide for me. So this is about an inch or so, but you know we're not going to go, get our money for measuring ting, so I'll body, you know an inch right on the top of the ear you're going to take that section and go like a horseshoe section. All the way around your crown you're going to take this whole top section and you're gon na pin it away like that beautiful gorgeous what hello gorgeous. I should be my new just gon na be my new thing. Instead of saying hi guys, I'm gon na say hello gorgeous, okay, so we're going to be doing the same thing same exact thing now, with the front section you do not wan na put us watching right here, you're gon na start, the watch just just above that Ear right there, okay, so the longer works are have four clips in them. So that should be enough for that whole top section see right here. This one is kind of loose and that's because it's not teased properly. So I'm going to tease this again and now it's much better. So that's one of the things when you feel that a clip is loose is because you didn't ease properly and it has no grip. It'S not gon na grip to your hair, so make sure that you tease and you spray that area and well now, with the top section, is a little trickier just because you have gotten to the top of your. You have gotten to the top and you don't want that last left to show so the second to last, the one that I just put in. I have one more worked and then I have the individuals left so the second to last you're gon na kind of just like stack them on top of each other, so it will blend with your hair, with my hair, my hats pretty thick, so you won't really Noticed it, but if you have thinner hair, then you I do not recommend that you put the extension right up on your crown. Put it a little lower so, instead of doing like um half an inch you're gon na do maybe a quarter of an inch in space between them go to make. This see right here needs a little more hair and again just tease Spray and then clip it in. So I'm going to show you what we have done so far. This is what they look like. So now we're going to do the front section. I want it to be too long and I feel like it is so with the front section, because my hair, you know I have these little pieces, I'm just going to put two in here and two in here and then just try to blend as much as Possible, actually, I'm gon na do a side part, so I'm not going to put any on this side. What I'm gon na do is I'm just gon na make sure that the West, you can't see them and I'm going to do a deep side. Part like this. So basically, I'm going to be putting in those four pounds for individuals these. These are about an inch and another. I'M gon na use all four but we'll see cuz. I really like this type and action thing, so I'm just gon na put them like right in here now being that this side gang is gon na really cover half of my face. You can put an extension right up in here because you're not pulling the hair back, so it's not gon na be noticed. So I'm going to put another one right in here on the bottom. I don't think that that's the best location for it so guys, as you can see, this is what they look like and I haven't even curled them. I just put in a few pieces here in the front I put in two only I have to pull the last two left, but I want to show you the back, so basically, what I'm trying to show you guys is you need to play around with your Extensions, you need to kind of know your hair and also you need to avoid the five common mistakes that I mentioned in the beginning, and I hope that you guys like it. You know I'm going to be posting the final picture of the hair or curls, and everything on Instagram so make sure you follow me on instagram to see the after pictures, because you know it takes a long time and I don't want to drag this video. It'S just I'm just gon na want it real, quick, it's nothing special. So I hope that you guys enjoyed this tutorial. It was so much fun. I'Ve been trying to do this tutorial for a while, and I hope that you guys can follow all these tips and tricks on how to avoid mistakes um, while putting in your hair extensions and the proper way to put in your clip in hair extensions. Now I want to tell you if you haven't subscribed, please subscribe if you're new to my channel, this channel is meant to give you with lots of information tutorials. How tools - and you know anything here. Makeup related also tell me what you guys think about the backgrounds you guys like it. I mean I like it after a lot of effort into it, and you know I just wanted to make it more cute for you guys. You know something you know girly. You know so tell me what you guys think about it. If you like it, you don't like it or would you like to see something else just saw me coming below and I will shore shore short so coming back now. I have something else to tell you guys: I am thinking about starting a fashion blog, so I will be posting a video on the different looks that I have done and you know like recently cuz. Obviously, you can just everything, but you know the certain looks and wear fine things: um uh, no budget. Okay. So if you guys want to see that comment below as well, I'm gon na be trying to make the video in the next two weeks. I just want to get some things ready for that. So again, you have a subscribe. Subscribe comment share like see you next video. What kisses kisses to you guys! Thank you. So much bye,

Comments
anneshirley duncan: Thank you. I bought some of these awhile back. But, they didn't have instructions. And I no clue, what to do. I found your channel today. After about halfway through, I was hooked. I love your background.
Zakia Kelly: Love the background!!!and than necklace is to die for!!!Great video, very informational, please do more. Question: what kind of extensions do you recommend for African-American hair. I have some extensions that are remi and they seem to be too shiny and don't blend with my textured hair.
Kesha H: Yesss would love to see the fashion vlogs. I always try to shop on a budget
Diamond Brown: Cute background! Long videos are always good very informative
Sharlesha Owens: Where did you get the extensions?
noirprncess: I thought you were going to install a sew in extensions, not clip ins. Really loved your necklace.
Anita Vives: Love your background...and the video
noirprncess: Forgot to mention, I like the new background.
Sunshine Jewel: Where's the hair from?