Micro Links Secrets Revealed | Braidless Sewin #Seemlesssewin #Braidlesssewin
- Posted on 13 May, 2019
- Microlink Hair Extensions
- By Anonymous
Microlinks Secrets Revealed Tutorial. No Braids. No Glue. No Thread. Please like, comment and subscribe to get a detailed video on your pricing structure.
**This is a luxury service and is NOT a protective style**
#microlinks #microlinkstutorial #braidlesssewin
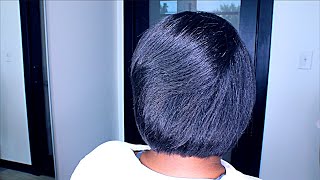
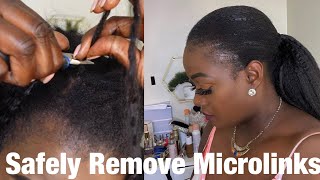
Hi everyone. I would like to thank you for purchasing the course. My name is Tiffany, and I am known as beautiful our Tiffany on Instagram. The tools I will be using is extensive fire, silicon micro beads and a crochet needle the culture. Needle that is pictured here is not the same crochet needle that I will be using in the tutorial. My crochet needle has a hook and a latch on opposite in the pliers will be used to open and close the crochet needle when you're, installing it uninstalling extensions, and one of the most important things is to make sure that your light bulbs are lined with silicone. If it is not like the silicone, it can cause breakage to your guests for clients, hair, and you want to also make sure that you are matching the beads with the color of the clients hair as well. So they do come in various colors, such as black brown and based, and that's what blonde would started a new install. You always want to begin at the nape of the neck, leaving at least an inch to an inch and a half of hair before inserting your dry tract placement after you started at the nape of the neck, you will take that same idea of not placing a Track from perimeter to form you will always want to leave at least a half an inch of spacing along your perimeter, so you will take the track going from ear to ear up until you reach the plateau Ridge, which is the natural curve of your head. I don't want to talk through the entire tutorial. However, I just want to point out that I already laid the tracks for the nape of the neck and what you will see me here again just land tracks in the middle, showing you that I already pre-cut my track and I love that half an inch of Space, I'm on the perimeter to make sure that there will be coverage and also you also see me using the needle in to open up a space, so I can insert the crochet hook through the double wefted track. I also use my noodle hope to kind of smooth out the amount of hair to ensure that it is enough hair that it's not too thin, and it's not too thick, so you can't fit in between those double web. Okay guys. So at this point, I'm using the pliers to hold the bead closer to the scalp, and you will also use the pliers to position it underneath the weft. So you can't see the bead, because the whole purpose is for it to be invisible. You will also need to make sure that the bead is not too tight, because it can cause the breakage if it's too tight, so the best way to just to make sure that you can move it slightly and also just simply just ask your client hey. Do you feel that this is too much tension on your scout? What you see here is me using my comb, to show you that there should be a Lisa into our inch and a half in between each speed. You want to make sure that when you lay your track with the B that there is no ways that your track is not wavering or have ridges your track should lay seamless and flat to have a seamless, install and to remove your micro links. You will simply just use your pliers to open your clothes micro, bead and slide it out and when you're doing a four-week touch of or tightening services, you would go through open your bead and just push your beat forward and close it back again. If, during the tightening services that you see that the silicone is missing out of the beat, sometimes it just falls out make sure you replace it with the newbie with that is silicone line, okay, guys so Grenier in the end of the tutorial? So you will keep playing your tracks from ear to ear up until you reach the parietal Ridge. Once you reached a plateau Ridge, you would either do your tracks either horizontally or vertically. You will leave your tracks vertically. If your guests know they're going to wear a little part or side part, you would just lay it vertically at the apex. Some people call it the apex or the horseshoe or the top of the head. If your guests know they do not like wearing middle parts or side parts and they just like wearing their hair straight back, then you can lay the tracks horizontally. Thank you guys so much for tuning in here's. The price listings for a partial, full, install shampoo style. Your four week update and just tightening services just know that the prices may vary if you're in different locations in different regions, I'm in a college town, so my persons will be lower than those that are from New York or other major cities such as LA or Houston, thank you guys so much and I really hope you enjoyed it.


Comments
My Style Diary: Thank you so much for this video! I’ve been wanting to learn this technique and was going to pay 1600! There sooo many different ways but I’m convinced this is the actual PROPER way to install mircolinks! I tried them on myself another way and it still looks great but this is the secret to it laying flat. Again thank you!
EbonyLynette: I had to comment! I actually did this on myself this method is Ah-mazing! My hair looks gorgeous! This was the first time I attempted this type of install. It took a minute for me to find a rhythm, but I found it! Your method was the most clean and precise way to install without sewing. Thank you for sharing!!
Tyra Stinnett: i’ve been looking all over for this method!!! thank you so much for posting, such a blessing!
andrea1030: Going to try this hopefully this weekend. Was trying to figure out how a popular IG stylist did the technique that she is charging $1600 to learn-using wefts and hidden beads. Thank you!!
Nicole Blackman: Thank you for this video! Like everyone else I was gonna take the class to learn this method (metowi) . I am a licensed stylist form NYC and will be offering this service soon for clients. Blessings
Lolita Leeks: Love the video!!! What size beads do you recommend? The 5mm or Nano? Thank you in advance for your help.
Kamisha Goodwin: Thank you for making this video. It was very informative.
Goddess: Thank you so much for showing this method! Like everyone else lol I too was going to pay 2400 to learn. Glad I can use it toward something else. Can you tell us the size of the beads?
Alvine Ledbetter: Hello and thank you for sharing! I have a crown thinning client that likes to eear her hair forward to cover her forehead, do I start the install at the front and overlap the next row to cover the thin areas. This will be my first time using the micro & nano links. Will you show a technique for a forward style...please and thank you.
Milon: Great work! Can I ask what size mm the beads are?
Roxie Wray: Thank you so much for sharing ❤️
Dope Beauti: God bless you for posting this
ciattylovesperoni: how is this video not more popular! this method is so great!
Chanell Mitchell: Where can i get the that tool
Queen Of It All: This video is great. Where'd you get the tool?
Bessie Kuri: God bless you people have been hiding this method in their videos thank you so much
Cierra Lanae: Did you put the crochet needle through the weft, attach the clients hair and then pull it through?
Kayla Shawnae: Thank you my love
Chanell Mitchell: Did pre double the track
Joyster JMac: . Thk you