New Box Braid Sew-In Method With Frontal Braids For Alopecia, Short, Thin, Damaged, Hair
- Posted on 05 June, 2022
- Sew-In Hair Extensions
- By Anonymous
PLEASE SUBSCRIBE, GIVE A THUMBS UP, HIT THE BELL SO THAT YOU CAN SEE NEW VIDEOS EVERY WEEK, SAVE & SHARE THIS VIDEO!
For More Information About Our Services, Hair Growth Products,
Hair, Wigs, Videos. Pics Etc. PLEASE VISIT OUR WEBSITE & PAGES:
https://www.facebook.com/TsBraidsWeave...
https://www.youtube.com/c/WestCoastFin...
https://tsbraidsweavesgandghairgrowth....
DONATE TO MY CHANNEL IF YOU WISH TOO:
CASHAPP: $TsBraidsWeaves
VISIT OUR SITES FOR MANY BEAUTIFUL STYLES & HAIR GROWTH PRODUCTS..
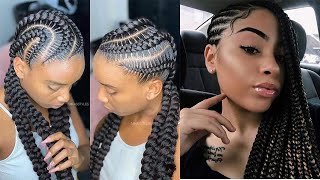
Peace and blessings fam, it's your girl, t, t's, braids waves and wigs. Yes, i do service in california, and here is what i love to do. Yes, alopecia. It will not win. No, it will not. Today, i am going to be doing an amazing hairstyle. Look at this style. Yes, i am going to lift her self-esteem, her self-confidence and make her feel good about herself when she steps outside. So yes, today, i am going to start off using our gng hair grow butter. Yes, our gng hair growth butter is made with 100 all natural oils and herbs. So in this video it's going to be pretty long, because i am going to show details of how i create this style. This is my very first time ever doing the style on a client, and i'm going to use my creativity to hide all this hair loss that she has. She does want braids, so i am going to create the braids in the front and give her box braids in the back. So please continue to watch as i give you details step by step. How to accomplish this. Look how this hair butter is melting into her scalp? Yes, if you want hair growth, you want a good hair growth butter to stimulate your scalp and promote some hair growth. Put your order. In now, the link is below our prices are very affordable, very reasonable. Our smart jars are ten dollars. Our large jars are twenty dollars and, yes, it is made with one hundred percent all natural oils and herbs. I'M talking sage basil, mint, coconut shea butter, you name it it is in there we packed it with all different hair growth herbs. So, yes, i am doing some head massaging and some scalp massaging, as i am using the hair growth butter. Ladies, this is very important. These head and scalp massages help stimulate the scalp to promote hair growth, so you need to do this on a regular basis. I can't stress it enough, even with your protective styles go on top of your wigs go on top of your weaves or whatever and move your hand in those circular motions, massaging and stimulating those hair follicles for hair growth. So yes step one, i am going to start preparing her braid pattern, i'm doing a braid pattern that is going to be consistent with this hairstyle that i'm going to create. She wants braids and i am going to create braids for her, even though she has hair loss in the front. So if you are interested in how i achieve this style, please continue to watch. I am going to go step by step and i'm going to come back from time to time to explain in details what each step it is that i am doing again. This is the very first time that i've even attempted to create a style like this. On a client with hair loss, but my ultimate goal is to help as many people as i can and do whatever i can to promote styles and create styles for people such as my client who have hair loss. So yes again step one, i'm going to continue to work on this braid pattern and i will come back in with details on the next step. So please continue to watch and i thank you so much for all your support and my channel okay. So i am going to be using the 13x4 lace frontal and i'm going to be using my elastic band method, and this is what i'm going to use to create the braids in the front. For my client, yes, i love my elastic band frontal method. I use this a lot with all my clients who have hair loss or who have thin hair. I refuse to use glue because, in my opinion, blue glue is not healthy for your hair and i'm trying to do what's most healthiest for my clients, hair each and every time so watch how i install the lace frontal. As you can see, the elastic band goes at the bottom, underneath the last perimeter braid or the braid that's closest to her neck, and i just slide it on, and i want to make sure that it fits nice and comfortable. It needs to be tight, but not too tight and it needs to be not too loose as well. So, as you can see, here is the last band and i'm asking my client: how does it feel? Is it too tight? Is it too loose? She says it feels too loose for her. She wants it to be a little tighter, and this is what you need to do if the band is too loose, grab it to the portion of tightness that is desired and just stitch. It - and all you have to do is just stitch it to the desire of your client. Again, you don't want it to be too tight, but you don't want it to be too loose, because this is what's going to keep it from slipping and sliding in the front without using any glue. So again you want to make sure that it's nice and comfortable. I am going to finish this part off and i will come back and let to know the next details of the second or actually the third step, because this is the second step which is doing the elastic band and placing the frontal on. Yes. Whenever you have a client who doesn't have hair or have hair loss in the front, this is a great method that you can use. Look how sturdy and secure this is already just with the elastic band and i haven't sold the back of the frontal down yet so yes, this is a nice secure method. I love it. I use it all the time with my clients, because she does not have hair in the front and i don't want it to slip and slide. As i am braiding her cornrows down. I am going to use a little lace front tape in the front, and i find that this lace tape is much more healthier than using any glue. I'M going to place the tape on her hairline after i use a little oil because i noticed that it's very greasy around their edges because i did moisturize it really really good with our hair growth butter. So i'm just going to clean the sides off with a little bit of alcohol, as you see i'm doing here, and this is just only on her hairline. Ladies only on the hairline - and this is where i'm going to place the lace tape. The lace tape is also very good when you are removing it, you don't have to worry about any of your hair being taken out or pulled out after removing the lace tape. So that's another reason why i love using the lace tape and that i decided to use that instead of any glue, because i don't want to create any more hair loss than what she already has. This lace tape is very easy to remove and again it doesn't take out any of your hair. Look how that just peels off so that peels off and that's what i'm going to help hold the lace frontal down in the front. This is step three, placing the lace tape across her hairline or across her forehead, so that i can secure this lace frontal. When i begin doing her braids another option with the lace frontal is you can braid the braids on a wig head first before applying it on the client's hair or on your own head? If you're doing your own hair that's another option, however this particular client, i decided to do everything on her. No, we wig head needed so again continue to watch, as i finish up step three okay, so we are moving along to step four step. Four, i am going to be using a wig cap and i decided to use this. We wig cap as a foundation to be able to attach her box braids. So yes, this is another creativity that i came up with in order to be able to give my client some box braids in the back. So i place the wig cap over the entire back of her head and i am going to sew the the wig cap to the back of the frontal. So that is what's going to keep the wig cap in place and keep the frontal in place. So please watch how this step 4 process is done. Yes, if you're wondering what that cap is for, it is needed to attach those box braids again very creative. You got to get creative and that's exactly what i'm doing again. Remember, ladies keep in mind. This is the very first time that i've ever done a style like this on a client with this much hair loss. So please continue to watch as i go through step four and show you how i sew down this cap and how i sew the frontal to the wig cap. This is beautiful. This is brilliant. This is brilliant. Ladies. Keep watching please step 5 is just cutting off the access lace. I mean the access wig cap. We don't want the edge of the wig cap, it's not needed and we want that frontal to lay nice and flat so that our braids in the front will be nice and flat. So this is step five, which is cutting off the excess of the cap that we don't need. So again, please continue to watch as i go through these steps and continue to create this brilliant amazing style. I am so proud of myself. Yes, thank you. So much see me apply some additional olive oil to the top of the wig cap. Why? Because, although i stress with my clients, each and every time they come in how important it is to moisturize their scalp, they never or hardly ever do so. That was just some additional moisturizer that i wanted to add. Oh my gosh look. How this frontal is laying. I am now starting step, six, which i am corn, rolling or braiding the frontal. Yes, i'm going to braid the frontal in a straight back pattern or design. Nothing too fancy, but just to give a style in the front so that we can create this braid style that my client is desiring. So, yes, i am braiding that frontal the lace tape is holding very well as you can see how sturdy sturdy and secure it is. This frontal is not moving at all. It is laying nice and flat and flush with the wig cap. It looks so natural. Ladies. Oh, my god, it is looking so natural and so neat so again continue to watch the process. I am just going to clone roll or braid the entire front of this frontal and okay fam, so i'm almost done with braiding the entire frontal. Unfortunately, my client does not like baby hair. I tried to convince her to let me do a little bit of baby hair that will make the frontal look a lot more natural in the front. However, she says she does a lot of sweating. She doesn't know how to keep the baby hair up and she insisted that no baby hair, so i didn't leave any out all the frontal, including baby hairs all braided in. I think that that would have helped bring the style out, but as a hair stylist, you have to give your clients what they ask for and if they don't want it, you can't force them. So, yes, we are moving on to step. Seven. We are going to apply some box braids. Yes, we are doing some crochet box braids. They are 20 inches long. We are using color 1b and we are going to add a splash of color in it as well. So i am going to do regular crochets on the braids that she have in the back, and i will show you step 8 of how i attach the box braids to the wig cap. Yes, this is coming out so beautiful. Ladies, i am so proud of myself of this creativity that i am using to give my client what she wants what she needs. I am definitely working hard to accomplish this style and i am giving in 110, as i give each and every one of my clients each time they sit down in my chair. So yes, here it is. I am doing my sewing method. Yes, i am sewing these crochets to the wig cap on her head and this is going to be nice and full. I am going to eventually slow it down a little bit, so you can see we used two packs of crochet box braids again they are 20 inches long. We used color 1b and i'm going to show you the other color that we used in just a moment. So yes, this is how i am attaching the box braids to the wig cap, using my sew in method. I have several videos showing my sewing method. Yes, here is the splash of color. It is a 1b 118. I'M going to leave the link below to where you can purchase these box braids. Yes, these box braids are what 3.95 a pack. Yes, you got to get them and they are very easy to use. They don't tangle, they don't shed. The braids are amazing. So here i am slowing that process down to show you how i take the needle and thread go through free loop again. Yes, these are pre-loop face, so they are very easy to use and i actually just take the needle and thread go through the pre-loop hole and i actually go through and make a knot each and every time i take it through and i go through about three Or four times - and that makes it very secure - i love that the box braids are very versatile, meaning they can move to the left to the right. They can move up and they can move down. So this sew in method is very versatile with the braids meaning they don't just lay flat and lay down. They can be pulled in any direction needed style. Yes, look at these braids, oh my gosh. This style came out so beautiful. These braids are nice and full. I love how the braids on the frontal came out. However, i wish we could have had a little baby hair, but i did notice that it's much harder to braid on the client's head opposed to braiding on a wig cap, but look at that. It came out. Amazing. Thank you so much for watching


Comments
Lakeisha Storey: Love it! Beautiful!!
Mary Sutton: Very relaxing.
Dark_Tarot: Im in Los Angeles, can I come pick up some growth butter from a location or do you ship only?
jennifer koonce: Where are you located
Sheila Lewis: i would like the address to order to if the hair butter