Beginner: How To Make A Upart Wig Tutorial. Fully Detailed Upart Wig Tutorail Video
- Posted on 24 January, 2023
- Sew-In Hair Extensions
- By Anonymous
#wigtutorials #beginnerwig #upartwigs #upartwig #howtomakeawig
In this tutorial, I'll show you step-by-step how to make a u-part wig at home using a weaving cap, wefted hair extensions (bundles), and a needle and thread.
This method is perfect for those who want to add volume and length to their hair while leaving some of their natural hair exposed for a more natural look.
I'll also cover how to stitch your wefts to ensure they don't slip out of place. So whether you're a beginner or a seasoned pro, you'll be able to create a beautiful u-part wig in no time!
Important Links
Supplies used:
T pins are for securing your weaving cap into place and to also help hold the wefts in place.
Curved sewing needles for hair:
Thread for sewing hair extensions:
canvas block head:
wig stand (to put your canvas block head on):
For more hair tutorials, subscribe to our channel and leave a comment on what you'd like to see next.
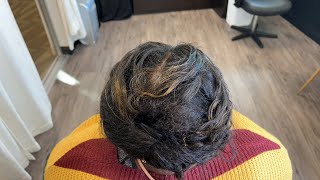
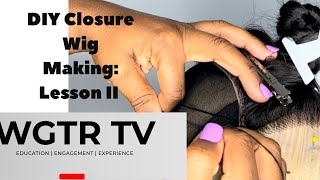
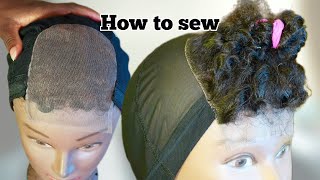
First thing I'm going to do is part my leave out. I want a middle part for this week, so I'm going to do a middle part. Leave out. I usually like to leave out a little less hair than this, but I'm just going with the flow. So I'm just gon na do my leave out and I try to section it between the start of my eyebrows. So one side of my leave out is at the start of one eyebrow and the other, so it's like in the middle in the middle of my eyebrows, as you can see right here after I get my leave out section, I'm going to section off my edges On each side of my head and I'm going to plait those up and get them out the way, so I can start braiding my base to the back of my head. These braids are much flatter than straight backs. So right here, I'm gon na braid kind of like slanted going towards the back. Instead of going straight down the sides like I usually do, braiding your hair back is definitely an arm workout. So I had to take a quick little break so now I'm just going to finish the last braid on the side I already started and then I'm going to switch to the other side and do the exact same thing and make sure you're not using up all The space at the nape of your head when parting these braids, because I wasn't even paying attention and I barely had any space to go all the way down to finish all my braids across my head, as you can see, and first of all, what is these Because I wasn't even sweating, it's got to be a stain or something repeat all the steps on this side and now we're going to make the wig. So here is the cap, I'm using I'm just using a regular weaving cap from the beauty supply store. Personally, I like this cap because it has the two adjustable elastics in the back and it really helps with adjusting my capsize so right now, I'm just putting the cap on my head to measure where I want to start sewing it and I'm making sure I do Not sew where I left my edges out at on, I'm only going to start where the braids start. So, as you can see right here, I'm going to start on that black little line. I guess that's where the two fabric pieces overlap and they sewed it together. It'S a good measuring point, so I will not be sewing on the tabs that I'm pulling. As you can see me pulling this tab out. I will not sewn that only on that black piece right there and here are the adjustable tabs that you can just pull to tighten the cap to your head before we start I'm going to freeze the video so that you can get everything you need to make Your wig next I'm going to grab some t-pins and I use these to stretch my wig cap a little bit and to hold it into place, so it won't shrink while I'm sewing - and you can do exactly. As you see me doing just stretch it down a little bit unless you have a smaller head in your cap feet for this Dome head now, I'm going to start sewing above the band at the back and also above the elastic piece. I do not sew on the elastic at all, because I want it to be functional and actually it just if you sew through the elastic, it's probably not going to adjust so make sure you're sewing above that band piece and above the elastic. So your track should be overly elastic. So for my stitching, what I do is I go through the weft: well, not through the world. If I go under the wealth and through the cap, and then I create a loop, I I don't know if I'll be able to explain this to y'all, but once I create that loop, I go through the loop and then before I go on to the next Stitch I go back behind that Stitch and create another Stitch, so it can stay into place. That is how I do my stitches. I really hope you can just get it from the video, because it's going to be hard for me to explain. I might do a separate video with just showing you how I Stitch. If you want to see that comment below - and let me know, okay, so here's a different view of the elastic band and the flap back there I'm going to go over it. As you can see, I'm not going to sew on it. I'M going to go over on the top of it, here's another view of the elastic and sewing I'm going to go through the actual knit, but not the elastic, and I'm going to sew my weft on top of the elastic. As you can see, I'm pulling a piece of the knit that covers the elastic you can sew through that, but don't go through the elastic just go through the neck fabric. This is also a better view of how I Stitch my weft. As you can see, I created a loop which allows me to put my needle through, and I just hold the end piece of the string, the thread and keep going until I get to another Stitch. Here'S a better view of Me sewing through the mesh fabric that lays on top of the elastic and not going through the elastic I'm picking up the fabric with the needle and continuing to stitch until it's time for me to fold over and go back the opposite Direction, foreign about to flip and fold over my weft, I do reinforce it with going back behind each Stitch and creating another Stitch. As you can see me doing, I just make sure this area is really reinforced, because I am going to flip over and eventually start sewing the other direction. I am going to take my weft up a little bit like in the U shape. As you can see, I'm not going to just go straight across I'm going to go curve it up a little into the u-shape so that it can lay how I want it to lay, and once I flip the track over, I'm going to reinforce it some more Before I start to sew as usual, now y'all don't be like me and forget to Mark out your leave out on the wig cap. So now I have to take it off and I'm about to use some pricing powder with a little makeup brush and I'm just going to Mark around my leave out so that I won't sew in that area. That'S what I'm going to cut out, so I can cover my tracks with my hair, so you can use like a crayon, a white crayon, some Foundation. They actually have a piece of chalk that you use exactly for these I'll link it below. But yes, please, whatever you do don't sew over that area. Now I'm going to put the wig cap back on my dom head and I'm just going to clean it up again. I'M gon na go back over the lines, the outline and just clean it up. Then I'm going to continue sewing and I'm actually using these t-pins to hold the track in place and I'm just going to continue sewing around in a u shape. And then it's going to end up eventually going around my leave out area that I sectioned off and just keep doing this until you get all the way around. That'S gon na look funny because the cap looks like it's going down the face of the head, but it's not it's going to feature head perfectly. So next up is another view of me stitching the tracks. I'M gon na slow it down. So you can actually see what I'm doing foreign. I just start right where my last Stitch was with my new needle, so I go in and I probably secure it down about two to three times and then I continue stitching as normal once secured in place. You just cut your old needle out and continue to sew as normal. Okay, foreign continue sewing as normal, and once you get to the front, don't go past the black band that I showed you earlier in the beginning, and also once you fold your tracks over. If you see a space where you can see the neck through the tray, Just Adjust them and sew them closer together, I also want to add that once I got past the first three rows in the bag, I started sewing my tracks as a single weft and Not doubling them up so that may be why you can see through them at the top a little bit, but once you put the wig on your head, you won't see through it at all and I'm just going to continue to lay in the direction I want To sew with the t-pin, so the tracks can stay in place and it can be easier for me to sew now we're almost done sewing as you can see. This is my last piece of weft and it's not going to reach all the way around, but I do have another piece that is going to seal it off perfectly. So you just continue to sew and I'm right there on the line where my leave out is, and the next piece is going to go on the other side right on the leave out line and it's all going to fit perfectly and then I'll be done with The sewing so this is the finished result of my wig. I wish I would have recorded these as soon as I put it on, because my hair looks so much better. Now I can just tuck my hair behind my ear and of course you know I left my edges out around here, so you can just pull some hair out. If you like right now, I didn't even um flat out my hair right. I got in the shower and didn't you know, protect my hair, so it's not looking the best, but this is the finished results. I absolutely love this hair. I'Ve had it for like seven years um and if you have any questions or any tips, comment below also, since you made it this far in the video, I am going to pick names to email you and give you a giveaway from my Boutique so make sure Subscribe to my channel, so you can come in and have a chance to win every single week every single week I'm going to be giving away something for my Boutique so make sure you're following me and like this video leave a comment bye. So now you've learned how to make your u-part wig, but we need to know how to put it on and make it look natural, so make sure you're following And subscribe to my channel, because next week I'm gon na show you how to put that thing on And make it look natural like it's coming out of your scalp? Okay,

Comments
TheBestofMeBRIDGETTB.: Hey love. New subbie. You did a great job. Love it.
VloggingWithDazsh: Hey here from TikTok ❤