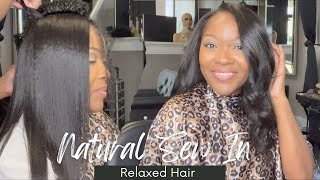
How To Do Your Own Sew In! Quarantine Edition (Super Detailed)
- Posted on 02 May, 2020
- Sew-In Hair Extensions
- By Anonymous
Hi guys! Im going to show you how to do your own traditional sew in or a sew in with leave
out!
Charlotte NC based
FOLLOW ME
My Instagram: https://www.instagram.com/lovekeyara.1...
Hair Instagram: https://www.instagram.com/alluremuse/?...
Booking site: https://alluremuse.as.me/schedule.php
Raw hair http://itsdreamhair.com/
**************************************************
Sew in, Sew in with leave out, natural sew in, natural sew in with leave out, sew in weave tutorial, charlotte sew in, cleveland sew in, charlottehairstylist, cleveland hairstylist, sew in weave, sew in hairstyles, sew in weave tutorial with leave out, natural sew in weave, natural sew in with little leave out, natural sew in with leave out, how to sew in hair, how to do sew in, virgin hair, authentic virgin hair, raw silk tv, million dollar baby sew in, keyara anntionette, itsdreamhair
Hey everybody welcome back to my channel, so in today's video I'm going to be showing you guys how to do your own sewing before we get started. I want to send a huge shout out to ditto cosmetics. They sent me all of these makeup palettes and I just quickly use. I just quickly use this eyeshadow palette right here for this intro and I'm going to be doing a makeup tutorial with at least one of these palettes, but I just wanted to show them to you guys - and I want to thank you - did all cosmetics for sending Me these and I'll put the link to purchase these in the description box, but today's video I'm going to show you guys how to do your own some way. So if you guys are interested stay tuned and we can get right into the video okay, so the first thing that I'm about to do is it feels good to be back on camera. Okay. So the first thing that I did was completely blow dry. My hair and I'm doing a middle part, because the middle of my hair is damaged one and again I hadn't. I don't know how it happened, but I was like taking a hoodie off and it was still zipped up and my hair got caught in the zipper and it like ripped so much of my hair out. So I ended up cutting something I leave out, but look at me so yeah. I need to go, get a closure. Well, I am going to continue damaging my already damaged part. If you know me, you know, I cannot do a middle part to save my life in all of my videos. Every single one of this, my middle parts, are all centered. Why and I like to go, I like, to put my part all the way to the center of my head literally right at the top, and I'm only leaving a sliver of hair out, because I don't want to damage anything that not damaged. I only want to keep damaging the damaged part. I just do apart right next to it, and then you just want to look at and just make sure it's enough to cover. Can I just take here and I'm afraid it down? This is ridiculous, so yeah, I'm gon na cut that later on in the video okay. I think so next thing you want to do. Is you want to make sure you have enough hair to cover the back track so you're, just gon na like just make like a scoop of extra hair? Oh that's too much! I won't be using this because this is clearly not damaged. That'S going to be ready too, but if you want to, you can take an extra section of small hair just like this and braid it down, and you can have an extra piece to cover behind. I just included mines in my two braids. I do not like leaving hair out around my perimeter when it breaks it off for me and to the farther back. You make your braids. The fall is farther back. Your hair is gon na fall. So if you leave all of this out - and this is not long - your actual swimming is going to start back here and if your hair is short and broken, this is just going to become more short and more broken. Or if your hair is healthy and is not heat damaged, you will heat damaged. Whatever is left out. I like the bright about edges on the opposite side. You can damage your edges by braiding them too. I'M reading them too tight and putting too much tension. One of them, so you can leave out the perimeter without having to leave out a bunch. What I do is I take my comb and right at the tip of where my leave out is I'll. Just go straight down and I will leave potentially this much out for the sake of this video. I'M gon na act like I believe in this piece out so I'll braid this up to the side, for you guys, I'm bringing it up. If you're, not missing edges, you could just start braiding. I just take the part going this way and not just start to very straight down. You want to do a medium-sized braid. You don't want to do it too, small, because you don't want to put too much tension and you don't want to make it too big, because you wanted to sit as close to your edges as possible, so your hair can fall in your face. So you want to move it down and then I just start writing. Leave then leave your energies out. These are edges. Leave them out. Leave them out do not try to bury that leave it up, get up as close so the tip of here as possible and braid it as close up as you can some I'm missing a patch of hair right here. So what I do is I started like making one braid. I have to break these braids up and I'll. Just add this in there like this, and I want you want your brains to be tight. They should be tight, but they should not be tight to where, like you, have a headache or where it hurts so next, I'm just gon na keep braiding all the way straight this way, and so I reached the end of my leave up as you braid down You want to kick this up and you don't want it to pull see how that's pulling just hold it like this up. So I'm going to show you real, quick and remember, make sure you start to brai this far up here, as you can alright so about halfway through your braid. You want to lift up the great before it and take it and put it in that middle strand. So you have your right strand and then you have the hair with your left strand, I'm going to add it to that middle strand and grate it in and if you notice that the braids will start to get thicker and thicker, because you have the end of The braid before it so I just feel, like my prayers - are always like SH medium and then that third braids just start to fall like behind the ear and when you part make sure you don't part too much hair in the back, make sure you have room To get your whole head and braid it to the back, I'm down doing the sides, and now, when you get to the back part, you just want to start gradually making your parts like to the back. So initially what you do like the first one is going to be kind of slanted, and then you just want to keep partying until you get all Tina. I'M gon na try to insert a clip of how I do this back part to make it all one. Braid but then you take that one piece and then you lift it up and you start to sew it in between your parts like I'm doing, and if your hair is super long, you'll, slow it up and then once you reach or leave out you'll bring it Back down, you'll just keep bringing it back down and back up until it's completely thrown down. So this is how big, then it actually comes, and I do my hair instead of just putting on here, I wasted ned. So when you're doing your net on your edges, you want to make sure you bring the net at least like an inch above your braid just because then that might pull back a little bit. You want to try not to put any type of tension or anything on it and when you do your, you want it like a inch above your braid and maybe like two inches over the top of your braids like. So it covers your libo because, as you sew, your hair on this part is just gon na get shorter in a shorter, so knots on my nuts. This well there's not a tire right at the end like, and I just make sure I'd double knot. It you want to make sure your tracks start up right where the leave up again - and I sew through the braid through the bottom part of the track. Some people go around the web. Whatever is your preference and in this part, I'll just kind of do like twice and then the first couple, one I'll make them super close together through and then some people like make a knot as a joke. I don't typically do that, but if you want to you, can it does make the tracks more secure, but you can't really see it. But this is my break and I want to make sure I said of putting my trap on top of the braid and like kind of tuck itself, underneath the braid be careful not to make the string too long. Okay, that's pretty secure, so I'm just gon na. Do this, and so this all the way around okay, so now you have the perimeter done. This just ensures that here it's gon na fall in your face. I like to do it this way. Next, I'm just gon na pick up the one with the most hair and I'm just gon na start small, my hair in in the back. So basically I what's the way I do. It is I'll start like maybe like here to here and then I flip it over and I'll just keep going up like little little by little. I don't like when I watched you know long like this was a really long string. I like to make my string just a little bit shorter. Usually I do like almost arm's length, but the longer the string is the more tangled it can get and the harder it is not to move quicker. And I, like someone quick so when it's time to flip the check over. I put my finger and the fold where I want to flip it over, and then I lay the new track on top of the old track. So this part doesn't make a big board right here, instead of doing it like this right on top of each other. It'S like this. Okay, you want to put like one finger space in between the tracks in the back until you get to like the mid part of your head. If you are short on hair, if you have another, two go right on top of each track: go ahead, but usually three with three bundles you'll need to put a little bit of space in between here stop play about here, and then you want to gradually bring Your hair up here and make it even like this and just make sure you kind of like look in a mirror when you do it, so you can kind of make it more. You want a more even in the front like that. Alright, so make sure when you are bringing your tracks up to the perimeter, you are not anchoring these tracks onto this first track right here, because then you're going to pull it back and then you want to make sure every time you lay the track down. It'S lame naturally, where it would be and you're not pulling the track. It'S like talk, so we can't make it to the other side. You want to make sure you like. The track is relaxed when you fold it. Otherwise, it's gon na put tension on your hair and if there is tension on your hair, all you have to do is cut the string right where the track is and then, if I usually jump back into place, how much you poured it and then you can Just resew it down wherever it lays naturally, so that is a little tip now I did the first to condo and with my second one, I'm gon na start bringing the track closer together, so I'm gon na keep coming around and when you get to the corners, You want to make sure you double stitch it, so I'm walking right in this foe. It'S gon na be a little tough to get through it, but you're gon na go right in that flow and just make this whole pipe flat. Oh alright, y'all didn't notice. It'S been a couple days more like almost a week and a half I just keep putting on the same sweater. I hate doing my own hair okay, so when you get to the top like, so you want to make sure the width all the way around is the same. So, for example, my leave out stops right here and you can tell like I have more space in this section, because you want to be able to evenly bring your tracks all the way around. So what I'm gon na do is I'm just gon na fill in these parts right here, like this, just add a few tracks back and forth all right. So now I'm just gon na take this track and go around so for this part, you just want to make sure like I've been saying like the perimeter around you leave out its even if it's not easy, it was not. Even you want to add tracks to the size of your hair until this space between the sides and the back are all the same. You saw your hair, you may catch knots in your string. So, for example, like I'm doing my hair and I get like a nut or some tie not close to the web, cut it and just start over it's so annoying or maybe you're sewing it and then actually know you're filling through your hair, and you feel like One of these, like this, what I do is I pull it as close together as possible. I make a knot with it as close to the track, and then I cut the extra off. So I should have. Did this part a little bit earlier? Are you going to cut this extra when I leave out is and leave out - and I was like right here and I didn't realize it ended that close, because now my track is not even around my perimeter. So this is where this is going to host a problem, because now I can't go back and forth because it's not enough space right here so now. What I'm going to have to do is just do the sides and then on my very last track. I just have enough room for wine, so now I'm just taking pieces, I'm fine! It like these tracks are all cut up, so I'm just trying to like cut up tracks, that'll fit just going straight across like so okay, so now that we're reaching the top better leave out, my leave out is really short, so I'm gon na get my tracks Literally as close as possible and I'm running out of net and the net is what is keeping the tracks in a braid like the net, keeps the braids secure and, as you can see, there's nothing really to hold on to. Because of the way that I prayed. For that, like first inch or so so, what I'm gon na do is just cut a little piece of net just a little baby piece, I'm gon na continue and him. My cut-up tracks still have some like cut up tracks, but this is the last track that I can fit all the way around with the backspace. I can only fit one more check in his back space, so I'm just gon na go ahead and move this one around my hair. It'S done. I have this super long piece. So what I'm gon na do is find like a gap in the back of my head and your soda is somewhere in the back. I probably add a track to this one on this side and people like your hair's too tight. All you have to do is cut the anchor track. So, for example, if I felt like my hair was too tight over in here, I will just cut the anchor track and then usually, if you pulled it, it'll jump back and then I'll just sew it down. Wherever it jumped that guy it'll be a little bit tight, but it should not be like extremely extremely tight and like this like its attention - and you can see it like see here - you can see the tension here. I'Ll probably go back in and cut some of these tress and let them jump back okay. So the next thing that I'm gon na do is comb out my hair, I usually get like shared pieces of hair. I can feel for like if I had thread - and I always do it with a super small comb - get all the knots out all the tangles up get in the back and you know I'm not to cut it and then I'm gon na show you how to Blend the shorter leave out and I'm gon na cut your us after AB flat iron it in this piece right here, I'm just going to say because, as my hair girls out, I like to add in it and then add a track just to blend it up. A little bit now, I'm gon na move on to styling, I'm just gon na take a pump of this funnel wrap. This is the motion phone styling lotion. This is a very, very sticky in my hair is already dry, so you only you want to start on the ends and underneath this for, like a half a pump per suction in your hitter, especially if it's already dry, you don't want too much project to weigh The hair down, what's gon na happen, is it's going to be super stiff and then nothing to have any movement, and then I'm gon na blow dry it in and I'm gon na do a half a pump for my entire Revo. So after I blow dry the product in my hair, I'm just gon na take section by section and flat iron. My leave out I like to use this edge control when I make my parts, especially with short hair, is just hope. You let your hair down flatter and then I am going to go ahead and I'm going to cut all of the extra hair just to make it even and you can see. I took that piece from I leave out interest use it to cover the back of my hair and then I'm gon na take some more edge control to make my part straight and then I'm gon na take it, and I'm gon na put the edge control on The ends of my hair, so if you have short hair, that's a really easy way to make your hair lay down alright guys. So this is the final look. I tried to put some waves in my hair. It just didn't work out the way I wanted it to work out. The hair that I have gained is from its dream. Hair. This hair is like super old, it's probably one on like a second year, and you can see it's just gorgeous. My eyelashes are on there and I will link the exact pair that I got in the description box as well. Please subscribe to my channel and follow me on Instagram, like this video comment, share it and watch the ads, and I put in a video all that stuff helps me out and yeah. I think that's it um if you guys have any questions or anything concerning trying to do it. On someone leave me a comment. I usually get back to like all of my comments, but I want to thank you guys for watching. I know I haven't posted a video in like three or four months, but I am trying to get back into the swing of things, but in the meantime I just wanted to show you guys a little like while I was doing my hair. I just decided to tell me so thank you for watching and I will see you in my next tutorial.


Comments
Bri J.: Girl THANK YOU so much for this video. I've never had a sew in and i refuse to pay a arm and leg when I can do it myself. This was helpful!!
clipinqueen: Wow! you did a fantastic job explaining your technique. I loved that you included little things like what to do when you get a knot while stitching (get it all the time!). That helps so much and a lot of people don't mention it. Thanks for sharing. Your hair looks great!
shayshay: This is the ONLY video I’ve seen on YT that actually shows how to do a sew in!! Every other video is a freaking wig install. Thank you for this !! So detailed!
Zay Vee: Best tutorial I’ve seen in a while. I’m glad I found this video
BabyG: I love how knowledgeable you were when it came to natural hair care and causing minimal damage
Ebony Thomas: This was amazing!!!! It was thorough, knowledgeable and flawless. I am going to try this method
Krissy James: THIS WAS SOOOOO HELPFUL! Thank you ♥️
Andrea Linton: Very detailed def helped to show the full braid pattern and telling of if you make any mistakes how to fix and solve I will def be using this video when I try and put in my own hair. Thank you!
Gazagurl87: Thank you. This video was very informative and I really like the fact that u took ur time to explain each step and also give tips. I used to do sew in but never on myself. Am gonna use this as a guide. Thanks
Desianae Dooley: After a whole lotta searching , I finally found an amazing easy way to do my middle part sew in !!! Thank you !!!!!!!!
Gee collins: Keyara, thank you for that video. This is the best demonstrated video l have ever seen. You did an amazing job, l will definitely use your tips and try my own sewing. Thank you and you look amazing.
Autumn432hz: omg she is so naturally pretty. This video helped me so much, i saved $ doing my own sew in today
Melanin Body: This one is the one for me! Explained nicely. Thank you.
Beautiful Peace: This was very informative. I’m actually gonna try and give myself a sew-in. Wish me luck
Sweetness Shelton: Thanks for the tips you did that girly!
Eliza Mack: Just decided to start doing sew ins again. Thanks for all these tips!
Ashley Stephens: I’ve always known how to braid and sew so I’m trying to learn how to do my own sew in. I’m sick of hair stylist only being able to get me in on random times, barely reply and charge and arm and a leg
India carter: Really great job girl! Looks really nice
Brianna hoke: Girrllll!!! I’ve been looking for a video where someone is installing a net on themselves! This is all I needed for my installs to be FLAWLESS
Haleigh Wiley: This was such a good tutorial!! It was so informative!! Def got my like and subscribe
Slim Miller: Best explained video I have seen in weeks thank u girl! I subscribed
Dr. S.M.Egans: I really appreciate this video. The best training video I have ever seen and I’ve watched a lot of them.
Lil Jersey: Super dope, I like the braiding technique I’m going to try it out today. I’ve done my own sew in before but I think this video will help me improve.
J H: “These are edges, leave them out” thanks for this video! ✨✨✨
aaliyah gooseby: Super detailed! Thank you!
winter fall: You did a great job explaining an gave a solutions for every problem
Makeupswatch Fan: Need this for sure Thanks for sharing ❤️ PS your hair is beautiful and it will grow again
Clarified Tangles: This was an awesome tutorial
Celestial Nicole: Does sewing the track around the perimeter that way make it more difficult if you wanted to pull it up into a ponytail a little? Thanks for doing this video btw! I'm literally doing my own sew in for the first time right now.
Queen Elizabeth: Don’t sleep on wax sticks girl! Perfect for blending hair. I recommend she’s bomb collection wax stick
🎀Gemini Doll: Thank you! I just got a horrible seew in yesterday and im taking it down and doing it myself!!
moldygrape: "If you know me, you know I CANT di a middle part" * does middle part perfectly *
ahdawnus1: Thank you I needed that detail
Nicke Smith: When I saw the braid pattern, I was yes..alright! When I saw you pick up the net...Girl....I knew you knew what you were doing.
Yana Le Rouge: Thanks for the tutorial!
JENNIFER IGHAVOGBE: I am tired of paying people to make my hair the worst part they don't do it properly
UniquelyDesigned 43: Great job mommas. And thank u for the explanation.
aadore mari: Best tutorial ever!❤️
DarlesiaB: I learned a lot from this video, new subscriber
Ava Haywood: Thank you! Very detailed how long did it take you in total ?
Kandace Noire: Thank you! How do you reuse the hair once it’s cut??
Chris H: I like that you’re reading tf out of your damaged hair while you’re giving the tutorial. I’m over here laughing hard as hell
sunwillcomeup: Thanks for the tutorial - I want to try this soon. How do you moisturize your hair/scalp through the net?
T. J: Missed your videos &&& your natural hair is beautiful ❤️
ChristyJane: I am only 5 mins in, and I had to pause to hit the like button because you are already so thorough and informative! Thank you for this!
𝓣𝓲𝓹𝓼𝓑𝔂𝓑𝓻𝓲: So glad I clicked on your video specifically. Thanks girly
joyce armah: Thank You! I'm doing this!
Kiara M: How long did it take you to braid?
Khaliyah Liyah: First step:learn how to cornrow
She's SINGLE Media: Thank you for this!!
Guerdyth Morand: What I was looking for thanks girl
Lissa Rene: I love this! I wanted to see how you place the net I have a hard time with that..
B: “Today I’m going to be continuing to damage my already damaged part” lmao why is this me? I have a head full of curls but my top middle part is just straight because I’m always straightening that part
elleislia: I’m watching this video on repeat while I’m doing my first sew in. I’m not gonna lie this is really hard to do on short straight hair :(
LifeofBL: It was the net steps that made me realize my seew in. Could be right on my leave out
Joy Coble: Love love love it!
Anita Patterson: You have beautiful hair already!
Tylia Fuqua: She’s bomb with the tutorials. Omg I’m finna be a pro
Les and Marie: I never seen anyone do the perimeter first. That is so smart.
A G: This really the Best tutorial I’ve seen!! Time to go buy some hair
naaire featuring Aden Brown: I'm glad I found this video... I love it ... U have a new subscriber in me
Cottoncandy Majin Bae: Hi do you sew under the braid or through it ?
Destiny Brown: Great video!!… what’s the purpose of the net and do you have to use it ??
Ava James: I knew I could trust the method when I saw you applying the net lol. How long do you typically leave this in?
Suilen Bryant: Wow your natural hair is beautiful
Cyn OrWin: I'm just curious because i've done my own sew in for yearrss by myself (and by other stylists) and I've never used the net before... I know you said it's to secure the braid, but I've never had an issue braiding the tracks straight onto my braids. So i guess my question is, what would happen if you didn't use it? Would your braids just start to unravel faster? Thanks for sharing! Much Love xoxo
Lovely Ti : Wow thank you ❤️
Tiazhane Life: i want to learn how to do my own sew in
andreetta cooper: Question: what’s the difference between a net a a cap? Do they serve the same purpose?
AALIYAH MISHAY: how many bundles did you use in total?
Alianna: Best most in depth video!
Alice Loftus: How long does it last xx
Tiffany C: You're gorgeous. Thank u 4 tutorial
Beautiful Peace: So basically if you have a big head buy 4 bundles.... depending on where you get the hair from. I just need my first attempt to go smooth. Any recommendations for kinky straight hair....????
Undetected Angel: How many bundles do I need for my whole head ?
cece fowler: Do you have to use the net ?
armanie brooks: Hi! Near the end of your install you pointed out a piece of hair you saved and said you’ll add it in as your hair grows out. Do you have a video showing or explaining what you mean a little more?
Andrita: JUST WHAT I WAS LOOKING FOR
Roxann Lopez Roxy: I always come back to this video to sew in
Revy K: How many bundles did you use?
Nicke Smith: Question: how many bundles did you use?
Pocahontas Grace: You are so patient. I have to make wigs because I just can’t lol, but you did a great job❤️
Rich Tresses: Sooooo does the foam wrap on the leaveout help it stay straight longer? Im natural and really don’t ever flat iron my hair so it doesn’t know how to act i want to wear a leaveout sewin sooooo bad but I’m scared b/c my hair reverts so quick
Ashley Williams: I wanna try this
Darling Sunshine: Damn you did tf outta this! Black queen, black queen you are amazing
Cee & Rae: Hey I wanted to ask what would I do because I have a undercut at the back of my hair
Makayla Kelly: love this video
Sami A: Woo idk if I’ll ever have the patience for this
nima0919: Can we keep leave out without heat damage?
Natalia Veladez: my leave out looked like yours so i cut it all the way off and it hasn’t grown in curly since literally completely straight but the rest of my hair is kinky curls it looks so weird be careful
itss janelleee: this the only video that helped thanks booo
Nevaeh Gibson: girl yes be real with us !!
Panamami Moe': I been following you for years, you gotta keep heat off your leave out girl!
S B: Thank you so much
QuiYah Williams Israel: Shalom Shalom Sis! You have some beautiful hair
Asanté Randall: This the best video I have ever watched
Chloee Jai: Everybody got those flatirons I got me some too and arrogant tae them flat irons get hot that’s why I love it great video too
Picaboo76: Nice!!!
simplybayyana: I can't be the only one who thinks she looks like Megan!!! OKAAAYY GUURRRLL!
Autism cat: I cant braid. Think I can get someone to braid my hair then do the weave myself.