Diy Tape In Hair Extensions. Make Tape Ins Using Your Bundles & Install Them At Home!
- Posted on 17 March, 2022
- Tape-In Hair Extensions
- By Anonymous
I am OBSESSED with these Tape In Extensions. In this video I will be showing you how to save money by making your own tape in extensions using the bundles you already have at all. You can also save money installing them yourself! Please like, comment & subscribe if you enjoyed ❤️
#tapeinhairextensions #hairextensions #diyhairextensions #diyhairstyles #tapeins
Links:
Tape In Tabs for extensions:
Extensions Holder:
Follow Us On IG:
https://www.instagram.com/the_victorio...
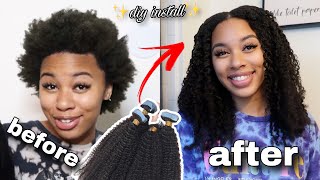
Up guys welcome to the victoria's valentine channel. Today, i'm going to be featuring a diy video on how to do tape in extensions using bundles that you already have at home. Let'S go, don't forget to subscribe and like alright, here's a quick sneak peek on how they came out - and i am obsessed first thing - you're going to need - is your bundles guys. Hopefully you have some bundles at home. If not go purchase them. They are way cheaper than these taping extensions. I use two bundles that i already had at home and i believe they are 20 inch. The second thing that you're going to need is the actual tape tabs. They are double-sided for extensions. You can even replace them when you go to redo your extensions and they came with 180 pieces from amazon for only 8.99. Let'S go, i will be sure to link it below, so you can purchase yours. So, as you can see right here in the video, i am removing the tape from one side and i'm just pressing it along the track and i'm doing that all the way down on my whole track. So you can see right here. Just take the one side off and i'm just pressing it right on just like that. Alright, so now you're going to see what they all look like when they are done after that you're going to need some scissors, because you're going to begin to cut right between each tape. Tab. Okay, just like that, make sure you just cut the top of the track and you don't actually cut the hair okay, there we go very simple: it took a while it took about maybe 25 minutes to get all the tape tabs on and then another 25 minutes To cut all of them, but it was so worth it once i got them so here's the second track and i didn't mind, cutting these bundles up because i was probably never going to use them again so, depending on you know, you might not want to use Your newest bundles, if you plan to use them again for a sew-in after that, i'm going to apply some heat to it for about 10 to 15 seconds. I did have the heat up too high at one point where the glue began to burn, so i did have to turn the bumpers down and you just leave it on for about 10 to 15 seconds just so that glue can like melt onto the track and They won't fall out your hair, so they did take a while, but all the steps i got tired. I wanted some pizza, but i kept going because when i did see these tape ins online for sale, they cost a lot of money depending on how long you wanted it and also how thick you wanted it, you would have to purchase another set. So i saved about four hundred dollars on the tape ends and i also saved two hundred dollars installing them at home. So i know you guys have some questions like. Are these safe? You know you. I read things before i started that they should be. You know applied by a professional, but i believe that i could do them, so i gave it a try. So if you're a risk taker like me - and you want to give these a try - you won't regret it. You just got ta have some time. Take your time and be patient and really don't skip any steps, so you guys can see what they look like here's my tape ins made from bundles so simple guys. I did wash my hair before applying them. I didn't use conditioner because i heard a lot of things. How conditioner makes them slip out your hair? I didn't know if it would meant that they slip out your hair if you wash them in conditioner, while you already had them in or before, but i just didn't know so i just didn't condition my hair, the first time that i did it, i just washed It and then i blow dried it and then started the process from there. So when you go to remove the extensions there is a glue remover for taping extensions, that's on amazon! I will link that below. I obviously just put mines in so i'm not sure. If i will be using the actual remover for them or if i would be creating my own using an alcohol and a coconut oil which i saw, other people be successful with removing them using those two ingredients all right. So i straighten my hair, i'm not the best, a hair straightener, but it did what it did and i tried not to apply any oil or anything. I just used the heat protector spray because i didn't know how the tape ins would react if they would slide out or anything like that. I also got this gadget from amazon. I will link it below. It was a lifesaver with just having a place to put the extensions also. I did wash and blow dry my bundles before using them, so i was able to stick them all in and blow dry them on here and then, when i was applying them, i was able to reuse it again, you're able to close it, and then i went Ahead and straightened the bundles well tapings, now all right, so i literally just did these two days ago, so i will be back with the removal process with the washing process. How all of that went because you can wash your hair with these in they just want. You to be gentle and not to use conditioner, because conditioner will cause them to slip out. Also, you can keep them in for six to eight weeks, i'm not a six to eight weeks kind of hairstyle person, but we will see how long i'll keep them in from here. I went on and braided my edges because i want these left out, so i could put my hair in a ponytail, so you can see the back in the front. I wasn't sure if i was going to do a side part or middle part, but if you do a side part you'll be lucky that you can change it to a middle part anytime, so i had to test them out first to see, if i can do It and yes, i'm like i can do it. I was so hyped, so let's show y'all how this is two rows in so literally what you do is, after each part, you take that little bit of hair. That'S right there and use sandwich to tape in so that the tape is on the bottom of your hair and the tape is on the top of your hair and they are both facing in so you can see right now. I took the tape and you don't want to put it to your scalp, but you also don't want to have it too loose, so just be low, like leave some space in between. So you can also put your hair up in a ponytail without that irritating or pulling your hair. So i put the one tape in at the bottom, with the double side facing my hair and then i sandwiched it with a tape in on top with the sticky part facing my hair, and i just lined them up with each other. And then i pressed on with my hand after this. This is a very important step that you're going to do you're going to take the bumpers and you're going to apply heat to them for about 10 seconds just to get that glue to melt again. So you can see me pressing it down getting that glue to melt and then there are hair pliers guys. I am crazy and i didn't have no hair pliers and it was also like 30 and i'm like who knows if i'm gon na ever use these again. So i'm gon na use regular pliers, so i got some 5.99 pliers from like target or something you just be careful because they are sharp and the whole goal of the pliers is to press it down, um, just to make sure that tape sticks after it has Melted from the heat all right guys, that was so simple, i'm going to do a few more, so you guys can see. So you just lift up your hair. You don't want to do too much hair, but you also don't want to do not enough hair guys. If i had somebody partner my hair for me, it would have came out so much better. I'M not the part kind of person. I, like can't see the back of my head when i'm adjusting a mirror for whatever reason, but it still came out so good. I really can't imagine if i had somebody helping me with the parts, because i did struggle the most with the parts, but if you're a person that can part, listen, it's going to be flawless. So i put that tape on the bottom and then i'm going to sandwich it again right. On top all, through the back of my hair, i put the tape in the straight april, so i went straight across my head from side to side. I will say when i got to the sides of my head: i didn't fill it in all the way like line by line by line. I did leave gaps in because i didn't want it to be bulky when i went to put it in a ponytail. In my sides, so i didn't do a whole lot at the top, and also when, where my side part was, i put those tape ins going to the side instead of a pros. But later that day i was like okay, i could have added a few more tracks in because you could kind of see in the front where my natural hair is - and i wanted it to blend more. So i am going to go back and still add in a few more pieces to the front so that it'll blend more naturally - and you won't see like where my hair cuts off at so the process was really simple guys. I actually couldn't believe how simple it was. Here'S me putting it in a ponytail and when i saw this video of the back and how flawless it looked, i was like, oh, my goodness, and the same for the front once i've started, brushing it up, and things like that. You can see that. There'S no tape showing and i'm just obsessed - and i love it so so so much, and i'm so glad that i took a chance to do these for myself. They look so natural. I really felt like it's my hair, because it's like literally attached to my head. They were so comfortable to sleep in and everything, and once they were curled, oh, my goodness, they were freaking flawless like beautiful guys. I love them. You can hear a minute six to eight weeks. You can wash your hair in them saved about six hundred dollars, doing them myself at home with bundles. I already had all together. It took about two to three hours. I did split it over two days, but it was one of the best things that i ever did and i love them, and i hope that you guys love them, stay tuned for videos on how to remove them and also the washing process. All right guys be victorious until next time like and subscribe talk to you soon.


Comments
Stephanie Torres: Definitely do a video taking these out with a final review of how you liked this over all. I want to do these ! Great video !
WR Bri: Video came right in time. I will be trying this. Great video and very detailed.
C GIL: Beautiful! Blessings to you and your little one.
Ivahna La'Tese: Yess! I can't wait to try this! Thank you ❤
Misty O: Great content thank you for sharing
Beth Bonnett: Love this! Does it matter what side of the track you put the tape?
Lady V: Your hair it self is beautiful,thanks for sharing,now I'm gonna try this
Sassy Moi: How long did they last in your hair?
Krystal Carter: Your hair looks great
Jamila Lewis: So creative ❤️
life with lola: Will you be able to reuse them or is this a one time use situation?
Syvae McDaniel: YESSSSS love thissss sending this to Rae she was just talking about this
vanessa shaw: Thanks for this post. Very useful. Uh…one question…does your sweetheart have any single older brothers…uncles…grandfathers…etc.? Asking for a friend.
Sogbeye Okoro: Can you make a video of hair maintenance with them in
Caramel Cube:
Danielle J.: 10:24
DD Gang: U put too much in the sandwich…