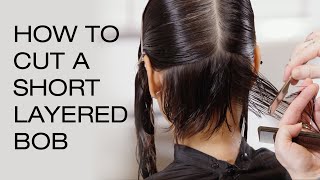
Textured Short Haircut Tutorial | Short Layered Haircut For Women | Long To Short Haircut
- Posted on 25 December, 2020
- Hair Knowledge
- By Anonymous
Textured short haircut tutorial
How to cut a Short layered haircut for women
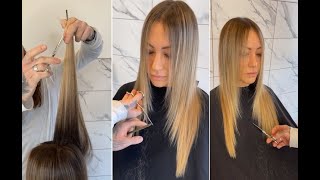
Long to short Haircut
*Giving is hold forever*
#TexturedShort #ShortLayeredHaircut #LongToShort
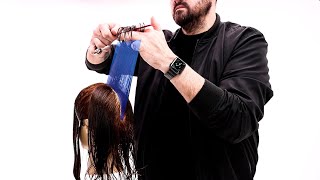
Good morning guys and welcome to our uh third and final day, okay, we're we're going to do a short little haircut today. So if you've never uh joined in and seen what edge academy is offering, we came up back the weekend to do a three days. Three haircuts just to give thanks because it's thanksgiving tomorrow in the us - and we just wanted to give thanks to all our friends and followers uh, some free education. So we started with a long shape. Then yesterday we went into more of a mid length and today we're gon na chop. It all off all right. So we're going to go into a short haircut all right, so we're going to go into like a little short kind of like you know: pixie-ish textured little crop, but approaching it in maybe a different way than you normally do. Okay, uh, the last two haircuts. We did we, you can find them on instagram live or you can find them on our facebook page at edge74. So we have our instagram page at hdacademy or we have our facebook page edge74, okay and you can find all the videos on there. Okay, if you're watching live, want to say a quick hello to the people who are watching live thanks for joining us. It is just gone 9 30 in the am uh here in california and we're gon na literally just crack on and do a little short haircut. Okay, so the inspiration today was a short choppy little crop. Uh she's got a log from yesterday, so we did the seamless long layers, we've done a lob and now we're going to obviously take it into a little crop all right, so i've wet the hair down. Already all right there we've pre-sectioned. So if you want to see the sectioning pattern, you'll be able to see that so we literally work from a radial from the crown to the ear. So we subdivide the hair into two okay, then in front of the radial. Okay, we've literally gone a horizontal section, quite low as well, so it's below the curve of the head uh. What we're going to do here we're not going to disconnect okay. So i know the sectioning pads pattern might look like you're going to do an undercut or we're taking it shorter through the underneath, but all this haircut is going to be connected. Okay, i just feel like sometimes it's nice to disconnect, but sometimes it's just nice to connect and do just a nice little haircut that way as well uh, you know with our advanced programs. At our academy, we do disconnections, we connect, we work with graduation layering. You know different techniques and i was playing around with some shapes this morning. Thinking how what can i approach? How can i do something slightly different than what i always do, so i thought i'll just connect it today, but again, if you're working on thicker hair densities, uh someone with muchos hair, you could take this shorter, then you could slightly disconnect the top. If you wanted to when we get to that, we can talk about the variations all right, but today it's all going to be connected. We'Re going to introduce some layering through the top we're going to graduate through the underneath and we're going to leave some elements of length for some femininity to it, and then we're also going to be um, taking it shorter in certain areas. So we're going to have some focal points which are going to have some interest points of interest and then we're going to obviously take it all short as well. Okay, so sectioning pattern radial horizontal underneath the curve of the head on both sides and then it's diagonal, as you can see, through the back going into a little v. Okay, making sure the point of the v on a real client would be around about the occipital bone. Okay, so think about where the o bone is. This would be literally where the old bone is what we want to do. We want to create graduation here we're going to work on like a rounded graduation in the nape, and we want that to hook the head shape and hook the nape so then went above the oboe which is within this triangle. This will be coming down onto a stationary guideline to build up more weight and more shape. Okay. So that's what we're going to end up doing so, it's just literally so someone just said: i missed the sectioning pattern. Okay, so i'll! Let jelly tell you it's a radial from crown to the ear horizontal below the curve of the head on both sides and then literally a large triangle to the oboe all right. We also post these videos as well after the live, so you can revisit it and get inspired if you've got a client who comes in she's got short hair and you want to do something slightly different. You can do this approach all right. So what i'm going to do, i'm going to start the back area, so i'm going to carry that radial down we're just going to push that little front bit out the way. Okay, if you want to you, can also clip it out the way. If you want to just put a clip in there like so, and then we can concentrate within the nape area all right. So what we're going to do now we're going to work within this nape area, i'm going to take it all off as well guys we're going to go pretty short on this haircut. So if you were joined as yesterday, you would have seen this put into a lob. So what we're going to do today we're going to cut this completely off and take it shorter? It'S not a dry haircut, the last couple of haircuts. We did them dry because we got requested from our followers to do our dry haircuts and it's not a massive thing. I do but it's kind of nice to see something dry uh. What i'm doing now, i've wet it wet the mannequin down and we're literally going to crack on and do this haircut from wet to dry, so we're going to work diagonal backs all right. I probably use that clip because i've got that many clips. All right. As we all know, clips are always hard to find in a salon. You go to work with five clips, come back with no all right and then what you'll start to see there there's the first section: what we're gon na do: okay, there's a few people waving all right! So hey hello, everybody! How everybody's doing lots of waving going on nice to see what people are saying? Hello, all right, so there's a nice little profile shot to show you what we're gon na do so. We'Ve got the radial in there. We'Ve got the horizontal, the diagonal back and then we've clipped the top out the way. So underneath the curve of the head is where we're going to start to graduate ignore the front. Okay, we're going to start in the nape area. So we're going to go from behind the ear diagonal back to the center of the nape and we're going to elevate this out at 45 degrees. It'S a graduation, okay! So to get it on a bit of a profile, so you can start to see the elevation. So we're going to work my fingers parallel to the parting. Well, i'm going to take this nice and tight guys as well. All right! I want it to be short all right if you will feel like you've got a client who wants to leave it a little bit longer, you're more than welcome to all right, so you can see like literally bringing that straight out. I'M gon na move my mannequin head, so you can get different angles of the shot all right and then we're literally working parallel to the parting. So what that means is my fingers are parallel to my parting. So i work today. I'Ve moved back section, so my fingers are also working diagonal back, so we're mirroring this section. So this section, what i put in here this section when i'm putting is literally then working parallel, parallel and parallel. Okay, i'm not over directing i'm not leaving it longer in the middle. I'M working following the head shape: okay, it's working on a round graduation, okay, once you're happy with that, we can take the clip out there and we can do another section. How many sections you take depends on the density of the hair? Okay. So if you're working on thicker hair types, you take more sections, if you're working on finer hair types, then you can take less sections. Okay, if you can't see the guideline - and you can't see your previous section - what you've got, don't guess it okay! So now we're going to do i'm going to lose your fine teeth for the comb and call me from underneath to build up that weight and that graduation. My fingers are like perpendicular, parallel to the parting or t to the parting, again personal, it's wherever you've been trained guys. You know i've been saying that over the last couple of days you know, we've all been trained in different colleges, cosmetology schools and different brands. Some of you would have been on some different education from different companies, and everybody has their own kind of terminology or language to talk through a haircut all right. So in this case, what i'm doing i'm just working parallel to that parting, perpendicular or t to the party at a 45 degree, elevation, okay and then we're continuing okay. So, in a way, i'm taking probably four sections. If some of you are experienced hairdressers out there and you're watching this and you're busy behind the chair, you get away with, like maybe two or three all right. Obviously our audience are different from all over the world. We have people tuning in and we have different experience. You know different levels, some some people have been watching who are more of a student, and then we have some people who are maybe salon owners watching this. So if, once you know the rules - and you feel like you understand this technique, then you can get faster and quicker may be placing a larger section in there, okay. So what i'm going to do now on the last two sections here, i don't want to go too high with my graduation. I want to start to keep that little bit of shape in there. If i go too high, my graduation then ends up turning into a layer. Okay, so all of a sudden i feel like about 45 and then all of a sudden, when i'm up here, i'm at 90., okay, and what does larry do it takes out weight? What does graduation do creates weight all right, so i want to put more shape into the hairstyle. So, as you can see there, my elevation on these last two sections was a little bit lower to maintain a little bit more shape. Okay, so that's what we're gon na do so losing the large fine teeth of macomb and today i'm using the smaller scissors from edge all right. These are our classics. These are the classic 6.25 there's a lot of people who are watching who probably use these as well. These are our most popular scissors to buy in our in our in our family. These are the 6.25 offset uh and they're. The attachy japanese steel, uh beautiful, highly polished, okay, handcrafted to perfection all right, beautiful used by some of the best hairdressers in the world, have been using these and they're available in our black friday sale. So we're having a sale over the weekend, because it's uh thanksgiving here tomorrow in america and we'll be uh doing our black friday sale. So there will be a discount on our shears. So if any of you are watching - and you feel like - i want to get a new, sheer or a new scissor uh, you know this is maybe an opportunity to get one okay. So if you can see that in that last section now we just comb it down onto the previous section all right, so my elevation's not going too high, there's nothing much worse and then all of a sudden, you've gone too high. Expose the obstacle bone, not complementing the head shape and all of a sudden introduce the layer. Okay, so you can see on a profile. There was literally just working a nice little rounded graduation, all the way through all right, so working parallel to the parting. So parallel to the party and we've gone 45 45 and then a stationary 45 and a stationary 45 and my finger always parallel to the parting. So my parting is my best friend. If you like, i don't know where i'm going, i'm not sure where i'm going, which way should my finger be then, all of a sudden you just go back to the parting and parallel to that parting, all the way through okay, once you're happy with that, okay And you've, literally just rounded one side off now: we're going to introduce the opposite side: okay, so we're going to do this side now, so we'll literally work the front away, so anything in front of the radial just ignore it. Okay and now we're just going to work behind the ear okay, so you got that area there all right, so we're going to work diagonal back, we'll grab all that hair. You know keep it nice and clean clean sections, clean, a haircut, okay and then literally now, what we'll do is working with my fingers down working parallel to the parting. You haven't got a guideline, so if you find this kind of tricky to do what you could do, if you're new to graduation or you're a hairdresser who's watching and you're still at beauty, school, yeah and you're doing you want to learn this technique. What might be quite nice is to put one section here and one section on the opposite side: get it absolutely balanced at the top in the middle and at the bottom of the nape. Once it's perfect, then you could continue and you could do alt alternate. So you could alternate, you could go one section here, one section here, one section here, one section so get it absolutely perfect. If you feel like now, i can get that you know. I feel. Okay, i've been doing it for a while. Then you can literally work on one side and then do the opposite side. So in this case now be careful not to cut it too short, because then you will have to go back through and do all the opposite side all right. A little bit pressure on me here now, then all right so literally working nice and blunt, so it's all blunt working tea to the parting or perpendicular, whatever you prefer to call it working on a a rounded graduation and what we're going to do now, we're just Going to literally just stop and check that balance, i know for a fact it's a little bit longer because i left it a bit longer, because i wanted to make sure that my balance with our edge combs we've got a ruler on the spine. I don't know if you can kind of see that if i zoom in there or i zoom in there you'll be able to see there's a ruler on the spine and we designed that. So when you check in balance, you can check your haircuts. So if it's an inch longer on the sides, let's have a look, it is just over an inch longer all right, so i can measure it and then i can measure my actual length all the way down and then, when i come to this side now, i Can measure - and i can see that this is two inches longer, so that means i've got another inch to cut away okay, so we designed a little ruler on the spine of the comb to help with check your balance to get nice control. Okay, so working through the flat part of your fingers just bring in all the hair to your body, and then you can check your balance. If you wish okay and then we now can continue, there's a lot of people joining this morning. A lot of people obviously like the short haircuts, so nice, thanks for following us, guys hope everybody's well around the world, and then we just literally clip out each top section, will spin now mannequin around. I keep saying model i'm so used to working on real people, but uh with this lockdown situation, and you know how we've been working this year. It'S been a lot of mannequins all right and then literally just working that nice and tight again parallel to the section. So perpendicular so combing from underneath so you're building up that graduation, taking it nice and tight and you're working right across the middle, so we're going right across. We don't want to create a little duck's tail. I don't want to have like a wedge going on, so i don't want to turn this into like a a 70s haircut and create like a wedge if you've got a client who said look, i want to have a bit of heaviness into the middle. You just stop in the middle and you create a little wedge, okay and uh, but i'm going right across right across. So it's working more of a rounded graduation. So again call me now from on top, so my elevation doesn't go too high or blunt if you're watching and you feel like. I could do this, but i've got a client who likes it more choppier. You choose to point at it, then, okay, i just want to make it all nice and clean and blunt put the foundation in and then i can always break it up later. The foundation of the haircut will make the haircut last longer. Okay, client will really appreciate that a nice shape all the friends. The family will complement that lovely haircut and i'm a big believer that you put the foundation in it's like building a house. Yeah put the foundation it's going to last longer, a good foundation lasts longer, but then all of a sudden, if i want to personalize this and chop into it and break it up a little bit, that's just a bit like decorating, okay, so all of a sudden I'Ve bought a really nice apartment, it's got a great apartment, it's got great foundations, but all of a sudden i want to put my own personal take on this. So if i put my own personal take on this, then i'm going to decorate it. I'M going to choose my own wallpaper, my own paint, all of a sudden. Then it's down to me what i see and what you see it will be different than when you come to customization and personalizing the shape all right. So there you have it a nice, clean kind of rounded graduation within the nape area, both sides level. All right, if you wanted to you, could pick out from the same area check your balance. You could get your edge comb, maybe a little ruler on there and then literally just check out all your balance all the way through all right, i'm looking for the same length all the way through there, okay, so once you're happy with that, let's just quickly check And make sure we are happy, i don't want to carry on if it's not right. Okay, i'm loving that okay, okay, we love it right. So what we're gon na do now we're gon na tidy up all the uh, the outline okay. So i'm gon na go into the outline now again just point cut in that hairline again, if you'd like to keep it a little bit more solid and you wanted to make it a little bit more blunt, you can do i'm taking that hairline a little bit Stronger only too choppy where it looks a bit too weak but, like i said earlier, this is all about customization. What you see and what i see are always going to be different, so you might want to round the hairline. So maybe you might want to con. You know concave, it now make it a little bit shorter in the middle there's lots of things you could do with the hairline. You make it your haircut, not all right once you've done, that you've tightened up the hairline and then we can tie you up the back. If you wish i like to have some length there, so i can just tidy up a little bit. Some of you might want to take that a lot shorter. I just want to keep some of the length there it's in there as well. I don't want to take it right to the hairline okay. So that's all the back completed. So just a quick recap guys it's just around graduation and i think now, with the hair starting to dry a little bit on camera, you can start to see that buildup of weight there just come in nicely following the sectioning pattern. So we literally worked parallel to the parting one, two, three, four keeping your elevation a little bit lower on the last couple of sections 45 degrees, so distribution, the way i'm combing, it is t to the parting. My elevation is 45 and we're cutting it parallel. Okay, so it's all parallel to the parting like a round graduation, all right, so that's all completed so now we're going to go on to the sides. Okay, so we're going to cut these sides now all right, i don't want to cut them completely off, though i want to keep some femininities in there as well. Well, i'm going to take it completely off and around the ears and stuff like that, so we're going to leave some length on the sides. So the guideline at the top is our best friend we're going to connect it so we're going to take the set. So we're at the top top section not at the bottom, not at the bottom, but we're going to start at the top. So basically we're going to take a section underneath the horizontal like so and then we'll drop that down we're going to start at the top. Okay, we're going to then spin my model around, so you can be able to see and uh elevate this out at 90 from the head, ignoring the bottom area, okay, so we're starting at the top and where's my guideline. How short do i take this there's? My guideline, you can see it's sticking out all right, it's the back, so it's the top section at the back. We carry that section on into the front, so my distribution, my elevation, okay, is 90 from the head right out from the head at 90. and i'm going to point cut this a little bit softer. I want it a bit softer through the front okay, so i'm just going to point cut that just parallel to the parting again, so my fingers are horizontal. My parting is horizontal okay and i'm literally working all the way through all right and then you can start to see you've taken an area shorter, okay, and what i'm going to do now, i'm not just going to leave that long like that. Okay, so what we're going to do now? We'Re going to travel so we're going to over direct all that hair up okay to this guideline at the top, so it's over directing up and we call that block layering or block graduation depending on how high you're going or how low you go. So in this technique i will call this a block graduation because i'm cutting it in a block all right, so i can even use the larger teeth of my comb. So i grab all the hair now from underneath so you're making sure that you're scooping okay and you're, scooping all the hair up to that stationary guide and what's that going to do guys, it's going to maintain length in the perimeter. So let's point cut that off now and what's going to happen, it's going to be left a bit longer in the bottom, all right. So then, when i drop that down. Ah all of a sudden, i've got a little bit of length to play with okay. I call that an optional length because i'm not sure if i want to keep it all yet, i'm not sure. Well, i will look right at the end of the haircut, but i find that keeping it softer and wispier here is going to keep it kind of feminine again, there's going to be different choices from some girls and boys who have this haircut might turn out. I hate it on my ears. I hate it so, let's just chop it all off. Okay, now, all of a sudden exactly the same on the opposite side, so i get the guideline from behind. So that's on the on the guide, my fingers, how about? Let'S spin my model around, so let's have a better camera angle, all right that seems to be the money shot all right so like just dropping that down you're bringing that straight out. You'Ve got your guideline is in my fingers. There there's my guideline and then we just work parallel. Remember in our point cutting just to give it a bit of softness. You could go to the larger blade if you wanted to in edge, but most people we don't own like three or four pairs of scissors. You know some some hairdressers are watching, we might just have one scissor and that's it and it does everything: okay, some some hairdressers. They might have two or three pairs of scissors, which is always nice, okay. So, in this case, i'm just using the 6.25 classics from edge and we're just literally over directing all that hair now up and you create a great little shot there really, as you can see the over direction, scooping up okay, maintaining maximum length through those sides. Okay, we can drop that down and you can see a beautiful shot for the back. Okay. So there's your rounded graduation beautiful now, it's dragging naturally as well under the lights and then all of a sudden. Then you've got a nice little profile shot there as you've got that little bit of softness and femininity to it. It'S up to you. If you want to carve that away. Do we want to keep some of this? You know it all comes down to suitability from your client. You know, and the key to any haircut is a really good consultation. So when i do a consultation guys, i always do the same questions, and some of you might have seen me talk about consultations before. If you've been following edge before, but for me behind the chair and stuff, i asked the three questions: yeah. What do you love about your hair? What do you hate about your hair and what product are you using in your hair at the moment? That really gives me a lot to go on. Okay, so she turns around. She says i hate my hair being long. I want to take it short. Okay. Is there anything you hate about it and if we go short, i don't want to see my ears. I don't want to be like a boy. I don't want to be too short. All of a sudden. Then i've got some ideas of how short she can go all right. So i'm just going to dry it off. I'Ve just got a hair dryer, a comb. I don't need a brush. I don't want to get it big. Okay, so just keep it flat, so use your comb to dry it. I don't need big hair guys. I don't want it big. Keep that all nice and flat. Okay, use your nozzle. If you wanted to you just dry that off we're draining all that off, really nice and simple, okay, that's not difficult for sure! My blow dries were like that all right. So all of a sudden, you dry that off and then you can start to see the shape. Okay, you can start to see what you like what you don't like. I am going to go to the larger blade now because i'm going to customize a little bit guys. These are our sevens if you've never seen them before. So again, i don't want to break it up too much as a hairdresser. You understand the shape and get that absolutely perfect, that graduation and i don't want to go in and just smash the hell out of it, and then i've lost a complete foundation all right so following the shape the same shape. So if i put that in the comb there there you go perfect, you can see the lovely shape. What we've cut in. If i wasn't confident with my graduation and there was a big hole here or it was bumps and lumps and all off balance, then i would, i believe, probably go in and personalize it quite a bit just to hide all my mistakes. So what i'm doing here? I'M thinking about how the haircut is going to grow out okay, so this is why i'm just customizing a little bit thinking about this was a real life scenario. How would this grow out on this lady? All right, if she's got a color placement in here, i want to make sure the color blends in as well all right, so just making sure that the whole look works really well. So you can see just a little bit of deep point cutting and why i work with the sevens is because i can get deep into the hair. So i find these are really good for like customizing or cutting dry hair, and then, when i come to the sides, i want to take out the weight through the top okay, so through the top area, i'll take some weight out and then through the underneath. I'M just going to leave it. I don't want to make that wispy and weak okay. So it's understand when you're customizing you're also following the same methodology of how you've done the haircut. You don't just pick it up and start hacking away. Okay, all right! So we're happy with the underneath. We can tidy up all that perimeter and all this length later all right. I don't want to end up cutting too much off it. Yet, okay, so now we're going to go into the top i'm going to connect it if you're a hairdresser, you love disconnections and you wanted to create a little funky undercut. You could basically disconnect this now and you could literally just put a layer in there if you wanted to and just let all this fall over it. You know i've done that day in day out, so i just wanted to do something a bit fresh and bit different today, all right, but that's just my personal opinion, all right, so we're going to do now we're going to work parallel to the uh to the Triangle trying to think what it was, so we got a triangle in here right and what i'm going to do now, i'm just going to work triangle and then bring it down onto the guideline, bring it down onto the guideline. So eventually i run out of hair through this top. So all this crown area is going to be basically combing down to a stationary guideline and what that means is going to get heavier and heavier and heavier and create more shape. All right, if you felt like i didn't, want to do that, then you could disconnect, have it slightly softer and then add in a little bit of a uh, a layer, okay, i'm honored to be one of your students. Answer me today. Oh tony, how are you my friend, never stopped learning? Thank you so much thanks for the uh. The nice comments all right. It'S uh! It'S always good to never! Stop learning! I'M a big believer of that. Okay, we never stop learning. If we stop learning. There'S a hairdresser, then sometimes we have to look and say: do we look? Do we love our job anymore? There'S always something new, a new approach to a haircut, a new product. You know products are changing all the time when i first started hairdressing. You know i'm showing my age here now, but we only had mousse hairspray a wax and a gel and all of a sudden, now, there's probably 50 or 100 products in certain ranges now and you're like wow. What all these products there's so much choice out there now? Okay! So i'm going to change my body, so you can have a better look where we're going so get a nice camera angle. So you can see literally i'm going to work diagonal backs and i'm going to work all the way through and i'm going to bring everything down onto that stationary guideline, i'm going to lose your large t for the cone why some people have a double crown. They could have a whirl. You could have a bit of movement around that crown, so let's uh not put too much tension on there. Okay and we'll just bring it down onto that stationary guideline. Can you see what i'm doing? I think you can? Let'S get back home in a better angle like that and then let's go for it, okay and then we're just going to step around the head and we're just creating a nice graduation here, guys, i'm just bringing everything down onto the stationary guideline. Okay, diagonal backs coming down to natural form, just follow that shape and, like i said before, it's getting heavier and heavier, but if you felt like, i didn't want this to be too heavy, i wanted it to be a bit more shattered. I wanted it to be. Not as classic in a way, then you could literally just slightly do a disconnection and then introduce the layer. So what you would do, if you, if you've, got a client who said look, i want it a little bit funkier, but i love this haircut. I'Ve had it now for a couple of months, and i just wanted to have a slight change, because i think having a slight change, keeps your clients interested and also coming back to you, because i've never heard of a new client come to me and say i Love my hairdresser, it's usually i'm bored. My hairdresser does the same haircut on me every time. Sometimes i don't even get a consultation anymore. You know so i'm bored, so we don't want to fall into that category. So we have to give our clients little changes. All the time and the little changes like it doesn't have to be a big change like a fringe or like chop it all off, but a little change by leaving the hair longer or taking those the fringe, shorter or introducing a layer. So, all of a sudden now there you can start to see a nice little shape coming through if you felt that looked a little bit too classic looking next time just disconnect and then introduce the layer. Well actually ignore this part and then introduce everything. Is that natural form? Yes yeah? So it's literally working on a diagonal, okay and then we'll calm that down and then that's natural, full natural fall and then literally working everything. Natural form basically went out of hair and if the lady's hair was already layered say like this was layered uh, then it might not even reach. Hopefully that looks natural for everybody on the camera. So the question it's good. You know, obviously my body positioning with the camera. I'M always conscious of that. I want to make sure you guys see but yeah it's natural for guys, and then we just comb all that and there you have your nice little shape coming through. Okay, you're just bringing everything down onto that stationary guideline, so basically it's natural for all the way down and, like i said before, there's different experience watching so, if you're a hairdresser and you're like i could easily do this, you do it in one. Go once you've got that foundation in there, then, if you're, a faster hairdresser and well experienced, you can just bring all that down onto that guideline yeah. If this is heavily layered, it's not going to reach. So you bring everything down to that guideline. You don't have to go section by section by section all right uh, because we are going to lay this to make it a bit more funkier all right. We don't want to make it too classic and too flat. Okay, all right, but you can start to see you can it's kind of nice because you can see the wet hair and the dry hair so underneath in the nape that's dry, but now that wet hair. You can start to see where it's sitting and it's really got to really make sure that the weight line sits underneath the upper elbow. So once this is dried, this is going to complement. As you can see, the head shape there's nothing much worse than this. Going too high yeah, so you want to make sure that complements the head shape, so we're making sure that it's underneath the occipital bone. Okay right! So that's all the back completed. Okay! So now we're going to go on to the sides. Okay, friends, can you recap how you cut the nape area? Okay, hi kelly? How are you my darling, so the nape area, just to recap it? We did a like a round graduation? Okay. So with the rep with the nape area, we started at the uh behind the ear and i worked diagonal backs and it was literally a large triangle and i just literally work diagonal diagonal, diagonal 45 degrees, okay, rounded graduation, and then we bring everything onto the uh Onto that weight line, so now we go on to the top okay, the top right. So what we're going to do now is, i want to connect it into the sides, so we're going to go horizontal just like we did on the sides, we'll drop that down and we're just literally going to go and bring everything down onto this stationary guideline. So remembering, if we go underneath here, there was one section, shorter yeah and then we over directed up to work like a block graduation. So now what we're going to do now we're going to bring everything down onto that guideline, creating like a nice little bowling kind of modern day shape, so we're going to stand on the side, we're going to comb it down to natural fall, and you have two Guidelines here guys - and that might sound a bit weird two guidelines, but you have a guideline underneath and you have a guideline behind the radial, so the hair, what you just cut yeah, is also going to be connected into the front, but also the underneath that little Weight line there is bringing it down onto it, so we're bringing it down onto that guideline, but also connecting in the back into the sides. Okay, if that makes sense to everybody hope so, okay, so we're just going to comb it down a large t for the comb, because i'm working with a bit of hair there - and i don't want to get carried away so we're just bringing everything down onto that Guide like so, and then you can start to see, this is going to get heavier and heavier this weight line now. Okay, so i'm just going to bring everything down and then, like i said earlier, if the hair was layered, the client had short layers already in here. It wouldn't reach okay and then just literally work to wherever you need to yeah. So maybe just going past the middle part in because we're going to layer all this pop anyway as well. I don't want it to keep it too heavy. So what i love about this haircut when i'm thinking about like, what's my next stage of the haircut and like how i'm taking you through it, what i love about it personally is there's so many ways you can take this haircut and there's so many choices and What you, what you see and what i see, are always going to be different, so what i love about it, so maybe you might look at this and go oh. I love this shape. It'S really nice! I could do this one of quite a few clients, because when you watch education, videos, you start to think of which client would have this. Oh i've got a client next week who could come in and have this haircut? Oh that'd, be great. I'Ve got a family member who could have this haircut, but then also we might be looking at this and going. I could take it shorter. I could leave it longer or i would take it choppier. Oh, i don't kind of like it at the moment, but i could take it a bit shorter than what anthony's doing and that's what makes it your haircut, not my haircut and you know i'm looking at it now. I'M thinking a slight disconnection in here make it a little bit softer. If i wanted to heavier layer through the top, it could make it a bit more funkier a little bit more, give it more texture uh. If a client says i don't like layers, i don't like big hair. I like it a little bit more flatter. Naturally, my hair goes big anyway, then i wouldn't put a layer in there. Then, all of a sudden, you think, oh what else could you do? You could do something different within the fringe, so that's what i love about this haircut. You can do you know it's endless. You know you've got lots of different ways. You can take it to the next next level, so we're just bringing everything down onto that stationary guideline that all comes down onto the guideline like so, and that is top and back connected through okay and there's some of you might go. Oh, i love the fringe and all that guess what guys i'm going to chop the fringe off. Sorry all right, i just it's nice to have it like that, but i want to do something different in the fringe. So let's try it off and let's have a look at the shape, because this could be completely finished if you wanted to, but i'm going to carry on and do a little bit of customizing and break it up a bit more or i want to show you Like variations of this look, so if we dry this off now, it's going to look a little bit heavier it's going to look kind of heavy through the sides. Now, as you can see, that shape is coming through nicely. Like i said before, i wanted to make this more of a crop. I wanted to make it a little bit like a you know, a bit of a pixie at the moment because of the length on the top. It doesn't look very pixish, looks kind of heavy and bowling well. I wanted to give you a trip. You know in a way i'm only doing one haircut today, but i want you to look at this and think wow. These give me like six haircuts to do in one shape. That'S what i'm trying to achieve. It'S not just like. Okay, there you go, there's one short haircut go back and copy it look at it and think what did you like about it? What didn't you like about this shape and then make it your own strain that up and then we're going to just detail it wherever necessary, all right, so, let's spin it around, so you can have a little bit of look at the probe at the back now, As well, so you can start to see the shape at the back yeah. You start to see that beautiful shape, how it's falling. Hope you guys like it. You know, then you can start to think about color placement. You know because there's a hairdresser, you can do a fantastic haircut and how do we make our haircut even look better color? I want to make more money. How do i make more money add-ons buy some products have some color the holidays are coming. I need to get some money from my little girl. You know not being cheeky, but that's how it works. Isn'T it we love our job, we love it. We love doing hair, but we also love money. Okay, so you just move that around and then you start to see what you love about it, what you hate about it for me being left heavier on the top. It reminds me of the 80s when i first started: hair: okay, very linda vancilische, the other model. You know things like that very heavy. You know there's a lot of models at the time lots of campaigns wearing the hair like this. That was really broken up and then really kind of wiggy and heavy on the top kelly chop. It thanks darling. I know i'm gon na chop it all right. So, let's get this chopped because i'm going to chop most of this string drop anyway, all right, but some of you are watching you might like this and like this length on the top and you're like okay, i like that kind of shape, it's very playful, very Fun and that's why i was wanting to dry it before cutting it all off on the top, because there's one haircut there there's another haircut. So if you've got a client, who's got fine, hair, yeah or naturally her hair goes big anyway, and she says i have big hair. It naturally goes quite big yeah. Then you could just leave it like that yeah it looks nice and heavy and nice and full okay. So you've got that as an option. There nice little optional kind of little shape there, it's kind of cool, all right, um, and then we can literally go in and break this up even more so i'm gon na go back to my old sevens and i'm gon na break this up. So i'm gon na introduce a layer now through this top okay, so we're going to layer this top area. So what you'll see is going to be a point in the top, because everything basically is pulled down to the sides and we've got a point of weight through the top area. So i'm just going to take off that weight through the top. So i'm starting from behind around the crown, keep it nice and clean. Let'S just comb that, through in a salon situation, let's get it over her eyes, so she can see okay and then we just literally just bring everything up on the base. We'Re gon na do like a square there, guys, okay and then how short you take it through. The top is honestly up to you, okay and i'm just going to create a little bit of chop. Choppiness, okay through there take that little square through the top really break that up introducing a nice little layer all the way through. If you wanted to maintain a fringe, this is where you would maybe over direct, come off the base. If the client said look, i want a long fringe because you don't want to take out too much weight, but i'm just bringing everything on the base at 90 and i'm just cutting off all that bulk in the top in that middle section. So in the middle. So getting rid of the point working it's square, so all the hair's coming to the ceiling so all looked at ceiling all right. So all up there just point cut through break that up just make sure that we're nice and clean all the way through dropping that down. While i'm doing this, you know, we've got all our education now for next year online. So if you want to check out any of our education for 2021, all the dates are available now on edge74.com. So if you go on edge74.com, you see all the classes. What we're offering next year. You can book on and you know, come to our academy and do our classes uh they're, all available now to book, okay, starting off in january, with our most popular class. I want to be an educator, so any of you want to be an educator, or you know some hairdressers who love to get involved in education and how to become a teacher. We do a three-day boot camp, which is phenomenal, so i'm one of our most popular classes. We do okay, so you can see that kind of nice texture coming through loving what we've got going on so far. Okay, just looking a little bit heavy now see where this weight line is here, because we brought everything down onto that stationary guideline just felt like it's looking a little bit too bowly, that's my personal preference! So what i'm going to do? I'M just going to go in and break up that weight line a little bit with some deep point. Cutting if you didn't. If you had this as a disconnection and it was slightly disconnected, then you wouldn't have this weight line. This would fall a little bit looser. So again, these are things to look out for. Would you want to disconnect and then go straight to the layer, or did you like how we connected it and then we can break it up like this again. These are just personal choices. I wanted to give you a bit of variation today. I wanted you to see what it looked like heavy. I wanted to see what it looked like connected and then i wanted them to show you with a layer and then now softening that layer. So there you go a great example see both sides, one side's, a bit looser one side's still a bit heavy, so media there might go. Oh i really like this. I'M sure you might feel that's nice. So again, it's personal choice. Okay, we'll just elevate - and we just break that up using the sevens getting getting with those big old sevens, break it up fantastic for customizing, a seven inch blade by edge beautiful blades, okay, if you're in san, diego and you're, watching this. If you want to test these scissors out, give us a dm, we have a sample scissors going around san, diego they're at certain salons at the moment, but we can put you on the list and you can. We can drop them off and you and the team can play around with our scissors for free all right. You can test the scissors out. Testing them out, you know, have them for a couple of weeks, have some fun all right and see what you think of our scissors all right, so you just break that up a little bit more see what you like see what you don't like about this shape. Okay, now we're going to go in and break some of this length up this buckle and then the final part of the haircut now start to think about what do i know what i don't like. I don't like the front. I personally do not like that front. It just looks so dated, but that's my personal opinion, so i'm gon na literally now break the front up a little bit more so i'll move that around move it around move it around see what it looks like. Okay, i'm loving this kind of length at the bottom, so i want to keep some of this loving. These kind of wispy bits keeps it nice and soft and feminine okay nice to be at home on my own. Everyone else is in the salon. Today i was trying to do this in our academy, this haircut and uh. The girls kicked me out because someone's too busy so i'm at home - and now i live it, i'm at home in our little den got the queen behind me. As you can see, this is the queen all right, she's watching me all right and then what we're going to do now is just this fringe. You know, would you want to keep it long? Do you like that something you might like this? You know something looking at and think wow i love that shape. It'S wicked all right. It'S a nice little shape coming through very modern uh, but i undo i wan na open this up a little bit more, so i'm gon na work a little bit more concave. This fringe, i'm gon na, take the fringe completely off. I'M gon na make it more now all right, so a little bit more of a rounded kind of concave fringe. Okay, all right! So i'm going to start in the middle and i'm going to take all that fringe away. Okay, but again that's just personal preference, all right! So i'm going to comb it from the middle okay and i'm going to cut this off okay. So i'm going to cut all the fringe off, i'm going to comb it down and i'm going to just literally be quite aggressive there. Okay and i want to keep it really kind of chunky. Okay, i don't want it feathered all right. I don't want a feathered fringe. I want to keep it like a little bit chunky, so i'm just cutting that onto the skin and start to opening up the face a little bit. Okay, but again on this up to you what you prefer, okay and then same see if i was doing a hair competition, probably leave it like that, all right, you know in it funny how some of these hair competitions, the more weird the hair is, the more You win all right, so you know salon situation. Client would love to go what the hell are you doing put in a care, competition, i'll, probably win. Okay, all right! So again, just breaking that up and then for me it's really tempting to do this and go in parallel and break that up. Well, that's going to do, though, that's going to make that wispier and break that up and that's going to make it more feathered depending on your client is what she wants. So some of the clients might turn around and say i want it really wispy. If you do, then you go in and do some deep point cutting my mom has short hair. She likes, she always says: can you feather the fringe? Can you make it really wispy the fringe and what she means is basically just make it a lot thinner. So when it's my mom or like a mature client, i would go in this way. But if it's a you know somebody who wants to be a bit more modern with the fringe, i'm still modern at her age and stuff she's got a really cool, funky little um pixie. So what i would do, then i would literally clunk put my scissors in the top like this comb it down like channel cutting. So you know when you go in and you go in and open and close your blade like a channel cut, but i call it j to the parting. I came up with this a few years ago, where i put it on a j. So what i do? I bring it down like so, and then i bend my scissor like on it like making the letter j shape so think about the letter. J goes down and around okay and that's what i'm going to do with the scissor. But i'm going to go down. I'M going to bend it on the j and guess what i'm going to cut it on the j and then all of a sudden, i'm cutting little chunks out and i'm making it a little bit like she's got her own fringe a little bit making it a Little bit more chunky and broken up, i'm cutting it on the j just to make it a bit more broken up that way. Right so final, section, it's just on the front here. Let'S just get this little bit off, like i said before, keeping it shorter in the front and longer on the outer edges, love it when it's a little bit heavy a little bit bowlier very now, if you look at this shape now, this is very now a Lot of hairdressers, lots of educators, cutting stuff like this now, okay, but it's a little bit pointy. I love that little pointless to it. I love it when it goes up. I don't want it too round. I like it, but it goes into like a bit more of a point. I think it looks more. You know it really complements the head shape and really complements the kind of the feeling what i'm going for a little bit of channeling, and i love customizing, because what you see and what i see always going to be a little bit different. Like i said earlier, and then i go to the j now, i just literally bring that down and then cut on a j, go down cut on a j, go down and cut on a j but you're just cutting it and you're breaking it up a little Bit more see lots of thumbs up so some people like it thanks guys for the support. It'S uh. What time is it now? Is it gone 10 o'clock wow it's hot past 10 here now, so i'm going an hour on this one. Normally, i'm a little bit faster, but we did a little bit of talking today, so uh hope you've enjoyed the demonstration today. We just came up with this over the weekend to do three haircuts in three days just to inspire i'm not asking for anything.

Comments
Tatjana Piric: You are an amazing educator! I truly enjoyed this cut! Thank you!
Ligia P: I m interested to see the final cut of back side ,that s the most important part of bob cut .
李佩蓉:
tracmt: Ok... Anyone else confused? Or is it just me? I clicked on this video because of the girls hairstyle on the cover of the video. That's what I was wanting to see and expecting to see. But sadly...it wasn't!
mary weiss: Hello from SC USA