Aveda How-To | Quick & Easy Knotted Hair Bun
- Posted on 02 November, 2015
- Hair Knowledge
- By Anonymous
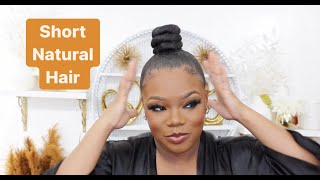
http://www.aveda.com/index.tmpl Need a versatile hairstyle that only takes a few minutes? A knotted bun is the answer. Aveda Institute Minneapolis student Emily Patterson demonstrates a step-by-step tutorial to creating the perfect bun.
To remove any excess oil, start off by applying Aveda Shampure Dry Shampoo and distribute it throughout your hair with your Aveda paddle brush. Create a low ponytail and secure it with a hairband. Spray with Aveda Air Control Hairspray to add some texture. Next, separate your ponytail into two equal parts and tie your hair into a knot. Pull to tighten and repeat to create a line of knots. Depending on the length of your hair, you should be able to create about three to six knots. Wrap your knots around your ponytail, securing the ends underneath so that they don’t stick out. Use bobby pins to secure the bun. Depending on the length of your hair, you’ll be using quite a few. If the bun starts to come loose, just add in a few more pins. Don’t worry too much if your bun isn’t perfect, since this style actually lends itself to a bit of messiness. Set the look with Air Control so you can enjoy your bun from day to night.
This bun is a perfect everyday look. Click the link above to learn more about 99.8% naturally-derived* Aveda Shampure Dry Shampoo.
*From plants, non-petroleum minerals or water.
[, MUSIC PLAYING ], Hello, my name's Emily., I'm a student at the Aveda Institute of Minneapolis, and today I'm going to show you how to do a knotted bun., I'm going to begin with my dry shampoo.. This you want to spray kind of puff it just right. In the scalp area and work it into your scalp., This takes away any shininess or oiliness.. I'Ve been wearing this hairdo for the last day or so so I want to get rid of all that extra oiliness make sure it looks like I just washed it.. So that's what I'm going to use the shampoo the dry shampoo for., I'm going to distribute that evenly throughout my hair, with my Aveda paddle brush., Just brushing it through making sure everything's, nice and smooth.. Now I'm going to begin with a ponytail in the back of my hair. And I'm going to do this a low ponytail., So just smoothing everything with my fingers and my hands taking all of my hair and putting it into my ponytail.. I have an elastic on my wrist that I'm going to wrap it around my ponytail here just twisting my fingers pulling the hair through the loop until it's nice and tight.. If you want, you can kind of pull it a little extra tight just like that. So it's nice and smooth. Just so that everything stays nice and together is spray that with Air Control.. This is just going to make sure that it adds a little bit of extra texture to my hair.. My hair is really smooth right now, since I straightened it and now I'm going to add that texture with the Air Control. And then you're going to make your know. So separate it out into two. And you're, going to tie your hair into little knots with those Two equal parts, just like you, are tying your shoelaces., So taking those two pieces pulling them through and knotting all the way to the ends.. So I made three knots pulling nice and tight. And taking your ends, make sure you have those tight in your fingers. So you don't slip out. You're, going to wrap your knots around your head around the ponytail that you've already created making sure that you're securing the ends underneath. So they don't stick out., But the nice thing about this look. Is it actually looks better if it's just slightly messy.? So if you have little pieces sticking out, don't worry about it.. I am taking bobby pins now and securing that bun with the bobby pins.. I try my best not to see the bobby pins. So take a little piece of the bun and secure it to the back of your head, underneath it so they're kind of hiding., And I have quite a bit of hair, so I'm using about five or six bobby pins on mine today., But play around with it.. If it starts to fall out, add a couple extra bobby pins so that it's nice and secure. Going around making sure they're all nice and stuck in., And now that I have that nice and secure I'm going to finish with Air Control.. Just slightly spritzing. My hair. With that making sure that I'm getting the bun quite well just so that it can last all night. So now I'm ready to go.. Now I want you to be able to see this look. So I'm going to turn around and show you my bun.. As you can see, it's really really simple, but it also has a nice elegance about it., So I am all finished and ready to go.. I hope you like this tutorial and I will see you next time. [, MUSIC PLAYING ]


Comments
Anna Singh: Very easy and look beautiful ..
MagoLerio: Easy but goog :-))))
Emma T: I love your hair