Long Bob Hair Cut Tutorial Using A Razor
- Posted on 27 September, 2017
- Bob Hairstyles
- By Anonymous
OPEN FOR MORE INFORMATION!
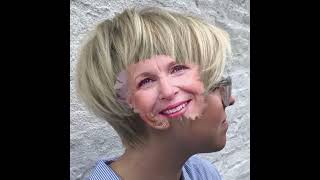
Here is another cool way to do a Long Bob Haircut! These looks are so popular and versatile for clients. I wanted to share how I do this cut for maximum texture! Razors aren't for everyone, so use discretion when cutting with a razor! (This video was not sponsored!)
PRODUCTS USED:
The Paul Mitchell Twist Razor http://bit.ly/2ytJFcD
EVO Styling Products
Bellami Flat Iron http://bit.ly/2wkyNwN
☞SHOP MONAT HAIR CARE:
http://www.alexsismae.mymonat.com
☞Become a VIP:
http://alexsismae.mymonat.com/vip/inde...
☞Email me:
__________________________
♥COME HANG OUT WITH ME ♥
♥YOUTUBE: http://www.youtube.com/user/AlexsisMae...
♥INSTAGRAM: http://instagram.com/alexsismae
♥FAMILY INSTAGRAM: http://instagram.com/thescalettifamily...
♥PINTEREST: http://pinterest.com/alexsismae/
♥E-MAIL: [email protected]
♥SALON APPOINTMENT INQUIERIES: [email protected]
(I’m located in Costa Mesa, CA)
♥✉SEND ME MAIL!✎♥
ALEXSIS SCALETTI
P.O. BOX 15428
NEWPORT BEACH, CA 92659
__________________________
♥SHOP MONAT HAIR CARE:
http://www.alexsismae.mymonat.com
☞Become a VIP:
http://alexsismae.mymonat.com/vip/inde...
☞Email me:
__________________________
♥ FAQ:
I am a licensed cosmetologist!
Camera- Cannon Mark 2 GX7
Editing Software- iMovie ’11 & Adobe Photoshop
Some links are affiliate link’s
__________________________
♥♥♥ All opinions are my own, and all products were purchased by myself unless otherwise noted. I will always share my honest opinion so that you know when I tell you my opinion of products/methods you can trust what I'm sharing. Love you XOXO, Alexsis♥♥♥
Hi guys today, I'm going to be sharing with you guys, a haircut look and today we're going to be doing a textured long bob, I'm going to be working with a razor, and I have my gorgeous model with me right here with this really really great: lovely Lovely textured cut - and I love texture on these haircuts because it gives it a really nice ball to the hair. So, let's go into the salon and show you how to do don't forget to follow me on Instagram to stay connected to see what we're doing in the salon. So here is our before. So you guys can see her hair is just long kind of grown out. So we're gon na give it some shape, so first make sure that we detangle everything. I'M going to use four sections four quadrants for my haircut and then I'm going to do diagonal forward to create a V, so that Cherie is basically getting her haircut like a V like you see in the diagram, so I am using the Paul Mitchell twist. This is like the coolest razor ever. I'Ve used it in another video before, but what I'm doing is I'm going to create my perimeter line, so I'm going to take at the center part of her hair and start to etch this out now, edging up and down is going to give us a really Really soft perimeter line so the thing that I love about this cut since we're doing a razor for this entire type. It is going to give you a really beautiful soft feud's. Look without it. Looking very blunt. So what I'm doing is I'm following that perimeter from the middle guide and I'm following that out to the edge of the corner. So I'm keeping everything square so that when we pull this hair towards the front, it's going to have a little shorter in the back too longer in the front. Look so I'm going to finish off the other side and check to balance, and then I got super smart because you know she has dark hair. So after I changed this little edit right here and going to lay down a white towel, so you guys can see when I check it. It looks nice even on both sides, so I'm gon na drop another layer down and then, instead of cutting everything, the way that we did before I attack the rest of the hair differently. So, starting in the middle, I'm gon na grab a section and I'm actually going to twist this entire section. Looking at my bottom guide, I'm going to start to etch down about two inches from the bottom line, all the way down to that bottom line, and now you guys can see this gon na create some really great internal layering without having to do actual layers. This just gives you that really great texture as the twist untwists, while you're fetching that out it just gives you the most beautiful layers without having to do a lot of hard work, and I love the finish end result for this. So again make sure that you're keeping everything square to the back so that you're keeping the length while it is brought in forwards when they actually wear this haircut. So I'm going to finish off the other side you guys can see. This is a little bit more of a visual haircut. It'S not a! This is exactly how it's done precise. This is not a precision haircut. This is a more softer, more edgier textured haircut. So when I go into dropping each section, I'm literally going to copy the same thing now, if you want to start higher up when you're edging you totally, can it just depends on what you want? Your end results to be so I'm just going to go in here and keep edging at around two inches from above my bottom perimeter line and then work my way down - and I am finished with all of that once I am I'm gon na grab that top Section lay it out horizontally flat and I'm gon na go in add a little bit of an angle like you guys, can see, and I'm gon na edge out some layers so think of it as slide cutting with a haircut with regular shears. I'M doing it with my razor and again I'm using this on the razor side and not on the there's two sides to this way. This is a razor side and there is a like notched out side to give more texture, I'm using the razor side, because I want to take out like an actual line, not just texture, so starting in the front, I'm gon na do a diagonal front part line. I'M gon na comb all of this down make sure that your partings are nice and straight and then pulling this to the back part of her head. So I'm not going to be cutting it over the front of her shoulders. I'M going to keep it back behind her shoulders and I'm going to edge an angle, so it's gon na go shorter in the back so longer in the front and, however much of a angle, your client wants that's, basically what I'm going to put in so again. There'S no specific angle to this. It'S just depending on how much angle you want to give your client in the haircut, so I'm gon na go and check for balance, just kind of checking a lawn and then edging out any little hairs that need to be removed until have that perfect little line And then what I'm going to do is check that very front guide to make sure that everything is exactly how I want it and then dropping down the next section. We'Re gon na do the same thing that we did in the back. Now that we have the perimeter down, I'm going to twist strands following my perimeter bottom line, and I am going to twist these either away or towards the face you can do both it really I mean if you want to keep your texture going towards the face. You can do the twists away and then same difference if you want the texture to go away from her face twist, the opposite way. So now that I have all of that done, I can go in and kind of on those front pieces. I ciao a little bit using that angled method through the top and then I just kind of check my perimeter and start to style. So what I'm going to do is just add some really great texturizing sprays to her hair I like to go into a head. More texture, especially if they have soft hair, like my client that way it's gon na give me the really beautiful finish because a lot of times I feel like when we're styling our clients, they want to see the end result that they see in the picture. So it's really important that I style their hair like the picture that we're looking at so I smooth her hair all out, so I could go back in and do some dry cutting. So I'm gon na use my texture shears. These kind of take out about medium weight, so the the teeth aren't super super thick or super super thin, and I'm going to do some slide at texture cutting. So I just like to do this through the bulk of the hair really through the midsection, so that I can take out some of that weight when I feel like I have enough done, I'm gon na go in and finish style her hair. So I'm using my Bellamy flatiron this flat iron is so awesome. It makes curling the hair super super easy. So all I'm gon na do is go in and do some strands going away and then towards the face doing both and then I just comb everything out whenever you do curls going both ways. It just helps to build up that texture and make it have that really cool rock-and-roll, modern vibe finishing up with some dry spray, wax the best thing ever to finish off a long bob and look at all this beautiful texture we have in her hair again. This is a very visual haircut, so if you want to see more texture somewhere, you just itch a little bit more into the hair and you've got your haircut alright. Thank you guys. So much for watching I'll see you guys in the next video bye


Comments
Ashley Marco: I can't get over how much of a difference that cut did for her. It looks amazing!!
Maria Ehrhart: I absolutely love this hair cut. Fantastic job!
paula smith: Gorgeous!! Plz keep the hair videos coming!!?! Your work is amazing!!
Lyubov: Hey Alexsis, what cutting technique would you recommend for thick, porous hair to achieve a blunt line lobe? My hair refuses to lay straight without straightening and blowing out, I am not happy! Thanks in advance and big hugs!
Casey Torres: Wow her haircut compliments her so well! Its so beautiful!
asianleo83: Wow this looks great u did an awesome job. I love the texture look and edgy look
DelilahZoe: Best tutorial I have seen, BY FAR! Thank you!!
Amethyst H.: This is just hella beautiful hairtsyle cut.. I want to do this and hope I can be close to it
jamie anglin: Amazing job! Wish you could do my hair!
Belle Robinson: I am a cosmo student right now. Can you help explain to me how you can tell if the texture is going towards the face or away? What's the benefits of both & how can you tell which was done?
Venna Nagev: Wow... it's so much beautiful! I love it!!!!! Greatings from Germany
Dulce Rodriguez: Love this video with the diagrams!
Quba Cki: We need a pixie haircutting tutorial from you :D
Michelle Stewart: Love this
Leila Barajas: More haircut videos
Ae Bo: I love a shattered cut i cant find anyone that does it the way i had the hair dresser did mine. Its an art i have look in you tube and found none. this way shown is not what i know as shattered.
Vanessa Smith: Amazing!
Jocelyn O'Halloran: Love this!!!!!!! Ive missed you on the Tube and Snapchat!!!!!
KellyJelly9976: Hey Alexis! By any chance do you have an opinion on the Redken ph bonder?
Kristin Echerd: I'm getting ready to start cosmetology school in January and I'm super nervous about cutting and coloring hair...I really love hair always have but and use to cut my own hair in high school & didn't do a bad job at it...I have really only ever styled hair and I have done some up-dos as well for events for family and friends....what are some tips you would give a friend just starting out in this field to get over the fear of not being good enough
Just Me: I wish you were in AZ. Can you give tips or refer us to a video you have made telling us how to find a good stylist? Thank you for sharing, the cut looks great and looks great on her.
Mandy Lee: How many sections are you taking in the back?
JayMMXII: Looks pretty u even to me
Dante Velasquez: nice