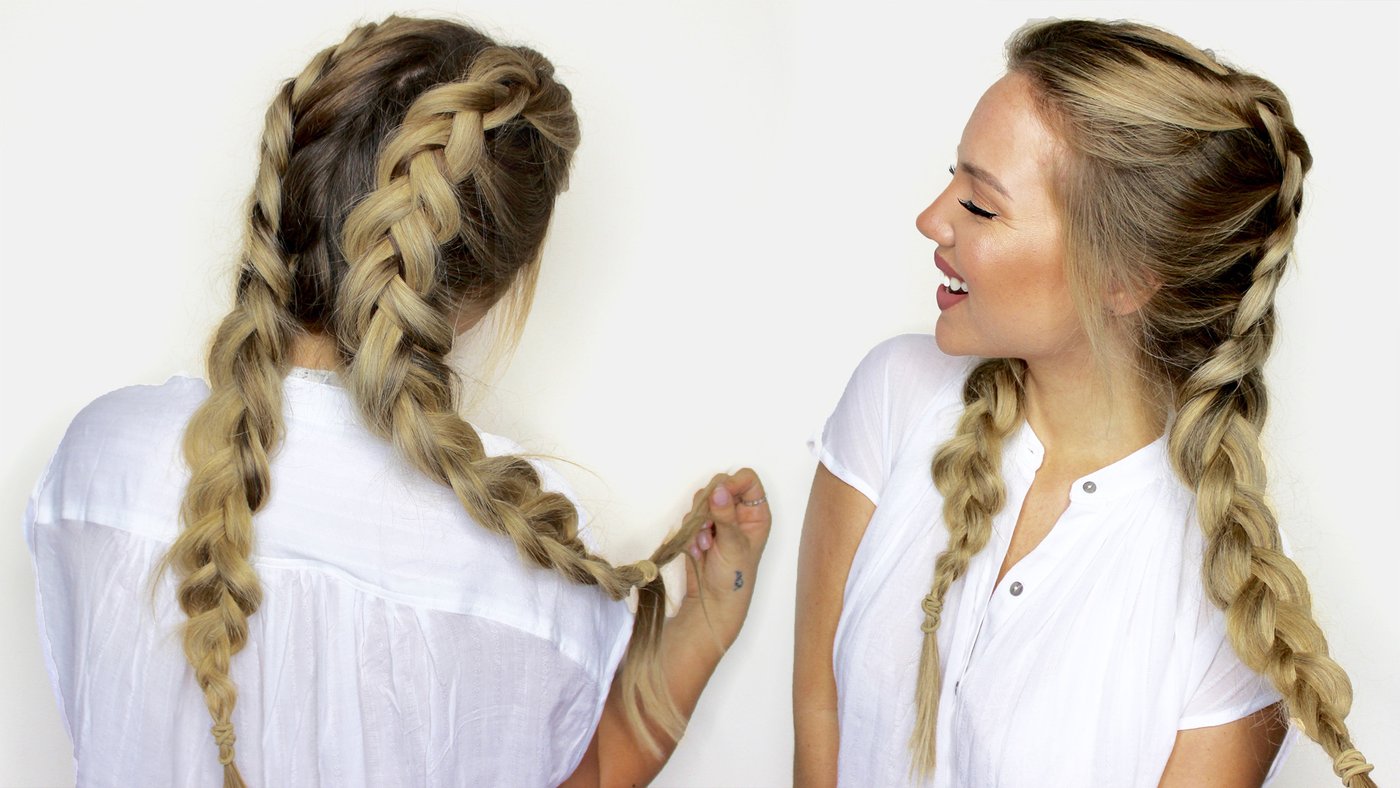
Dutch Braids: How To Hide Clip-Ins Extensions |Gemmacliffordxo
- Posted on 17 February, 2016
- Braids Hairstyles
- By Anonymous
INSTAGRAM: @gemmacliffordxo
SNAPCHAT: @gemmaclifford
TWITTER: @gemmacliffordxo
FACEBOOK PAGE: @gemmacliffordxo
LIKE, SHARE AND SUBSCRIBE -
Camera Used: Canon 600d
Edit: iMovie
First Song: Jingle Punks - Working It
Second Song: Silent Partner - Spring in my Step
Extensions Used: Brand from Clothes Show 3 Years ago, sorry can't remember name.
Im wanting to buy either FoxyLocks Extensions or Bellami so please tell me your experiences/thoughts in comments below.
Outfit: Top: NewLook
Makeup Featured:
Lipstick - Lipland Cosmetics Amrezy Liquid Lipstick 'Brooklyn'
Lip Liner - Maybelline 338 Midnight Plum
Bronzer to Contour - Benefit Hoola Bronzing Powder
Highighter - The Balm Mary Lou Manizer
Brushes Used:
MAC
Sigma Brushes
http://sigma-beauty.7eer.net/c/161523/...
Morphe Brushes:
Real Techniques
http://www.boots.com/en/Real-Technique...
Anastasia Beverly Hills ( Straight Cut Brow Brush)
http://www.cultbeauty.co.uk/anastasia-...
Bobbi Brown Concealer Brush
http://www.bobbibrown.co.uk/product/13...
Today'S video today I'm going to show you how I do my hair in Dutch braids using clip in extensions. I'M only going to use a few creeping extensions because we want to try and use as less as we possibly can. So it's easy to hide them, and so I'm just gon na use it for length rather than volume. So, as you can see, I've got my hair down I've just blow-dried it because I've just washed it it's probably best to actually braid your hair. The day after you wash it just because when it's too clean, sometimes it doesn't actually hold all your hairs in together properly. So when it's a little bit dirty, that's when you get really good grip and you can actually really pull the hair and tighten the hair as much as possible and you don't get as many like flyaway hair and say so. What you're gon na need is a comb, some hair extensions, a big bottle, looks like this and then two little bubbles to tie hair with. So if the extensions I'm actually using four pieces, so two one pieces and then two two pieces. These extensions I had a few years ago from when I went to the close show so they're a bit old and I'm really looking into investing some new ones. I don't know whether to choose foxy locks, extensions or to use Bellamy extensions, and so please put your comments down below on whether you've used them before and what your experience is with them, because I don't know which one to buy. So if you want to see how I create Dutch braids in my hair, clip in extensions, then please keep on watching okay. So the first step is to comb your hair through making sure there's no knots and then the second step, of course, is to split your hair into two sections. So here I've gone for a parting in the middle of my head. You can actually do a part in through the side if you want to, but I thought the middle will be the best sort of look okay and then weave one side of the section you want to put that with a hair, bow or group it out the Way just so, it doesn't get mixed up when your plat on the other side, okay, so with the extensions I'm starting off with a two piece extension and I'm actually lining this up in my cheekbone, maybe just around the area. You don't come too far for because you don't wan na see it when you're platting at the front of your hair, so you want to try and make sure it's around your cheekbone. So what I'm doing here? This is the most important part and it's actually gripping in vertically rather than horizontally, and this is because the plat is going to hide the extension. So when you're grabbing sections from either side you're not going to see the extension because it's going to be hidden underneath the braid. So now I'm putting in the one piece - and this is just in line with my ear. So, as you can see, I'm using less extensions because we want to try and cover them as much as possible. So now the next step is just to start braiding your hair. In a Dutch braid. Now a Dutch braid is actually plaited underneath rather than over. I think just a normal French plat is just plot it over, but a Dutch braid is under so just like any normal plat. You want to have three sections and you want to take the section from the outside plat it under and swap it with the middle section. It'S quite hard to explain if you just watch this video. Hopefully you get the hang of it and if you just keep practicing, you will get there in no time so actually coming up to the extension now. So what you want to do is just remain. Calm stay focused and basically just a plat, as you normally would so you're taking sections from the outside and your platen in the middle. So hopefully, if you do it correctly, it will cover the extension. If it doesn't not to worry, you can start again and reposition the extension, also just to say that, obviously it does get thicker because you have got more head to plat, so just make sure you hold it tightly and just carry on platen and you'll. Be absolutely fine, so, as you can see, you can see no extensions at all. It'S basically, our little secret nobody's gon na know that you've got extensions in your hair. If you follow these tips and tricks. So now you just want to plot your hair, as you normally would all the way down, and then you want to grab a hair ball or elastic bubble and just tie that up at the bottom. Okay. So that's the end of that side. So now it's on to the other side of the hair, and you just follow the exact same steps so you're clipping in vertically you're going from your cheekbone. You go from your ear and yeah. You just follow the steps and do exactly the same finish. You want to look in the mirror and make sure that everything is covered or get somebody to look for you because, as you can see, there's a piece of extension showing here. So all I do is I unclip it and I push it underneath the plat and I clip it back down and it's completely hidden because a plat is covering it and that's basically it so now. What I'm doing is just using some hairspray just to get rid of some flyaway hairs and some more baby hairs. So that's the end of this hair tutorial. As you can see, you can't see any hair extensions at all, so it'll be a little secret. Please give it a thumbs up, share and subscribe, and I actually hope it was quite easy for you to follow. It really took me about 10-15 minutes to do. I don't know if that's because I'm quite a quick fraida. Thank you so much for watching. I really hope you enjoyed it and I shall see in my next video bye,
![15 Stately Single, Double & Dutch Braids for Men [2021]](https://static.hairurl.com/p/2021/12-20/845e19b8304192af37f02d6a35264330.jpg)

Comments
Char Colwell: Glam time hair extensions are the best! I've had them for two years and they're still as good as when I first got them, I also double them up with hair rehab one. I've tried foxylocks before and they were awful, they used to matt underneath and would go frizzy when washed x
Isabelle Zondag: you should look into zala hair extensions, they're absolutely amazing and so thick from top to bottom, the colour range is really good too! I've had several sets and they've been amazing
Helen Maree: gorgeous as always xx
Becky Diver: I use lush hair extensions and find them great :)
Tea Time With Ciara: These braids are so cute
Holly Mann: Zala hair extentions are amazingggggg!!! Check them out
Gemma Daly: Your hair looks darker are you growing out the blonde?!
Hayliedokka: Does this work with a normal braid?