Diy| Braiding Hair Rack
- Posted on 20 February, 2022
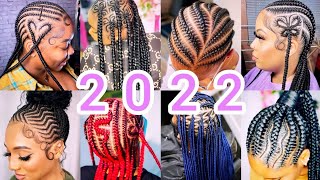
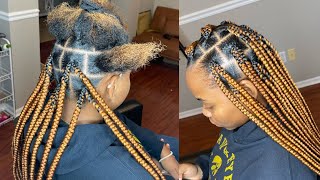
- Braids Hairstyles
- By Anonymous
Hey guys!!! I made this braiding hair rack a few weeks ago because I was having trouble sectioning my braiding hair to make sure they were all the same size and that I would have enough hair in the end. So I wanted to share this video with you guys to help anyone that might be having the same problem or who made be interested in making one.
IG: _demi.woods
Snap: demlovz
Wow, hey guys and welcome back to my channel as you guys can see from the title below i'll be diying. This thread, holder, kind of braiding, hair assistant, i've been seeing a lot of them on instagram and youtube. So i wanted to try one out because i always have difficulty sectioning my hair or like making them bigger or smaller so yeah. I used this a couple weeks ago to braid my hair, and this is what it looks like when i had all the braiding hairs on it. It was right beside my vanity, so it was super easy to use. I really appreciated how inexpensive this diy was. For me to make a lot of these stuff were pretty easy to find. I got these golf ball holders from walmart for eight dollars. You guys can get the smaller packs, which would be cheaper because i didn't use the whole container. I got these door hinges. They were like a dollar fifty and two wooden canvases for four dollars um. So i don't think this diy cost me more than like 20 bucks. So i would definitely recommend you guys trying to make this before like ordering one off amazon, because that's originally what i was gon na do. I was gon na order. One of those thread holders off amazon, but it was like 30 and up for good one and the shipment date was gon na be like so far, and i just wanted to braid my hair that week. So there isn't anything much for me to explain during this video you kind of just have to watch and see what i'm doing to understand what you guys should do, but right here, i'm just using my ruler to mark out the spots that i want to place. The golf ball holders, which it's pretty simple when you have a ruler, you can try and eyeball it, but i think it's just gon na take so much time if you try and use your eyes to like do it. So i just did that to the second canvas, and this is what they look like. It'S honestly, not necessarily important for you guys to have this much perfection, but i just i don't know. I think i was nervous that it wasn't gon na turn out good. So i was just trying to make sure everything was measured properly, but you guys can just screw them in on each side and it should be fine. These door hinges right here, weren't the best the screws keep breaking. I don't know if it's because i use my drill and it's a bit more powerful, but, as you can see, i kind of made a dent in the board which didn't really show in the end but yeah after attaching the hinges. I closed the board and i noticed that the two canvases weren't like flush like they weren't properly aligned, but it wasn't a big deal, so i just left it the way it was um right here, i'm just attaching the golf bar holders like the little spoolie stuff. I did use my hot glue gun in this video, but i would recommend you guys use wood glue instead, mainly because wood glue doesn't dry as fast, and it would last a lot longer with the wood glue, because both pieces are made of wood anyways. Like the golf ball holders or wooden and the canvases also wouldn't so i think it would last a lot longer. Some of mine did end up coming off, so i might have to rebuild it and use wood glue instead. So that's why i'm just letting you guys know i didn't notice how sharp the ends of these golf ball holders were gon na be. I do know that they're supposed to be like poked into the floor, but when i put them all on the canvas, they were really sharp. So i wish i kinda used my sandblock to sand them down. If you guys are making it - and you guys have kids or i don't know, i feel like you guys - should use a sandblock to file the ends down so that they're not as pointy. It will work the same. Whether or not you file the ends down or cut it off or whatever um it's just safer, if you do, especially if you have kids or pets or anything like that around so guys, this is basically the finished product. I really enjoyed doing this diy. It didn't take me more than 40 minutes to make so should take you guys less um, because i was just working off an idea. I didn't really know what i was doing but yeah you guys could use it in this angle, but i ended up putting some thumbtacks at the back and attaching a string and that's how i hang it on the wall. So that's the end of the video. I hope you guys enjoyed don't forget to like comment and subscribe.


Comments
Tomika Halley: Thank you for this idea. I will definitely do this. Its wayyyy cheap and I see Amazon have the sticks in pink to add some color
Aimster B: This is an awesome idea! The best one I've seen yet.
N Mills: Great idea!