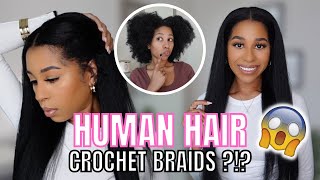
How To: Easy Feed In Braids W/Kanekalon Braiding Hair
- Posted on 21 March, 2018
- Braids Hairstyles
- By Anonymous
Easy feed in braids tutorial on natural curly hair (type 3C).
This is an easy feed in braid tutorial for beginners. I did not use any heat for this style. This is a fun and easy protective style that can be dressed up or down.
Follow me on Instagram @diazynochex
Hair Used:
Model Model Synthetic Braid Premium Silky Touch Jumbo Braid 100% Premium Kanekalon Hair
Products used:
-Shea Moisture Jamaican Black Castor Oil LEAVE-In Conditioner
-Eco Style Olive Oil Styling Gel
Tools Used:
Denman Brush
Tooth Brush
Water Bottle
This is the link to my tutorial on how to braid for beginners:
https://www.youtube.com/edit?o=U&video...
SUBSCRIBE for more videos!!
Hey guys is joka here today, I'm gon na show you how I went from this hair, so this awesome protective style remember to subscribe to my channel like comment and share. So this is the same hair that I used for my jumbo break tutorial. I just split it in half and then I took each half and I split it into three pieces. I'M gon na have to hair information on my description below then I give myself a oil massage on my scalp. I used coconut oil. That'S one of my favorite oils. You can use your favorite and then I split my hair into two sections: I'm using the Jamaican black, castor oil leaving by Shea Moisture and I'm a little sad because I'm almost out so I have to go, get some more. My hair loves this stuff, so I'm gon na add a good amount of that and then a little bit of water just to start brushing everything out using a Denman brush and then I'm using equal gel. I actually used a lot more than what you see here. I'Ll show you on the other side, I started small, but then I added a lot more because you need this great to be really polished and also you need a lot of gel, because you want the style to last. I wanted the style to last as long as possible, so I'm braiding, really nice and tight. I'M tucking. Everything in you'll see me brushing us I'll go through and adding more gel. If you don't know how to braid, I actually have a easy braid tutorial. It is in Spanish, but if you don't speak Spanish, you can still watch it and you'll get the gist of it. You'Ll you'll see how this works, but it's really important that you already know how to brace to do this style. It'S just gon na make everything much easier. Then, once I get to like behind my ears, that's what I'm gon na start, adding the braiding hair, because I didn't want the braiding hair to show anywhere. So that's why I chose to do the braid and then add the hair like at the lower part of it and I'm just adding the braiding hair and I'm like grabbing it with my thumb and my index finger and then I'm continuing to grade and add more Hair as I go and of course, add more gel keep brushing as you go, because you want everything to be really nice and and tight, and this is the very first time that I did this hairstyle and, oh, my goodness guys. It was so easy to do. Like I can't even tell you how easy this was, and I love how good it looks, is such a cute style you'll see a little better, how I added the hair when I show you the other side, that's one once I've completed then moving on to the Other side, we are going to follow the same steps at the products brush everything through and then start to braid you see here. I used a lot a lot more job. You want to use a lot of gel because you want everything to look really really good. Also, it's gon na start getting warm out, so I'm really excited to do this hairstyle for the beach - and you know, keep my hair, nice and tucked away, I'm really focusing on growing my hair this year. So I'm gon na be trying a lot more protective styles and I'm going to be sharing that with you guys, if you guys, are interested in seeing them but again same thing: I'm adding to hair I'm just bringing it in and holding it with my index finger And my thumb and then I'm gon na continue to braid everything to go and just keep brushing everything and adding more gel as you go and I didn't use any heat on this hair ie, I just brushed everything down, use a lot of gel because the point Is to not use heat when you're using a protective style, so it's not gon na be a perfect braid. There might be some flyaways but I'll take that over using heat any day - and here I ended up with like a skinnier side of my braid, so I ended up freedom. I ended up with just radiating the hair. You might need to do that depending on how your break comes out, but it actually worked out, like you couldn't even tell, and when you get to your ends, make sure you add even more gel, because you want your ends to blend in with the braiding hair. If you have any questions about this hairstyle or any other hairstyle, you can find me on instagram @ vs, emo chicks. You can ask me any questions on there or through here. Once you get to this part, you can go ahead and cut off any hairs. I'M not gon na define ends into hot water because I already fit that with this hair. It'S like the third time I use hair. So it's fine and I'm just gon na brush my baby hairs and everything else into place, and that's it. Thank you. So much for tuning in remember to subscribe to my channel comment like and share. Thank you so much Vishal bye,


Comments
sandra Yaniry castro: hola saludos desde Colombia, que tono de cabello tienes, gracias
Ebony Perez: What color was this?