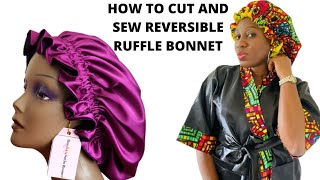
How To Make A Reversible Hair Bonnet | Diy Hair Bonnet Tutorial
- Posted on 22 April, 2020
- Long Hair
- By Anonymous
This video details an easy way of making a reversible hair bonnet using Ankara Fabric and Satin Fabric for added hair protection.
You can never have enough bonnets and I suggest you make all 3 sizes listed below:
Small Sized Bonnets - for days when we are wearing our natural hair, then your fabric should be cut on fold with a radius of 10 inches.
Medium Sized Bonnets - when wearing braids, wigs or weaves, then your fabric should be cut on fold with a radius of 12 - 12.5 inches.
Large Sized Bonnets - when wearing jumbo braids, please use a radius of 13 - 15 inches to fold and cut out your fabrics.
If you found my tutorial helpful, please click the like button and SUBSCRIBE to my channel for other juicy DIY tutorials.
Let me know what you think of this tutorial by leaving your comments in the section below.
Thank you.
xoxo!
Hi guys thank you for tuning in to my channel, it's so good to be back again for this tutorial I'll, be taking us on how to make a reversible hair bow net, and we require two different kinds of fabric for this. I have this piece of fabric for one side of the bonnet, and I have to choose from these I'll be making use of this for the other side of the bonnet. For this tutorial, the minimum inches required to make a medium-sized hippo net is about 12 inches. 12.5, maybe 13. Anything above 13 means that you're making a jumbo-sized help on it. It'S also important to note that you should have your fabric folded like you're, folding and cutting for a full circle. My fabric accommodates my measurements, I'll just proceed to make my markings. I have my measuring tape placed at that apex points and measure out 12 inches towards my right side. I measure out 12 inches from top to bottom and I'll just keep rotating my measuring tape to make my 12 inch mark I'll cut this out and I'll use. These in cutting out the other fabric as well, alright guys, so we have here two beautifully cut out full circles and what want to quickly do is place them right side facing each other. Take to our sewing machine and stitch round with about a quarter of an inch allowance all the way around. However, please leave an opening of 1.5 inches which will be used in turning out the hairpin aides to the right side. I'Ll take to my sewing machine now. Welcome back guys, so I have a stitch of a quarter of an inch. Also. This is a 1.5 inches opening. I also had to notch round the help on it so that it lays out flat when opened and without any bulge, ah quickly, turn out the help on it to the right side, and this is what we have so I had to give this a good press. Our help on it is already taking shape and I'm super excited at this point. We would require some elastic bands you can make use of the one-inch elastic band or the 0.5 inch elastic band for this tutorial I'll be making use of the 0.5 inch band. Even that would have to insert our elastic through a hairpin it. I'Ve been making a case in where my elastic or pastural, and since I'm using the 0.5 inch band, I will be sewing with an allowance of a 3/4 inch round. My help on it. So I'll. Just proceed to make my markings of a 3/4 inch all around. Please note that we wouldn't believe in any openings here. Your sewing round the help on it I'll take this or the sewing machine to close up the 3/4 inch casing for my elastic. Now we have the casing neatly: stone you'll also need to measure out the elastic lens, and for this purpose you would have to take the second friend of the individuals head or whoever would be putting on the hair bonnet. You have to factor in some allowance depending on how tight or lose the person wants it and don't forget, we'll have to tack both ends of the elastic up for this tutorial are we making use of a 21 inches length elastic, and this is just about okay - For me, including all allowance, we would also require two bobby pins, and what we want to achieve here is to hook one part of the elastic to one part of the 1.5 inches opening, just so that it doesn't move when you're fixing, in the other end of The elastic, through the other end of the 1.5 inches opening so I'll, just proceed to passing this true. All the way check out both ends of the elastic and also close up the 1.5 inches opening and we're sure guys. This is what a reversible help on it looks like at the end of the day of nicely filled of the opening. So it's not visible, absolutely beautiful. You can have it one this way. I just turn it over. To the other side, don't forget to evenly redistribute the gutters so that it has a uniform look. I do hope you found my tutorial helpful. Kindly give a thumbs up, don't forget to click the like and subscribe button and to tap on the notification bill. Please try! This out as well feel free to share this link and invite your friends to subscribe to my channel. Thank you for watching till the end till my next video stay safe,
Comments
Isabella Avwara: This is amazing. Well put together and you do have an amazing voice.
Chi Obaji: Great & helpful DIY video.
DianaF: Thank you for the tutorial! Girls can you confirm if the bonnet stays in the right place during sleep time? I mean, it doesn't fall off the head while we sleeping?
Samuel Abidemi Joseph: Nice one Juliet.