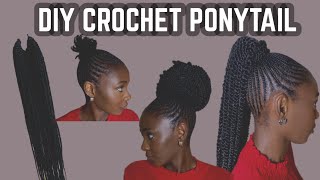
Crochet Ponytail Hat
- Posted on 13 January, 2020
- Ponytail Hairstyles
- By Anonymous
Easy to Follow Instructions. Can be adjusted for any size!
Hello welcome and let's get started. Let'S start with a slipknot, we will do a chain of about 13 or 5 inches or 13 centimeters. You can make as many chains as you like, depending on the width that you would like for your brim when this is folded. In half we will start in the second chain from the hook and do a single crochet. We can single crochet all the way across once you have reached the end. We could chain one and turn starting in the first single crochet, we're going to go into the back loop only and we're going to single crochet all the way across be sure not to miss that last stitch. Sometimes it's a little bit hidden in the back. Once you have reached the end chain, one and turn we're going to repeat this pattern until you have your desired length, you can continue till you have about 17 to 20 inches or 44 to 51 centimeters or until it fits around. Your head also make an even amount of rows. We will then fold the brim in half, insert your hook into the last single crochet that you made and then into the chain stitch. On the other side, we will then finish with a slip stitch so pulling it all the way through so continue the slip stitch all the way down the row. Your finished seam will have a bump. This will be on the inside on the other side, you'll notice that it's a great finish. We can now fold in half lengthwise match up your rows. Don'T worry about that! Beginning yarn. We can weave that in at the end chain one we will do a single crochet in the end of each row so going into the front and connecting it to the back. So at the end of each row we will put one single crochet. You will notice at the end of your rows when you go in on one side, it looks like you're going through a double stitch there or a thicker stitch, and then, when you go to the other side, it looks like just one. So, on the other side, it's like one and then it's opposite when you go into the next row so going into the next row, and then your single crochet just have a look to make sure that your rows are lined up. Continue this all the way around. Once you have reached the end, we will slip stitch to join in the top of the first single crochet. We can then chain one starting in the first stitch. We are going to do a front post, half double crochet, so around that first one front, post, half double crochet the chain. One does not count as a stitch. We will then do a half double crochet into the next stitch. We will now just repeat these two stitches, so front, post, half double crochet and then half double crochet once you have reached the end, if you do not have an even amount of stitches here is where you can add an extra one. We are going to do our joins from the back, so normally we would go into the front like this, but we're going to drop our hook and insert from the back for this round. We will put it into the front post, half double crochet from the round below. We will pull up our loop and bring it to the back and pull snug, make sure you pull nice and snug, and then we will do a chain one. We will then start in the very first stitch. This time we were going to do a half double crochet, but we're going to do it in the third loop. So that's a loop! That'S at the back of the stitch so right there that third loop, so half double crochet, finding that third loop and we're going to do this stitch all the way around. So doing it again, it's not at the front, that's one and two, but in the back is the third one and that's where we will insert our hook. You should now be able to see that v-stitch coming to the front of the row continue this all the way around to do our join this time. We will insert the hook from the back into the chain stitch from the round below, and we're going to do. This now and for every row we will then pull the loop to the back, pull snug and chain one. We will now repeat the last row, so we will do half double crochet into that third loop, all the way around, so just making sure you get into that third loop. So I think I missed it the first time so there it is and doing your half double crochet all the way around. You should always have the same amount of stitches in each row, and now you will be able to see how these roads are coming together. Again, to join, insert hook from behind into the chain stitch grabs a loop, bring it to the back, pull snug and then chain one. Let'S repeat this row again join your round chain one. We will now repeat the last four rows so this row we will do the front post, half double crochet and the half double crochet. So this is round one of the four. We will continue this four row pattern until we have about seven inches or 18 centimeters in the length of the Hat. We will now start to decrease so for this row, we're going to do the half double crochet and then another half double crochet, and then we will put two half double crochet together so insert into the first we're going to stop there yarn over insert into the Next one and then we're going to yarn over and pull through all five. That is a two half double crochet together, so repeating this pattern we will do two half double crochet and then we will do the two half double crochet together, so inserting into the first yarning over going into the next one, and then yarn Engle yarn over and Pull through all five continue all the way around until the end. Do not worry if the pattern doesn't match up for the last stitch join together the same as you've done all the other rounds. We are now going to do another row of decrease, so exactly the same as the rope below we will do, half double crochet and then another half double crochet, and then we will do two half double crochet together. Stop the decreases when you have an opening. That'S about two times the size of your hair elastic for our last row. We will do a chain one and then we're going to single crochet around the elastic so doing our single crochet we're just going to do a normal single crochet into our stitch, starting in the first one and just making sure our elastic is there and continue to Crochet all the way around when you have finished your last stitch to join, we will first cut our yarn and pull through and we're going to finish with an invisible close. So with your darning needle. We will finish the stitch as follows: insert your needle from the front to the back of the first single crochet from the round below, and then we will go into the back part of the last single crochet into the back section, and then we will weave the End into the back you've just created an extra V or an invisible clothes. We can now turn our hat inside out and weave in both ends. As you can see, the Hat on the right does have more rows. It'S because I used a finer yarn and a smaller hook. Everybody'S hat will be a little bit different, but you should have that seam in the back going down in a straight line and not be very noticeable. Thank you so much for watching. I hope you've enjoyed these videos and please like and subscribe and hope to see you again bye. You

Comments
Cathie Parkerson: Great hat and directions are very clear! This knitters first hat to Crochet. Thanks for sharing!
Jessica Weirback: I just finished this and it was my first hat ever made! You were easy to follow as a maybe "advanced beginner". Thank you!!
curlycords: Thank you so much Stephanie! I love the way you joined from the back. It leaves such a perfect seam. I can't wait to crochet this hat.
Kelbrason DG: Love it!!
Jane Chen-Quan: Thank you for showing each stitch and each row slowly and detailed. I like how you show more than talk repeatedly. Love your video.
KayPenn1: Love This! I want to make a matching scarf, do you have a pattern or video on that?
Jama Roy: How much yarn does this use? Would I be able to use one skein to make 2 hats?
Sandra Solaligue-Pérez: This is so neat! But I have a serious problem. When I crochet, my work becomes wider or smaller. Why?